Showing posts with label Daring Bakers. Show all posts

Saturday, March 26, 2011

DB: Maple Walut Meringue Coffee Cake


The March 2011 Daring Baker’s Challenge was hosted by Ria of Ria’s Collection and Jamie of Life’s a Feast. Ria and Jamie challenged The Daring Bakers to bake a yeasted Meringue Coffee Cake.

I love love loved this month's Daring Baker's challenge. It wasn't too too much of a challenge since my all-time favorite thing to make is sweet yeast bread.


I opted to "Canadianize" the sweet, nutty, cinnamonny filling by adding maple extract. Maple-Walnut is a tried and true flavor pairing. The walnuts also provided a texturally interesting contrast to the creamy, fluffy meringue and soft yeast bread. Thanks for a great challenge this month. It's one of my favorites thus far!


Maple Walnut Meringue Coffee Cake
2 round 10" cakes

For the yeast coffee cake dough:
4 cups flour
1/4 cup sugar
3/4 tsp salt
1 package active dried yeast
3/4 cup whole milk
1/4 cup water, any temperature
1/2 cup butter, room temperature
2 large eggs at room temperature

For the meringue:
3 large egg whites at room temperature
1/4 tsp salt
1/2 tsp vanilla
1/2 cup sugar

For the filling:
1 tsp maple extract
1 cup chopped walnuts
2 tbsp sugar
1/2 tsp cinnamon

1. Prepare the dough:
In a large mixing bowl, combine 1 1/2 cups of the flour, the sugar, salt and yeast. In a saucepan, combine the milk, water and butter and heat over medium heat until warm and the butter is just melted. With an electric mixer on low, gradually add the warm liquid to the flour/yeast mixture, beating until well blended. Increase mixer speed to medium and beat 2 minutes. Add the eggs and 1 cup flour and beat for 2 more minutes. Stir in enough of the remaining flour to make a dough that holds together. Turn out onto a floured surface (use any of the 1 1/2 cups of flour remaining) and knead the dough for 8 to 10 minutes until the dough is soft, smooth, and elastic, keeping the work surface floured and adding extra flour as needed.

Place the dough in a lightly greased bowl, turning to coat all sides. Cover the bowl with plastic wrap and a kitchen towel and let rise until double in bulk, 45 – 60 minutes. Prepare your filling by combining all the filling ingredients in a small bowl.

2. Once the dough has doubled, make the meringue and filling: In a plastic or metal bowl so the egg whites adhere to the side (they slip on glass) beat the egg whites with the salt, first on low speed for 30 seconds, then increase to high and continue beating until foamy and opaque. Add the vanilla then start adding the 1/2 cup sugar, a tablespoon at a time as you beat, until very stiff, glossy peaks form. Combine all filling ingredients in a separate small bowl.

3. Assembly:
Line 2 baking/cookie sheets with parchment paper. Punch down the dough and divide in half. On a lightly floured surface, working one piece of the dough at a time (keep the other half of the dough wrapped in plastic), roll out the dough into a 20 x 10-inch rectangle. Spread half of the meringue evenly over the rectangle up to about 1/2-inch from the edges. Sprinkle half of your filling evenly over the meringue.

Roll up the dough jellyroll style, from the long side. Pinch the seam closed to seal. Very carefully transfer the filled log to one of the lined cookie sheets, seam side down. Bring the ends of the log around and seal the ends together, forming a ring, tucking one end into the other and pinching to seal. Using kitchen scissors or a sharp knife (scissors are easier), make cuts along the outside edge at 1-inch intervals. Don't be afraid to cut deep into the ring. Repeat with the remaining dough, meringue and fillings. Cover the 2 coffee cakes with plastic wrap and allow them to rise again for 45 to 60 minutes.

4. Baking: Preheat the oven to 350 degrees F. Brush the tops of the coffee cakes with the egg wash. Bake in the preheated oven for 25 to 30 minutes until risen and golden brown. The dough should sound hollow when tapped. Remove from the oven and slide the parchment paper off the cookie sheets onto the table. Very gently loosen the coffee cakes from the paper with a large spatula and carefully slide the cakes off onto cooling racks. Just before serving, dust the tops of the coffee cakes with confectioner’s sugar.

Sunday, February 27, 2011

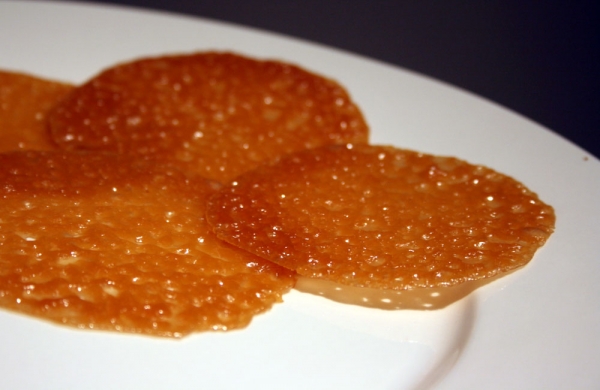
DB: Panna Cotta and Florentines


The February 2011 Daring Bakers’ challenge was hosted by Mallory from A Sofa in the Kitchen. She chose to challenge everyone to make Panna Cotta from a Giada de Laurentiis recipe and Nestle Florentine Cookies.


I made mine lemon-flavored by using lemon gelatin powder instead of plain and throwing in some lemon zest. I made mine in a spring form pan atop a graham cracker crust, much like a no-bake cheesecake. It was delicious, but next time I will let it set a little longer in the fridge before digging in.


The florentines were delicate, crisp and lacy. Word of caution: You absolutely need a silicone mat or parchment for easy removal from the baking tray.

Lemon Panna Cotta
adapted from Giada de Laurentiis

1 cup whole milk
2 tablespoons lemon flavored Jell-o powder
3 cups whipping cream
1/3 cup honey
1 tablespoon sugar
zest from 1 lemon
Pinch salt

Place the milk in a small bowl. Sprinkle the gelatin over. Let stand for 3 to 5 minutes to soften the gelatin. Pour milk mixture into a heavy saucepan and stir over medium heat just until the gelatin dissolves but the milk does not boil, about 5 minutes. Add the cream, honey, sugar, zest and salt. Stir until the sugar dissolves, 5 to 7 minutes. Remove from the heat. Pour into serving dishes. Cool slightly. Refrigerate until set, at least 6 hours.

Florentines
Nestle

2/3 cup unsalted butter
2 cups quick oats
1 cup granulated sugar
2/3 cup flour
1/4 cup dark corn syrup
1/4 cup whole milk
1 tsp vanilla extract
pinch of salt
1 1/2 dark or milk chocolate

Preheat oven to 375 degrees F. Prepare your baking sheet with silpat or parchment paper. Melt butter in a medium saucepan, then remove from the heat.

To the melted butter add oats, sugar, flour, corn syrup, milk, vanilla, and salt. Mix well. Drop a tablespoon full, three inches apart, onto your prepared baking sheet. Flatten slightly.

Bake in preheated oven for 6-8 minutes, until cookies are golden brown. Cool completely on the baking sheets.

While the cookies are cooling melt your chocolate until smooth either in the microwave (1 1/2 minutes), or stovetop (double boiler).

Peel the cookies from the silpat or parchment and place face down on a wire rack set over a sheet of wax/parchment paper. Spread a tablespoon of chocolate on the bottom of your cookie, sandwiching another cookie atop the chocolate.

Thursday, December 23, 2010

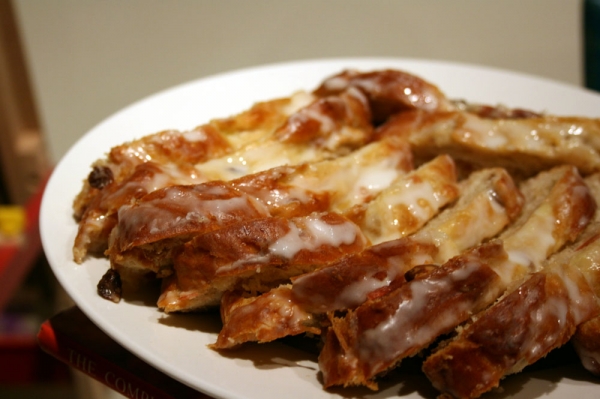
DB: Christmas Stollen


The 2010 December Daring Bakers’ challenge was hosted by Penny of Sweet Sadie’s Baking. She chose to challenge Daring Bakers’ to make Stollen. She adapted a friend’s family recipe and combined it with information from friends, techniques from Peter Reinhart’s book.........and Martha Stewart’s demonstration.


Stollen is a fruitcake made with yeast, water and flour, and usually dried citrus peel, dried fruit, almonds, and spices (cinnamon, cardamom, mace). The dough is rich with butter and eggs and slightly sweetened with sugar. The fruits are soaked in brandy or rum and the finished cake is sprinkled with icing sugar.

I used a combination of recipes from the kitchen staple cookbooks: The Fannie Farmer Baking Book and the Joy of Cooking.

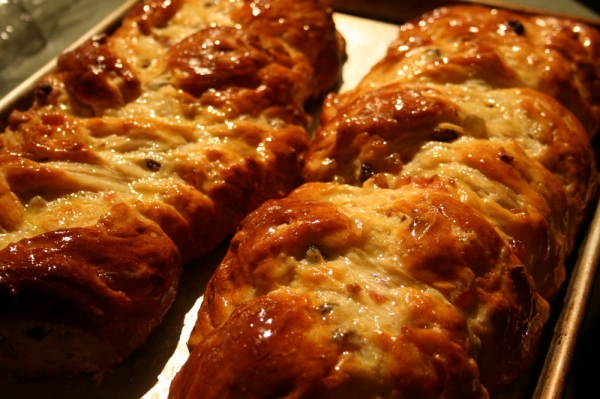
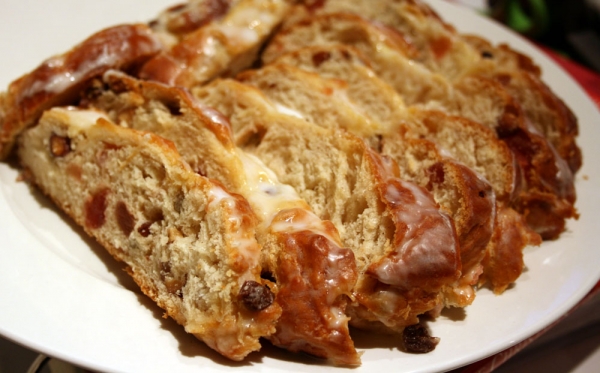
I made a non-traditional shape - a braid instead of a wreath or loaf. I just couldn't bring myself to cover up the beautiful, golden-brown, fruit-studded bread, so I opted out of the powdered sugar on top.


It was very festive looking and very tasty and reminded me of hot cross buns! This was the first stollen I've made, but I'm sure it will make my holiday list in years to come. Thank you, Penny, for opening my eyes and tastebuds to this delicious sweet bread!

Saturday, November 27, 2010

DB: Crostata

The 2010 November Daring Bakers’ challenge was hosted by Simona of briciole. She chose to challenge Daring Bakers’ to make pasta frolla for a crostata. She used her own experience as a source, as well as information from Pellegrino Artusi’s Science in the Kitchen and the Art of Eating Well.


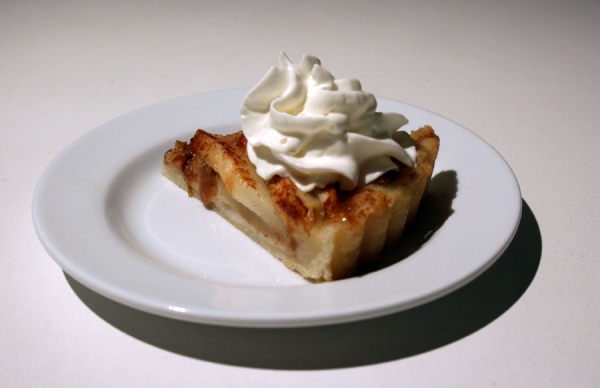
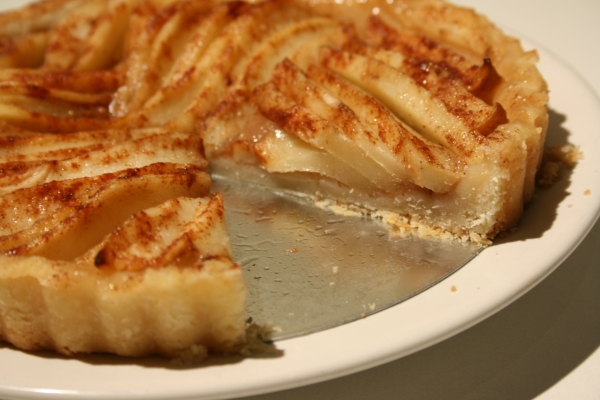
I loved the pie crust - pasta frolla - the american counterpart of the classic Crisco shortening-rich pie crust.

Wednesday, October 27, 2010

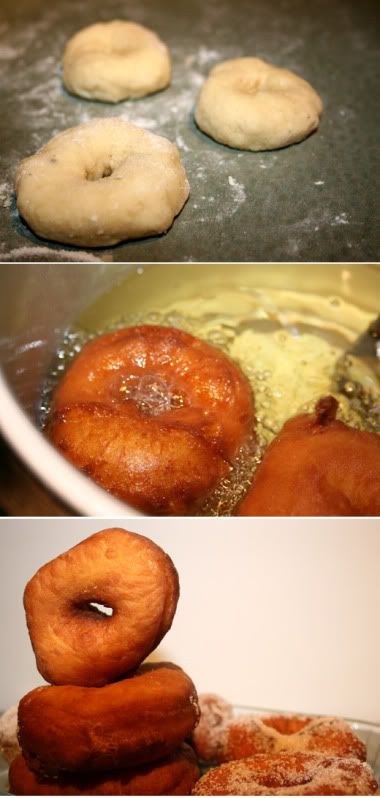
DB: Mini Cake Donuts


The October 2010 Daring Bakers challenge was hosted by Lori of Butter Me Up. Lori chose to challenge DBers to make doughnuts. She used several sources for her recipes including Alton Brown, Nancy Silverton, Kate Neumann and Epicurious.

I have been meaning to make donuts for a long time but kept putting off because it involved deep frying. But I have since overcome my fear of hot oil and have come to embrace its yummy goodness.

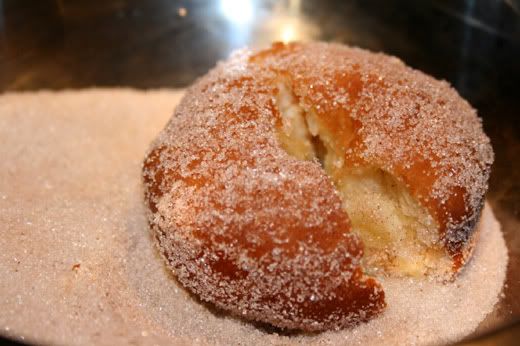
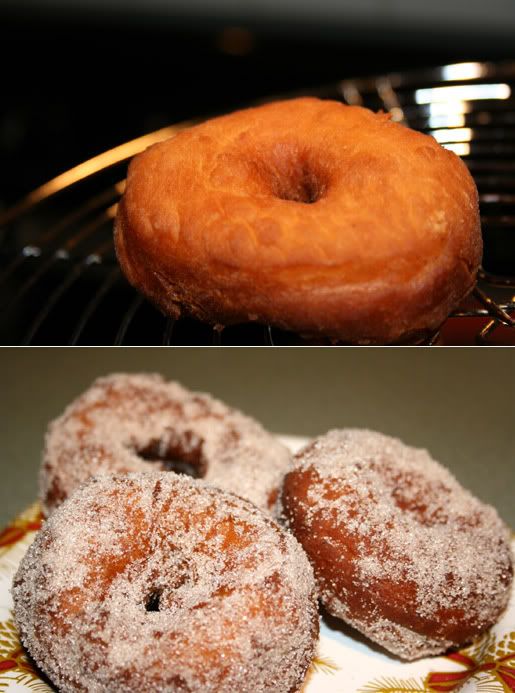
I used a cake donut recipe from Canadian Living magazine. I would have preferred to try a yeasted donut but didn't plan well enough ahead of time. These came together as easily as pancake batter, however, they required a 1 hour rest in the fridge. I am THRILLED with how they turned out. Super cute, 1 1/2" donuts or as the recipe directs, donut holes. I used my fingers to shape them.

My dad preferred them without the sugar, opting to have them dunked in his tea like a biscuit. Overall, a success! I will definitely be trying a yeasted version in the future and perhaps experimenting with a Krispy Kreme Copycat recipe.


Cake Donuts
from Canadian Living

3 cups flour
1 tbsp baking powder
3/4 tsp salt
1/2 tsp grated nutmeg
1/2 cup light cream (10% M.F.)
1/2 cup heavy cream
1 tsp vanilla
3 eggs
1 cup granulated sugar
Canola oil or safflower oil or vegetable oil, for deep-frying,

Cinnamon Sugar for coating

Preparation:
In bowl, whisk flour, baking powder, salt and nutmeg. In small bowl, whisk 10% and whipping creams and vanilla. Set aside.

In large bowl, beat eggs with sugar until pale; gradually beat in cream mixture. Stir in flour mixture to make soft sticky dough. Cover and refrigerate for 1 hour.

Spray a mini (1 tbsp) ice-cream scoop or 1 tbsp measure with nonstick spray. In deep fryer or deep saucepan, heat 2 inches oil until deep-fryer thermometer reads 350 degrees F. Drop batter by tablespoonfuls into oil, 6 at a time; deep-fry, turning once, until golden and puffed, 3 to 4 minutes. With slotted spoon, transfer to paper towels to drain. Transfer to rack; let cool slightly then toss in cinnamon sugar to coat.

Monday, September 27, 2010

DB: Sugar Cookie Pops


The September 2010 Daring Bakers’ challenge was hosted by Mandy of “What the Fruitcake?!” . Mandy challenged everyone to make Decorated Sugar Cookies based on recipes from Peggy Porschen and The Joy of Baking.

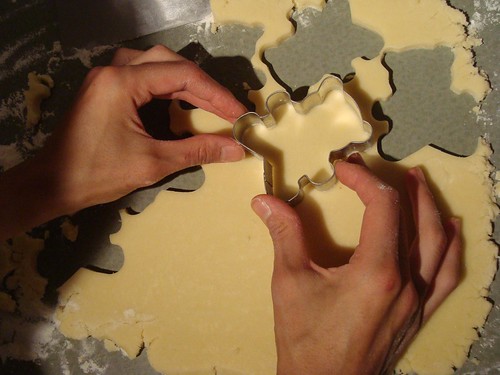
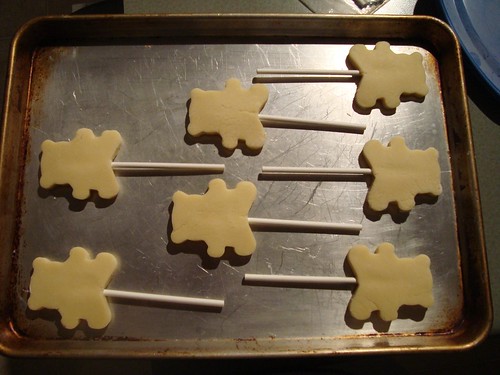
I made these sugar cookie pops as part of the baking catering I did for a co-worker for her grandson's dedication earlier this year. I didn't have time to do intricate sugar cookies this month so I apologize, but wanted to share these with you for Daring Baker's this month as I'm pretty happy with how they turned out and back when I originally made them, it certainly was a challenge!

I have never made cookie pops before but these turned out so well that I would definitely do it again. I made the sugar cookies a little thicker than normal and reinforced the backs of the sticks with extra dough. Not one fell off the stick even when the kids bit into them. The feedback I received was that they were the highlight of the party. They were such a huge hit that the kids just held onto them and admired them, not wanting to eat them for the longest time. Aww... I love that I can make people happy with my baking. It brings a smile to my face.
One more thing: I can't speak highly enough about this sugar cookie icing recipe (below). It is the kind of icing you'd find at a bakery. It dries shiny, smooth and hard enough to stack the cookies. It is a pleasure to work with and very yummy!


Sugar Cookie Cutouts
Makes 15 cookie pops | Adapted from Land-O-Lakes

1 cup butter, softened
1 cup sugar
1 egg
2 1/2 cups flour
2 tbsp lemon juice
1 tbsp vanilla
1 tsp baking powder

1. Combine butter, sugar and egg in large bowl. Beat at medium speed until creamy. Reduce speed to low; add all remaining cookie ingredients. Beat until well mixed. Divide dough into thirds; wrap in plastic food wrap. Refrigerate until firm (at least 2 hours).

2. Heat oven to 400 degrees F. Roll out dough to 1/4-inch thickness. Press the lollipop sticks into the cookies then cover the sticks with a small, flattened piece of dough so the stick is not visible. Flip the cookie over and place onto ungreased cookie sheet. Bake for 6 to 10 minutes or until edges are lightly browned. Cool 1 minute before removing from cookie sheets. Cool completely before frosting.


Better than Bakery Icing
adapted from allrecipes.com

1 cup icing sugar
2 teaspoons milk
2 teaspoons light corn syrup
1/4 teaspoon vanilla extract
food coloring
In a small bowl, stir together confectioners' sugar and milk until smooth. Add corn syrup and vanilla extract until icing is smooth and glossy. If icing is too thick, add more corn syrup.

Friday, August 27, 2010

DB: Petit Fours


The August 2010 Daring Bakers’ challenge was hosted by Elissa of 17 and Baking. For the first time, The Daring Bakers partnered with Sugar High Fridays for a co-event and Elissa was the gracious hostess of both. Using the theme of beurre noisette, or browned butter, Elissa chose to challenge Daring Bakers to make a pound cake to be used in either a Baked Alaska or in Ice Cream Petit Fours. The sources for Elissa’s challenge were Gourmet magazine and David Lebovitz’s “The Perfect Scoop”.


I didn't do the ice-cream filling because I am not a fan of cake and ice cream together. Last month's challenge was also a cake/ice cream combo so I thought I'd skip that part this time around. Sorry Elissa!

Instead of chocolate, I covered these cute little cakes with a poured fondant. 1/2 white, 1/2 pink then a drizzle of the opposing color on top of each of them. It was a fun, slightly messy and utterly delicious project.

I also used a Brown Sugar Pound Cake recipe from Martha Stewart instead of the Brown Butter Pound Cake from Gourmet. This cake had a nice, tight crumb, sliced wonderfully even into the thinnest of layers and held its shape and sharp corners when it was cut.

Monday, July 26, 2010

DB: Swiss Swirl Ice Cream Cake


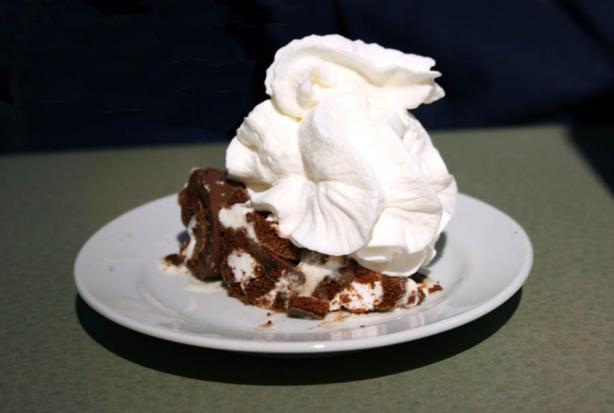
The July 2010 Daring Bakers’ challenge was hosted by Sunita of Sunita’s world – life and food. Sunita challenged everyone to make an ice-cream filled Swiss roll that’s then used to make a bombe with hot fudge. Her recipe is based on an ice cream cake recipe from Taste of Home.


For a PDF of this month's challenge including the recipe, click here.


*My Changes*
I have a very small freezer and do not have the luxury of having a deep freezer, so I have to constantly calculate and plan ahead to allocate freezer space. For this reason, I only made a fraction of the recipe. My finished product was assembled in a 1.5 quart bowl! I think there was no more than 2 cups of ice cream in my cake. With this small amount of ice cream I didn't bother doing chocolate and vanilla. I did all vanilla with a layer of chocolate syrup in the middle. It was just right for 4 servings and no leftovers.

I made and baked the cake on a swiss roll pan just like how you make normal swiss rolls. When it is baked, I divided the whole sheet into thirds then filled and rolled as usual, thus making mini swiss rolls. I loved how easy the sponge cake was to roll up. I have never made a swiss roll before and it always seemed quite daunting. Now, I'm all ready to experiment with different fillings and sizes. I'm now on the lookout for a not too sweet filling that will hold well at room temperature so I can save on fridge/freezer space :)

Sunday, June 27, 2010

DB: Pink Pavlova Cookies


The June 2010 Daring Bakers’ challenge was hosted by Dawn of Doable and Delicious. Dawn challenged the Daring Bakers’ to make Chocolate Pavlovas and Chocolate Mascarpone Mousse. The challenge recipe is based on a recipe from the book Chocolate Epiphany by Francois Payard.

I took some liberties with this recipe because of the group I was cooking for. They are not chocolate fans so I had to adapt and also to fit the them
e of a 21st birthday. It turned out pretty well and I'm pretty pleased.
1) I didn't do the chocolate part of this recipe. Instead I went with vanilla flavoring and colored these pretty in pink.
2) They were filled with a whipped sweetened cream cheese filling.
3) I made them cookie sized - individual sizes pavlovas.

Next time I'll try the chocolate version. Thanks for a great challenge! I made these ahead of time and only put the filling in at the last minute. Sorry, no pics of the filled version, it was too rushed at serving time to snap any pictures.

Thursday, May 27, 2010

DB: Piece Montée, deconstructed


The May 2010 Daring Bakers’ challenge was hosted by Cat of Little Miss Cupcake. Cat challenged everyone to make a piece montée, or croquembouche, based on recipes from Peter Kump’s Baking School in Manhattan and Nick Malgieri.

I must apologize... I am under a ton of stress right now so I didn't make this the real Daring Baker's way. I did cream puffs and a separate batch of toffee that I crumbled into bits to sprinkle on top of the whipped cream/ice cream to serve.

My stress is due to a HUGE due date coming up - the final report for my Accounting designation. If I pass this (last year's pass rate was 70%), I will be done done done with school. I will be a full fledged accountant!

I really enjoyed making the choux pastry and wondered why I don't make it more often! It's one of those little things that brings a smile to my face as the choux pastry "magically" rises in the oven into a light, fluffy, hollow pouf that is ready to be filled with whatever you can dream up. I've seen them used in savory applications although I think being the sugar-addict I am, I'll stick to sweet fillings.

I filled these with a simple vanilla pastry cream and made a separate batch of toffee brittle (instead of the hard caramel sauce). I think I'm going to fill the extra puffs with vanilla ice cream and freeze them for anytime-treats. I used Martha Stewart's recipes for both the pastry and pastry cream.

Check out the DB blogroll for real awesome croquembouches, unlike my cheater version.

Choux Pastry
Makes 2 dozen | Martha Stewart's Baking Handbook

1/2 cup (1 stick) unsalted butter, cut into 1/2-inch pieces
1 teaspoon sugar
1/2 teaspoon salt
1 1/4 cups all-purpose flour
4 large eggs, plus 1 large egg white if needed

1. Bring butter, sugar, salt, and 1 cup water to a boil in a medium saucepan. Remove from heat. Using a wooden spoon, quickly stir in flour. Cook over medium-high heat, stirring constantly, until mixture pulls away from sides and a film forms on bottom of pan, about 3 minutes.

2. Transfer to the bowl of an electric mixer fitted with the paddle attachment. Mix on low speed until slightly cooled, about 1 minute. Raise speed to medium; add whole eggs, 1 at a time, until a soft peak forms when batter is touched with your finger. If peak does not form, lightly beat remaining egg white, and mix it into batter a little at a time until it does. Use immediately.

3. Using a large plain piping tip, pipe 2" circles of pastry onto parchment paper or silicone-lined baking sheet. They don't need to be spaced very far apart as they don't spread, they just puff! Freeze for at least 30 minutes or once frozen, transfer to an airtight container and freeze for up to 3 weeks. Bake from frozen at 375 degrees F for 25-30 minutes until golden brown. Store air tight at room temperature. You can also freeze these after they are baked and then to serve later, bring to room temperature and re-crisp in the oven for a few minutes.

4. Slice them in half and fill with sweetened whipped cream or pastry cream (recipe follows).

Pastry Cream
Makes 1 1/2 cups | Martha Stewart's Cupcakes

4 large egg yolks
1/2 cup sugar
1/4 cup cornstarch
Pinch of salt
2 cups milk
1 1/4 teaspoons pure vanilla extract

1. Whisk egg yolks until smooth in a large bowl. Combine sugar, cornstarch, and salt in a medium saucepan, and heat over medium. Stirring constantly, gradually add milk in a slow, steady stream, and cook until mixture thickens and begins to bubble, about 5 minutes.

2. Whisking constantly, slowly pour one third of the milk mixture into egg yolks (this step is called tempering, which keeps the yolks from curdling). Pour mixture into remaining milk mixture in saucepan. Cook over medium heat, whisking constantly, until mixture comes to a full boil and is thick enough to hold its shape when lifted with a spoon, 2 to 4 minutes. Remove from heat; stir in vanilla.

3. Strain mixture through a fine sieve into a heatproof bowl. Cover with parchment paper or plastic wrap, pressing it directly on surface to prevent a skin from forming. Refrigerate until chilled and firm, at least 2 hours (or up to 2 days).

Toffee Recipe from Recipezaar

Saturday, March 27, 2010

DB: Orange Cranberry Tian(ne)


This dessert has the same name as me!!! It's like play on my own name - Tianne (rhymes with Dianne) - or Tia for short :)

A tian is a baked French dish composed of many layers of vegetables and herbs. The name comes from the earthenware dish it was traditionally cooked in but tians can be made in any kind of deep dish such as a casserole, dutch oven or baking pan. The dish originated in the Alpes-Martitimes region of Southeast France and tians are popular across Provence and throughout France.

The 2010 March Daring Baker’s challenge was hosted by Jennifer of Chocolate Shavings. She chose Orange Tian as the challenge for this month, a dessert based on a recipe from Alain Ducasse’s Cooking School in Paris.


This was a lot of fun to make. Many little components went into it but preparation could be broken up over several days. A few of the tweaks I made:

  • Used half whole wheat flour for the dough
  • Topped the Tians with homemade cranberry sauce instead of orange segments (a great complement to the orange marmalade)
  • Used vanilla ice cream instead of whipped cream for some of them. I think I preferred the ice cream filled ones.

    I could definitely see making these for the holidays. The color and presentation were beautiful and I like how versatile this dessert is. Thanks for a great challenge! I found this short version of the recipe to be a helpful guide to making the Tian.
  • Saturday, February 27, 2010

    DB: Tiramisu

    The February 2010 Daring Bakers’ challenge was hosted by Aparna of My Diverse Kitchen and Deeba of Passionate About Baking. They chose Tiramisu as the challenge for the month. Their challenge recipe is based on recipes from The Washington Post, Cordon Bleu at Home and Baking Obsession.


    I made this tiramisu without any liqueur in it! I suppose if they sold alcohol in the supermarkets in Canada I would have bought some, but the liquor store is so out of the way (I'm not a drinker at all, I'm the cheapest drunk you will ever find, I would be sound asleep after 1/2 a drink - really it's true!) The end result was wonderful even without it.

    I had a ton of fun making and putting together all the tiramisu components. You could buy the ladyfingers and mascarpone instead of making them if you want to save time. The recipe looks long and daunting but really it's very do-able and can be prepped in advance or in stages.


    What impressed me the most was the consistency of the ladyfingers. I used to always buy them but after making them myself I now realize how much money I can save and how much better they taste homemade. I was a little nervous about the delicate batter sticking to the pan but there was nothing to worry about. I baked the ladyfingers on my non-stick baking mat (AKA Silpat knockoff) and it peeled off with no problems whatsoever. I did both piped ladyfinger shaped cookies as well as 8" rounds. I will likely use the extra for another tiramisu this week since the first one was such a hit.


    I have never actually tasted mascarpone before so I don't know how this compared to storebought, but comparisons aside, it was delicious. Because of all the extra mascarpone this recipe made, I doubled the cream mixture and used it as a fruit dip. I brought the tiramisu to a get together where it was well received. I was feeling extra chocolatey so I added some grated chocolate between the layers and on top.


    Tiramisu
    6 servings | The Washington Post, July 11 2007

    Ingredients:
    For the zabaglione:
    2 large egg yolks
    3 tablespoons sugar/50gms
    1/4 cup/60ml Marsala wine (I used strong coffee)
    1/4 teaspoon/ 1.25ml vanilla extract
    1/2 teaspoon finely grated lemon zest

    For the vanilla pastry cream:
    1/4 cup/55gms sugar
    1 tablespoon/8gms all purpose flour
    1/2 teaspoon finely grated lemon zest
    1/2 teaspoon/ 2.5ml vanilla extract
    1 large egg yolk
    3/4 cup/175ml whole milk

    For the whipped cream:
    1 cup/235ml chilled heavy cream
    1/4 cup/55gms sugar
    1/2 teaspoon/ 2.5ml vanilla extract

    To assemble the tiramisu:
    2 cups/470ml brewed espresso, warmed
    1 teaspoon/5ml rum extract (optional)
    1/2 cup/110gms sugar
    1/3 cup/75gms mascarpone cheese
    36 savoiardi/ ladyfinger biscuits (approx.)
    cocoa powder for dusting

    Method:
    For the zabaglione:
    Heat water in a double boiler. If you don’t have a double boiler, place a pot with about an inch of water in it on the stove. Place a heat-proof bowl in the pot making sure the bottom does not touch the water.
    In a large mixing bowl (or stainless steel mixing bowl), mix together the egg yolks, sugar, the Marsala (or espresso/ coffee), vanilla extract and lemon zest. Whisk together until the yolks are fully blended and the mixture looks smooth.
    Transfer the mixture to the top of a double boiler or place your bowl over the pan/ pot with simmering water. Cook the egg mixture over low heat, stirring constantly, for about 8 minutes or until it resembles thick custard. It may bubble a bit as it reaches that consistency.
    Let cool to room temperature and transfer the zabaglione to a bowl. Cover and refrigerate at least 4 hours or overnight, until thoroughly chilled.

    For the pastry cream:
    Mix together the sugar, flour, lemon zest and vanilla extract in a medium heavy-bottomed saucepan. To this add the egg yolk and half the milk. Whisk until smooth.
    Now place the saucepan over low heat and cook, stirring constantly to prevent the mixture from curdling.
    Add the remaining milk a little at a time, still stirring constantly. After about 12 minutes the mixture will be thick, free of lumps and beginning to bubble. (If you have a few lumps, don’t worry. You can push the cream through a fine-mesh strainer.)
    Transfer the pastry cream to a bowl and cool to room temperature. Cover with plastic film and refrigerate at least 4 hours or overnight, until thoroughly chilled.

    For the whipped cream:
    Combine the cream, sugar and vanilla extract in a mixing bowl. Beat with an electric hand mixer or immersion blender until the mixture holds stiff peaks. Set aside.

    To assemble the tiramisu:
    Have ready a rectangular serving dish (about 8" by 8" should do) or one of your choice.
    Mix together the warm espresso, rum extract and sugar in a shallow dish, whisking to mix well. Set aside to cool.
    In a large bowl, beat the mascarpone cheese with a spoon to break down the lumps and make it smooth. This will make it easier to fold. Add the prepared and chilled zabaglione and pastry cream, blending until just combined. Gently fold in the whipped cream. Set this cream mixture aside.

    Now to start assembling the tiramisu.
    Workings quickly, dip 12 of the ladyfingers in the sweetened espresso, about 1 second per side. They should be moist but not soggy. Immediately transfer each ladyfinger to the platter, placing them side by side in a single row. You may break a lady finger into two, if necessary, to ensure the base of your dish is completely covered.
    Spoon one-third of the cream mixture on top of the ladyfingers, then use a rubber spatula or spreading knife to cover the top evenly, all the way to the edges.
    Repeat to create 2 more layers, using 12 ladyfingers and the cream mixture for each layer. Clean any spilled cream mixture; cover carefully with plastic wrap and refrigerate the tiramisu overnight.
    To serve, carefully remove the plastic wrap and sprinkle the tiramisu with cocoa powder using a fine-mesh strainer or decorate as you please. Cut into individual portions and serve.

    MASCARPONE CHEESE
    (Source: Vera’s Recipe for Homemade Mascarpone Cheese)
    This recipe makes 12oz/ 340gm of mascarpone cheese

    Ingredients:
    474ml (approx. 500ml)/ 2 cups whipping (36 %) pasteurized (not ultra-pasteurized), preferably organic cream (between 25% to 36% cream will do)
    1 tablespoon fresh lemon juice

    Method:
    Bring 1 inch of water to a boil in a wide skillet. Reduce the heat to medium-low so the water is barely simmering. Pour the cream into a medium heat-resistant bowl, then place the bowl into the skillet. Heat the cream, stirring often, to 190 F. If you do not have a thermometer, wait until small bubbles keep trying to push up to the surface.
    It will take about 15 minutes of delicate heating. Add the lemon juice and continue heating the mixture, stirring gently, until the cream curdles. Do not expect the same action as you see during ricotta cheese making. All that the whipping cream will do is become thicker, like a well-done crème anglaise. It will cover a back of your wooden spoon thickly. You will see just a few clear whey streaks when you stir. Remove the bowl from the water and let cool for about 20 minutes. Meanwhile, line a sieve with four layers of dampened cheesecloth and set it over a bowl. Transfer the mixture into the lined sieve. Do not squeeze the cheese in the cheesecloth or press on its surface (be patient, it will firm up after refrigeration time). Once cooled completely, cover with plastic wrap and refrigerate (in the sieve) overnight or up to 24 hours.
    Vera’s notes: The first time I made mascarpone I had all doubts if it’d been cooked enough, because of its custard-like texture. Have no fear, it will firm up beautifully in the fridge, and will yet remain lusciously creamy.
    Keep refrigerated and use within 3 to 4 days.

    LADYFINGERS/SAVOIARDI
    (Source: Recipe from Cordon Bleu At Home)
    This recipe makes approximately 24 big ladyfingers or 45 small (2 1/2" to 3" long) ladyfingers.

    Ingredients:
    3 eggs, separated
    6 tablespoons /75gms granulated sugar
    3/4 cup/95gms cake flour, sifted (or 3/4 cup all purpose flour + 2 tbsp corn starch)
    6 tablespoons /50gms confectioner's sugar,

    Method:
    Preheat your oven to 350 F (175 C) degrees, then lightly brush 2 baking sheets with oil or softened butter and line with parchment paper.
    Beat the egg whites using a hand held electric mixer until stiff peaks form. Gradually add granulate sugar and continue beating until the egg whites become stiff again, glossy and smooth.
    In a small bowl, beat the egg yolks lightly with a fork and fold them into the meringue, using a wooden spoon. Sift the flour over this mixture and fold gently until just mixed. It is important to fold very gently and not overdo the folding. Otherwise the batter would deflate and lose volume resulting in ladyfingers which are flat and not spongy.
    Fit a pastry bag with a plain tip (or just snip the end off; you could also use a Ziploc bag) and fill with the batter. Pipe the batter into 5" long and 3/4" wide strips leaving about 1" space in between the strips.
    Sprinkle half the confectioner's sugar over the ladyfingers and wait for 5 minutes. The sugar will pearl or look wet and glisten. Now sprinkle the remaining sugar. This helps to give the ladyfingers their characteristic crispness.
    Hold the parchment paper in place with your thumb and lift one side of the baking sheet and gently tap it on the work surface to remove excess sprinkled sugar.
    Bake the ladyfingers for 10 minutes, then rotate the sheets and bake for another 5 minutes or so until the puff up, turn lightly golden brown and are still soft.
    Allow them to cool slightly on the sheets for about 5 minutes and then remove the ladyfingers from the baking sheet with a metal spatula while still hot, and cool on a rack.
    Store them in an airtight container till required. They should keep for 2 to 3 weeks.

    Wednesday, January 27, 2010

    DB: Nanaimo Bars

    The January 2010 Daring Bakers’ challenge was hosted by Lauren of Celiac Teen. Lauren chose Gluten-Free Graham Wafers and Nanaimo Bars as the challenge for the month. The sources she based her recipe on are 101 Cookbooks and www.nanaimo.ca.


    This month's challenge is near to my heart. Being from Vancouver, BC, the city of Nanaimo is only a short drive and ferry ride away - about 60km (36 miles). It's neat that so many bakers around the world this mont are baking these bars which originate from my very own province! (Beams with pride). My personal preference is to omit the coconut and add a few tbsp of peanut butter to the filling. However, I have included the original, unadulterated Nanaimo Bar recipe below.

    Confession: I did not do the graham cracker part of the challenge, I used storebought instead because I had a sleeve of them leftover. I also couldn't find graham flour!


    Nanaimo Bars
    City of Nanaimo, BC

    Bottom Layer
    1/2 cup unsalted butter
    1/4 cup sugar
    5 tbsp. cocoa
    1 egg beaten
    1 1/4 cups graham wafer crumbs
    1/2 c. finely chopped almonds
    1 cup coconut

    Melt first 3 ingredients in top of double boiler. Add egg and stir to cook and thicken. Remove from heat. Stir in crumbs, coconut, and nuts. Press firmly into an ungreased 8" x 8" pan.

    Second Layer
    1/2 cup unsalted butter
    2 Tbsp. and 2 Tsp. cream
    2 Tbsp. vanilla custard powder
    2 cups icing sugar

    Cream butter, cream, custard powder, and icing sugar together well. Beat until light. Spread over bottom layer.

    Third Layer
    4 oz. semi-sweet chocolate
    2 Tbsp. unsalted butter

    Melt chocolate and butter overlow heat. Cool. Once cool, but still liquid, pour over second layer and chill in refrigerator.

    Sunday, December 27, 2009

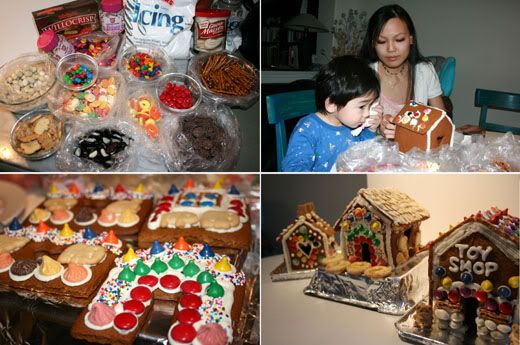
    DB: Gingerbread Houses


    The December 2009 Daring Bakers’ challenge was brought to you by Anna of Very Small Anna and Y of Lemonpi. They chose to challenge Daring Bakers’ everywhere to bake and assemble a gingerbread house from scratch. They chose recipes from Good Housekeeping and from The Great Scandinavian Baking Book as the challenge recipes.

    Every Christmas I make a gingerbread house with my sister. It's fun but I have to psych myself up for the long process of making the dough, chilling it, making my template, rolling and cutting the dough, baking it, cooling it, assembling it then FINALLY decorating it. I know I could cheat and buy a gingerbread house kit but they taste terrible and I can't bring myself to spend money on something I could make better myself.

    I love baking way more than I like decorating (which I find to be messy, time consuming and fiddly). I'd much rather sink my hands into a big ball of dough and knead away. However, because of this DB challenge and the fact that my son wanted to do a gingerbread house, there was no skipping it this year. I made 3 small houses so everyone could use their own creative flair.

    We really were down to the wire this year. It felt like Christmas snuck up on us way too soon. We only finished making these on Christmas morning after breakfast!


    The recipe I've used for 9 years is here, from Allrecipes.com. It produces a cookie full of spice, soft and tender yet sturdy enough to build into houses. We always eat our houses because are too yummy to waste! This recipe tastes as good as it looks and the dough can be refrigerated for 3-5 days before baking for easy prep during a busy time of year. One of my friends begs me for these cookies every year. My mom likes them so much she'd rather eat them without icing so she can taste the gingerbread without any distractions. Highly recommended. I tripled the recipe for my 3 small houses but you could just double it if you are making one standard sized house.

    Tip: Tie the pastry bag with a rubber band to prevent it from oozing out the top when squeezed by little hands.

    Gingerbread Cut-Outs
    24 -2" gingerbread men

    1/2 cup margarine
    1/2 cup sugar
    1/2 cup molasses
    1 egg yolk
    2 cups sifted all-purpose flour
    1/2 teaspoon salt
    1/2 teaspoon baking powder
    1/2 teaspoon baking soda
    1/2 teaspoon ground cinnamon
    1 teaspoon ground cloves
    1 teaspoon ginger
    1/2 teaspoon ground nutmeg

    1.In a large bowl, cream together the margarine and sugar until smooth. Stir in molasses and egg yolk. Combine the flour, salt, baking powder, baking soda, cinnamon, cloves, ginger, and nutmeg; blend into the molasses mixture until smooth. Cover, and chill for at least one hour.
    2.Preheat the oven to 350 degrees F (175 degrees C). On a lightly floured surface, roll the dough out to 1/4 inch thickness. Cut into desired shapes with cookie cutters. Place cookies 2 inches apart on ungreased cookie sheets.
    3.Bake for 8 to 10 minutes in the preheated oven, until firm. Remove from cookie sheets to cool on wire racks. Frost or decorate when cool.

    Friday, November 27, 2009

    DB: Cannoli Sandwich Cookies


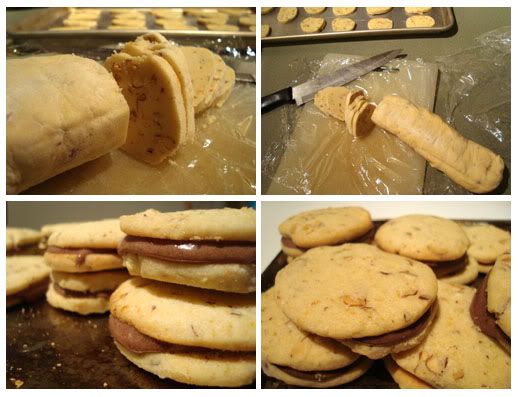
    So, this month's Daring Bakers challenge was not supposed to involve baking, but my twist still involved my oven. I took the inspiration from common cannoli flavorings - nuts, cheese, orange, chocolate - on the challenge was a baked cannoli cookie with chocolate-mascarpone filling.

    The cookie itself is delicate and crumbly, a little like shortbread. This slice-and-bake cookie fits itself nicely into your schedule. No need to even thaw the dough before baking - just slice directly out of the freezer and pop them into the oven. The flavors complemented each other really nicely. I think I will be adding these to my Christmas baking list (with a few changes to make them more festive). Pistachios and dried cranberries with cream cheese frosting. I'm looking forward to it!

    The November 2009 Daring Bakers Challenge was chosen and hosted by Lisa Michele of Parsley, Sage, Desserts and Line Drives. She chose the Italian Pastry, Cannolo (Cannoli is plural), using the cookbooks Lidia’s Italian-American Kitchen by Lidia Matticchio Bastianich and The Sopranos Family Cookbook by Allen Rucker; recipes by Michelle Scicolone, as ingredient/direction guides. She added her own modifications/changes, so the recipe is not 100% verbatim from either book.

    Cannoli Cookies
    adapted from Good Life Eats

    1 cup butter, softened
    3/4 cup sugar
    1/4 cup brown sugar
    1 large egg
    1 tsp vanilla extract
    2 1/4 cups flour
    1 1/2 tsp baking powder
    1/2 tsp orange zest
    1/4 tsp cinnamon
    1/2 cup finely chopped almonds

    Filling
    3/4 cup whole milk ricotta
    6 oz mascarpone cheese
    2 oz bittersweet chocolate, melted and cooled
    1/3 cup powdered sugar
    3/4 tsp vanilla

    4 oz. semi-sweet chocolate, for drizzling

    1. Beat butter at medium speed until creamy. Gradually add sugar and brown sugar, beating well. Add egg and vanilla, beat till combined.
    2. Combine flour, baking powder, zest, and cinnamon. Add to butter mixture. Beat at medium speed. Stir in pistachios.
    3. Shape dough into two 6" logs. Wrap with wax paper and freeze until firm. Slice frozen dough into 1/8 inch thick rounds. Place rounds on a parchment paper lined cookie sheet.
    4. Bake at 350 degrees F for 10-12 minutes, or until lightly browned at edges. Cool 1 minute on pan then transfer to wire rack.
    5. Fill completely cooled cookies with cannoli filling. Assemble sandwiches and drizzle with melted chocolate. Cool in refrigerator until chocolate has hardened.
    6. Filling: Mix filling ingredients together. Chill until ready to use. To fill sandwiches, pipe filling on the underside of one cookie and sandwich with another.
    Drizzle with melted chocolate.

    Sunday, September 27, 2009

    DB: Vols-Au-Vents


    The September 2009 Daring Bakers' challenge was hosted by Steph of A Whisk and a Spoon. She chose the French treat, Vols-au-Vent based on the Puff Pastry recipe by Michel Richard from the cookbook Baking With Julia by Dorie Greenspan.

    I had so much fun making these. What a sense of accomplishment and pride when you see your puff pastry rise in the oven and when you bite into a piece to reveal the beautiful layers. This has been my favorite Daring Baker's Challenge so far. Thank you Steph for this challenge! I have always been afraid of making puff pastry because of its reputation but it is actually not difficult at all. This recipe is one I will be using again and again.

    I chose a very simple filling (sweet rather than savory of course, because I have an insatiable sweet tooth!) I filled them with a sweetened whipped cream, which complemented the buttery puff pastry wonderfully.


    The butter block.


    4 dots to mark 4 turns completed.


    Filled with a simple sweetened whipped cream. Mmmm


    Layers!!!

    Michel Richard’s Puff Pastry Dough
    Baking with Julia by Dorie Greenspan | 2-1/2 pounds dough

    Steph’s note: This recipe makes more than you will need for the quantity of vols-au-vent stated above. While I encourage you to make the full recipe of puff pastry, as extra dough freezes well, you can halve it successfully if you’d rather not have much leftover.

    There is a wonderful on-line video from the PBS show “Baking with Julia” that accompanies the book. In it, Michel Richard and Julia Child demonstrate making puff pastry dough (although they go on to use it in other applications). They do seem to give slightly different ingredient measurements verbally than the ones in the book…I listed the recipe as it appears printed in the book. http://video.pbs.org/video/1174110297/search/Pastry

    Ingredients:
    2-1/2 cups (12.2 oz/ 354 g) unbleached all-purpose flour
    1-1/4 cups (5.0 oz/ 142 g) cake flour
    1 tbsp. salt (you can cut this by half for a less salty dough or for sweet preparations)
    1-1/4 cups (10 fl oz/ 300 ml) ice water
    1 pound (16 oz/ 454 g) very cold unsalted butter

    plus extra flour for dusting work surface

    Mixing the Dough
    Check the capacity of your food processor before you start. If it cannot hold the full quantity of ingredients, make the dough into two batches and combine them.

    Put the all-purpose flour, cake flour, and salt in the work bowl of a food processor fitted with a metal blade and pulse a couple of times just to mix. Add the water all at once, pulsing until the dough forms a ball on the blade. The dough will be very moist and pliable and will hold together when squeezed between your fingers. (Actually, it will feel like Play-Doh.)

    Remove the dough from the machine, form it into a ball, with a small sharp knife, slash the top in a tic-tac-toe pattern. Wrap the dough in a damp towel and refrigerate for about 5 minutes.

    Meanwhile, place the butter between 2 sheets of plastic wrap and beat it with a rolling pin until it flattens into a square that's about 1" thick. Take care that the butter remains cool and firm: if it has softened or become oily, chill it before continuing.

    Incorporating the Butter
    Unwrap the dough and place it on a work surface dusted with all-purpose flour (A cool piece of marble is the ideal surface for puff pastry) with your rolling pin (preferably a French rolling pin without handles), press on the dough to flatten it and then roll it into a 10" square. Keep the top and bottom of the dough well floured to prevent sticking and lift the dough and move it around frequently. Starting from the center of the square, roll out over each corner to create a thick center pad with "ears," or flaps.

    Place the cold butter in the middle of the dough and fold the ears over the butter, stretching them as needed so that they overlap slightly and encase the butter completely. (If you have to stretch the dough, stretch it from all over; don't just pull the ends) you should now have a package that is 8" square.

    To make great puff pastry, it is important to keep the dough cold at all times. There are specified times for chilling the dough, but if your room is warm, or you work slowly, or you find that for no particular reason the butter starts to ooze out of the pastry, cover the dough with plastic wrap and refrigerate it . You can stop at any point in the process and continue at your convenience or when the dough is properly chilled.

    Making the Turns
    Gently but firmly press the rolling pin against the top and bottom edges of the square (this will help keep it square). Then, keeping the work surface and the top of the dough well floured to prevent sticking, roll the dough into a rectangle that is three times as long as the square you started with, about 24" (don't worry about the width of the rectangle: if you get the 24", everything else will work itself out.) With this first roll, it is particularly important that the butter be rolled evenly along the length and width of the rectangle; check when you start rolling that the butter is moving along well, and roll a bit harder or more evenly, if necessary, to get a smooth, even dough-butter sandwich (use your arm-strength!).

    With a pastry brush, brush off the excess flour from the top of the dough, and fold the rectangle up from the bottom and down from the top in thirds, like a business letter, brushing off the excess flour. You have completed one turn.

    Rotate the dough so that the closed fold is to your left, like the spine of a book. Repeat the rolling and folding process, rolling the dough to a length of 24" and then folding it in thirds. This is the second turn.

    Chilling the Dough
    If the dough is still cool and no butter is oozing out, you can give the dough another two turns now. If the condition of the dough is iffy, wrap it in plastic wrap and refrigerate it for at least 30 minutes. Each time you refrigerate the dough, mark the number of turns you've completed by indenting the dough with your fingertips. It is best to refrigerate the dough for 30 to 60 minutes between each set of two turns.

    The total number of turns needed is six. If you prefer, you can give the dough just four turns now, chill it overnight, and do the last two turns the next day. Puff pastry is extremely flexible in this regard. However, no matter how you arrange your schedule, you should plan to chill the dough for at least an hour before cutting or shaping it.

    Forming and Baking the Vols-au-Vent
    Yield: 1/3 of the puff pastry recipe below will yield about 8-10 1.5” vols-au-vent or 4 4” vols-au-vent

    In addition to the equipment listed above, you will need:
    -well-chilled puff pastry dough (recipe below)
    -egg wash (1 egg or yolk beaten with a small amount of water)
    -your filling of choice

    Line a baking sheet with parchment and set aside.

    Using a knife or metal bench scraper, divided your chilled puff pastry dough into three equal pieces. Work with one piece of the dough, and leave the rest wrapped and chilled. (If you are looking to make more vols-au-vent than the yield stated above, you can roll and cut the remaining two pieces of dough as well…if not, then leave refrigerated for the time being or prepare it for longer-term freezer storage. See the “Tips” section below for more storage info.)

    On a lightly floured surface, roll the piece of dough into a rectangle about 1/8 to 1/4-inch (3-6 mm) thick. Transfer it to the baking sheet and refrigerate for about 10 minutes before proceeding with the cutting.

    (This assumes you will be using round cutters, but if you do not have them, it is possible to cut square vols-au-vents using a sharp chef’s knife.) For smaller, hors d'oeuvre sized vols-au-vent, use a 1.5” round cutter to cut out 8-10 circles. For larger sized vols-au-vent, fit for a main course or dessert, use a 4” cutter to cut out about 4 circles. Make clean, sharp cuts and try not to twist your cutters back and forth or drag your knife through the dough. Half of these rounds will be for the bases, and the other half will be for the sides. (Save any scrap by stacking—not wadding up—the pieces…they can be re-rolled and used if you need extra dough. If you do need to re-roll scrap to get enough disks, be sure to use any rounds cut from it for the bases, not the ring-shaped sides.)

    Using a ¾-inch cutter for small vols-au-vent, or a 2- to 2.5-inch round cutter for large, cut centers from half of the rounds to make rings. These rings will become the sides of the vols-au-vent, while the solid disks will be the bottoms. You can either save the center cut-outs to bake off as little “caps” for you vols-au-vent, or put them in the scrap pile.

    Dock the solid bottom rounds with a fork (prick them lightly, making sure not to go all the way through the pastry) and lightly brush them with egg wash. Place the rings directly on top of the bottom rounds and very lightly press them to adhere. Brush the top rings lightly with egg wash, trying not to drip any down the sides (which may inhibit rise). If you are using the little “caps,” dock and egg wash them as well.

    Refrigerate the assembled vols-au-vent on the lined baking sheet while you pre-heat the oven to 400ºF (200ºC). (You could also cover and refrigerate them for a few hours at this point.)

    Once the oven is heated, remove the sheet from the refrigerator and place a silicon baking mat (preferred because of its weight) or another sheet of parchment over top of the shells. This will help them rise evenly. Bake the shells until they have risen and begin to brown, about 10-15 minutes depending on their size. Reduce the oven temperature to 350ºF (180ºC), and remove the silicon mat or parchment sheet from the top of the vols-au-vent. If the centers have risen up inside the vols-au-vent, you can gently press them down. Continue baking (with no sheet on top) until the layers are golden, about 15-20 minutes more. (If you are baking the center “caps” they will likely be finished well ahead of the shells, so keep an eye on them and remove them from the oven when browned.)

    Remove to a rack to cool. Cool to room temperature for cold fillings or to warm for hot fillings.

    Fill and serve.

    *For additional rise on the larger-sized vols-au-vents, you can stack one or two additional ring layers on top of each other (using egg wash to "glue"). This will give higher sides to larger vols-au-vents, but is not advisable for the smaller ones, whose bases may not be large enough to support the extra weight.

    *Although they are at their best filled and eaten soon after baking, baked vols-au-vent shells can be stored airtight for a day.

    *Shaped, unbaked vols-au-vent can be wrapped and frozen for up to a month (bake from frozen, egg-washing them first).