Saturday, February 24, 2018

Tennis Cake


Happy 11th Birthday to my little tennis addict! Tennis is our life now and I love it. We are at the club 6 days a week and gearing up to do USTA tournaments this year. Now that Z is 11 year old, he can compete in yellow ball (the normal adult tennis balls) instead of starting out with the slower red or orange kids balls. Sure beats standing outside in the rain and cold watching soccer games!

I had so much fun making the details on this cake. I used a marshmallow fondant from Craftsy and it turned out perfectly. I didn't let it rest overnight, just for 30 mins in the fridge and it was great. Definitely will be my go-to recipe from now on.

Tuesday, December 22, 2015

Banana Cake with Cream Cheese Frosting


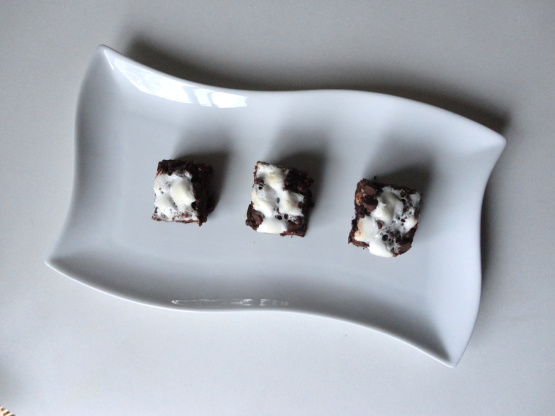
These banana bars are so simple, so moist and with a little effort (not much) they transform into beautiful, elegant treats. I love how a little swirl of frosting here, a carefully placed walnut there and ... tada... the humble banana bar is transformed!


I like this recipe because it only uses 2 bananas so it is perfect for those times when you only have a couple overripe bananas which isn't quite enough for a loaf of banana bread. The crunchy walnut, smooth cream cheese frosting and moist bar are an amazing combination. In my opinion, a splash of maple flavoring to the frosting truly elevates the taste by adding another dimension of flavor. Yum!


Banana Cake with Cream Cheese Frosting
9 x 13 pan | adapted from Betty Crocker

1 cup sugar
1 cup mashed very ripe bananas (2 medium)
1/3 cup vegetable oil
2 eggs
1 cup all-purpose flour
1 teaspoon baking powder
1/2 teaspoon baking soda
1/2 teaspoon ground cinnamon
1/4 teaspoon salt

Cream Cheese Frosting
1/2 brick cream cheese, softened
2 tbsp butter, softened
1 tsp maple flavoring (or vanilla)
1 cup powdered sugar (may need more to achieve desired consistency)
walnuts, for decoration

Directions:
1. Heat oven to 350 degrees F. Grease bottom and sides of rectangular pan, 9 x 13 pan with shortening. In large bowl, mix granulated sugar, bananas, oil and eggs with spoon. Stir in flour, baking powder, baking soda, cinnamon and salt. Spread in pan.
2. Bake bars 25 to 30 minutes or until toothpick inserted in center comes out clean. Cool completely, about 1 hour.
3. Meanwhile, with a hand mixer, mix cream cheese, butter and maple flavoring (or vanilla) on medium speed until blended. Gradually beat in powdered sugar, scraping bowl occasionally, until smooth and spreadable.
4. Cut cooled bars before frosting them. Put frosting in a piping bag and pipe a robust cream cheese frosting rosette on each bar. There is a fair bit of frosting, so you can be generous. Top with a walnut and serve.

Friday, December 18, 2015

Rocky Road Fudge Brownies


I can hardly believe it has been over a year since I last posted. Each month has gone by so quickly, it's hard to believe Christmas is just around the corner. I haven't been baking as much as I would like, but I hope to change that next year! So anyways, on to these bars!
These rocky road brownies are fudgy, dense, moist and packed with chocolate flavor. The peanuts added a delicious crunch and that hint of salt that pairs and contrasts so perfectly with chocolate. I was really skeptical about their consistency even after taking them out of the oven. It seemed like they were severely underbaked and I doubted that they would even hold together as squares but once they cooled fully, overnight, they were amazing! If you make this recipe, bake it with faith that they will set up in the end :)


Rocky Road Fudge Brownies
9 x 13" pan | adapted from King Arthur Flour Cookie Compation

1 2/3 cup all purpose flour
1/3 cup Dutch processed cocoa powder
2 tsp baking powder
1/2 tsp salt
1 cup butter, softened at room temp
1/2 cup dark brown sugar
1/2 granulated sugar
2 large eggs
1 tsp vanilla extract
3 cups semisweet chocolate chips, divided
1 cup salted peanuts
1 - 2 cups miniature marshmallows

DIRECTIONS:
1. Preheat oven to 350F. Lightly butter a 9×13 inch pan (or line with parchment).
2. Sift together flour, cocoa, baking powder and salt. Set aside. Cream butter and both sugars until combined. Beat in eggs and vanilla. Stir in the flour mixture, 2 cups chocolate chips and peanuts.
3. Pat the dough into your prepared pan. Bake for 15-20 minutes until the edges are set but still soft in the center. Sprinkle with remaining 1 cup chocolate chips and then marshmallows. Bake about 5-10 minutes more. Allow bars to cool completely before cutting. This is very important as they will be too gooey to cut if not cooled completely first. Ovenight is best I have found.

Friday, July 4, 2014

4th of July Cookies


Happy 4th of July everyone!!! This is my first 4th of July actually living in the US! After all the immigration hoops we've had to jump through (just to move 1 hour across the border from BC to WA) I am especially excited to celebrate this wonderful country.

Made my favorite sugar cookie recipe for these, along with my favorite recipe for sugar cookie icing. This is the kind of icing that pipes beautifully and dries hard and shiny so you can stack the cookies. It is also delicious!


Wishing you all a safe and happy day! God Bless America!!!

Rolled Sugar Cookies
Makes 60

1 1/2 cups butter, softened
2 cups white sugar
4 eggs
1 teaspoon vanilla extract
5 cups all-purpose flour
2 teaspoons baking powder
1 teaspoon salt

1. In a large bowl, cream together butter and sugar until smooth. Beat in eggs and vanilla. Stir in the flour, baking powder, and salt. Cover, and chill dough for at least one hour (or overnight).
2. Preheat oven to 400 degrees F (200 degrees C). Roll out dough on floured surface 1/4 to 1/2 inch thick. Cut into shapes with any cookie cutter. Place cookies 1 inch apart on ungreased cookie sheets.
3. Bake 6 to 8 minutes in preheated oven. Cool completely.

-----------------

Best Sugar Cookie Icing
Makes enough for 20 cookies

2 cups powdered sugar
4 tsp milk
4 tsp light corn syrup
dash of vanilla

1. Combine all the ingredients and mix well until smooth.
2. Divide into separate bowls and add food coloring as desired. (I prefer gel or paste food coloring. It is more intense and doesn't water down your icing).
3. Best used immediately as it will harden if left out. You can microwave it to soften it if it starts to harden while you are working.

Monday, December 30, 2013

Buttermilk Cheddar Cheese Biscuits


These addictive biscuits were an excellent accompaniment to homemade cream of broccoli soup. They full of flavor from all the delicious cheddar cheese. Best served warm but also make an excellent base for turkey sandwiches! I always use extra-sharp cheese in my baking for the most flavor.


Buttermilk Cheddar Cheese Biscuits
Makes 8 | Barefoot Contessa

2 cups all-purpose flour, plus more as needed
1 tablespoon baking powder
1 1/2 teaspoons kosher salt
12 tablespoons (1 1/2 sticks) cold unsalted butter, diced
1/2 cup cold buttermilk, shaken
1 cold extra-large egg
1 cup grated extra-sharp Cheddar
1 egg, beaten with 1 tablespoon water or milk
Sea salt, optional

1. Preheat the oven to 425 degrees F.

2. Place 2 cups of flour, the baking powder, and salt in the bowl of an electric mixer fitted with the paddle attachment. With the mixer on low, add the butter and mix until the butter is the size of peas.

3. Combine the buttermilk and egg in a small measuring cup and beat lightly with a fork. With the mixer still on low, quickly add the buttermilk mixture to the flour mixture and mix only until moistened. In a small bowl, mix the Cheddar with small handful of flour and, with the mixer still on low, add the cheese to the dough. Mix only until roughly combined.

4. Dump out onto a well-floured board and knead lightly about 6 times. Roll the dough out to a rectangle 10 by 5 inches. With a sharp, floured knife, cut the dough lengthwise in half and then across in quarters, making 8 rough rectangles. Transfer to a sheet pan lined with parchment paper. Brush the tops with the egg wash, sprinkle with salt, if using, and bake for 20 to 25 minutes, until the tops are browned and the biscuits are cooked through.

Monday, December 23, 2013

Pretzel Treats


Salty and sweet, festive and fun, easy peasy! These are a definite go-to treat for the holidays. They make great little gifts packaged in clear bags and tied with ribbon. My son enjoyed unwrapping all the Hershey's Kisses... occasionally popping one in his mouth when he thought I wasn't looking lol.

I probably won't be posting again before Christmas, so MERRY CHRISTMAS everyone!!! Hope you all have a wonderful holiday season with your families and friends.


Pretzel Treats
Makes as many as you want

Waffle shaped pretzels
Hershey's Kisses
M & M's

1. Heat the oven to 350 degrees F. Set a number of bite-size, waffle-shaped pretzels (one for each treat) in a single layer on a cookie sheet.

2. Bake for 4 to 6 minutes (the white chocolate will melt more quickly), until the chocolates feel soft when touched with a wooden spoon. Remove the cookie sheet from the oven and quickly press a candy coated chocolate (M & M) into the center of each kiss.

3. Allow the treats to cool for a few minutes, then place them in the refrigerator to set, about 10 minutes.

Saturday, December 21, 2013

Caramel Cashew Bars


We are only 4 days away from Christmas!!! Where did the time go. Seems like every year goes by faster and faster!

These bars are great to make in a pinch for time. They start out with crushed shortbread cookies - storebought or homemade. Perfect recipes to use up crumbled shortbread cookies. You could also substitute crushed graham crackers for the shortbread. I chose to omit the marshmallows and to reserve some crushed shortbread to sprinkle on top of the caramel mixture.


Caramel Cashew Bars
Makes 9 x 13" pan | adapted from BH&G

3 cups finely crushed shortbread cookies
1/2 cup butter, melted
1/4 cup sugar
36 vanilla caramels, unwrapped
1/2 cup whipping cream
2 cups coarsely chopped cashews
2 cups tiny marshmallows

1. Preheat oven to 325 degrees F. Line a 9 x 13-inch baking pan with foil, extending foil over the edges of the pan. Lightly grease foil; set pan aside.

2. In a large bowl stir together crushed shortbread cookies, butter, and sugar. Press cookie mixture firmly and evenly in prepared pan. Bake about 15 minutes or until crust is golden and dried around edges. Cool in pan on a wire rack.

3. Meanwhile, in a medium heavy saucepan heat and stir caramels and cream over medium-low heat until melted and smooth. Stir in cashews. Sprinkle marshmallows evenly over baked shortbread crust. Pour caramel mixture over marshmallows; carefully spread evenly.

4. Bake for 8 to 10 minutes or until caramel is set and bubbly around edges. Cool in pan on a wire rack. Use foil to lift uncut bars out of pan. Place on cutting board; cut into bars.

Monday, November 11, 2013

Double Blueberry Muffins


Here you have it. The first thing I baked in my new oven in our new home! Nothing fancy because I'm too exhausted to do much more than muffins right now. It was nice anyhow to fill the house with the smell of baking. Can't wait for the holiday season coming up and using my new gas oven to make all my goodies. The thing preheats so quickly. It's a dream!

We officially took possession Oct 24, 2013 but have been living without furniture until this last weekend when we rented a huge Budget truck and brought all my stuff down from Canada to our new home in Washington State.I am so excited not to be living in a condo anymore and more importantly to be living with my husband after more than a year of immigration hoops to jump through. Here are a couple pix of our house.


And now onto the recipe from Gale Gand - 2001 James Beard Pastry Chef award winner. They were fluffy, moist and tender.

Double Blueberry Muffins
Makes 12 | Gale Gand

8 tablespoons (1 stick) unsalted butter, softened at room temperature
1 cup plus 2 tablespoons sugar
2 eggs
1 teaspoon pure vanilla extract
2 teaspoons baking powder
1/4 teaspoon salt
2 1/2 cups fresh or thawed frozen blueberries
2 cups flour
1/2 cup milk
1/4 teaspoon cinnamon

1. Preheat the oven to 375 degrees F. Grease a muffin tin or line the cups with paper liners. In a mixer fitted with a paddle attachment (or using a hand mixer), cream the butter until smooth. Add 1 cup of the sugar and mix. Add the eggs, vanilla, baking powder, and salt and mix. In a shallow bowl, mash 3/4 cup of the blueberries with the back of a fork. Add to the batter and mix.

2.With the mixer running at low speed, add 1/2 of the flour, then 1/2 of the milk, and mix. Repeat with remaining flour and milk. Fold in the remaining 1 3/4 cups whole blueberries by hand until well mixed. In a separate small bowl, mix the remaining 2 tablespoons sugar with the cinnamon. Use an ice-cream scoop or large spoon to fill the muffin cups 3/4 full.

3. Sprinkle the cinnamon-sugar over the muffins and bake until golden brown and risen, 25 to 30 minutes. Let cool in the pan at least 30 minutes before turning out.

Sunday, September 8, 2013

Country Blueberry Pie


My husband's family is a "pie family". There is pie at every gathering that I have been to. This blueberry pie was just perfect. It wasn't too sweet or too starchy like blueberry pies can be if you overdo it on the cornstarch. This recipe also didn't call for tapioca. I prefer recipes that use ingredients on hand so I don't have to make a special trip to the store, and for me, tapioca isn't a pantry staple.


Country Blueberry Pie
1 - 9" pie | adapted from Food Network

Filling:
3/4 cup sugar
2 tablespoons cornstarch
1/2 teaspoon cinnamon
1/2 cup water
3 cups blueberries
1 tablespoon lemon juice

Pastry:
2 cups all-purpose flour
1 tablespoon sugar
1 teaspoon salt
3/4 cup shortening
1 egg
2 tablespoons water
1/2 tablespoon vinegar
Sugar, for sprinkling on top

1. Filling: Combine sugar, cornstarch, cinnamon and water. Add to a saucepan and heat rapidly until thickened. Set aside to cool as you prepare the pastry. Once cooled add the berries and lemon juice.

2. Preheat oven to 425 degrees F.

3. Combine flour, sugar and salt. Cut in shortening. Whisk together egg, water and vinegar. Add to flour mixture tossing lightly with a fork. Turn out onto a lightly floured cutting board and using your hands combine dough. Separate into 2 single crusts. Line the bottom of a pie plate with 1 of the crusts.

4. Pour filling into dough lined pie pan, and sprinkle the lemon juice over the filling. Adjust top crust, cut vents and flute rim. Sprinkle top lightly with sugar. Place pie onto a baking sheet and into the oven for 20 minutes. Reduce heat to 350 degrees F and bake for an additional 20 to 25 minutes.

Thursday, May 16, 2013

Cranberry Maple Almond Granola


I signed up to be one of Cooks Illustrated's recipe testers. This recipe came to me a few months ago by email from them and I was eager to try it out. The end product is a chunky, crunchy, not-too-sweet granola with lots of goodies in it. What makes it so great is that unlike other granola recipes, you don't have to rotate the pan and toss the granola every few minutes in the oven. This is WAY easier. You simply mix up the ingredients, pack it down on a baking tray and ptu it in the oven to bake til golden brown - as though you are baking an oversized cookie. After it has cooled, you break the giant granola bar into chunks. It freezes well, but is so addictive it probably won't make it to your freezer anyway.

More tips: Chopping the almonds by hand is the first choice for superior texture and crunch. If you prefer not to hand chop, substitute an equal quantity of slivered or sliced almonds. (A food processor does a lousy job of chopping nuts evenly.) Use your favorite dried fruit or a combination. Do not use quick oats.

Cranberry Maple Almond Granola

Makes 9 cups | Cooks Illustrated

1/3 cup maple syrup
1/3 cup packed (2 1/3 ounces) light brown sugar
4 teaspoons vanilla extract
1/2 teaspoon salt
1/2 cup vegetable oil
5 cups old-fashioned rolled oats
2 cups (10 ounces) raw almonds, chopped coarse
2 cups craisins or other dried fruit, chopped

1. Adjust oven rack to upper-middle position and heat oven to 325 degrees. Line rimmed baking sheet with parchment paper.

2. Whisk maple syrup, brown sugar, vanilla, and salt in large bowl. Whisk in oil. Fold in oats and almonds until thoroughly coated.

3. Transfer oat mixture to prepared baking sheet and spread across sheet into thin, even layer (about 3/8 inch thick). Using stiff metal spatula, compress oat mixture until very compact. Bake until lightly browned, 40 to 45 minutes, rotating pan once halfway through baking. Remove granola from oven and cool on wire rack to room temperature, about 1 hour. Break cooled granola into pieces of desired size. Stir in dried fruit. (Granola can be stored in airtight container for up to 2 weeks or frozen).