Friday, September 30, 2011

Dulce de Leche Pecan Tarts


I love the time between back to school and Christmas. Even though the weather sucks and the sun disappears way too early, I still embrace this season. Leading up towards Christmas the festive feeling in the air becomes thicker and everything looks more magical strewn with lights and covered in frost. People gather together to celebrate and embrace family and friends. This year I am excited to be celebrating two Thanksgivings - Canadian AND American!

With fall just around the corner, this recipe was perfect to celebrate the close of September. With the addition of chocolate and dulce de leche, it is a decadent twist on traditional pecan pie. The recipe comes from Gourmet Magazine. The only change I made is to bake these in small tart pans instead of as a large pie. Note: You may need to make pastry for a double-crust pie if you are making tarts, because the ratio of crust to filling will be higher for tarts.

Dulce de Leche Pecan Pie
9" Pie | adapted from Gourmet, October 2009

Pastry dough for single-crust pie
1 cup dark corn syrup
1/2 cup sugar 2 large eggs
1 tablespoon flour
1 tablespoon butter, melted
1 teaspoon vanilla extract
1/4 teaspoon salt
1 cup bittersweet chocolate (6 oz), melted
1 1/4 cups pecans (5 oz), chopped, plus whole pecans for garnish
1/4 cup dulce de leche

1. Preheat oven to 350 degrees F with rack in middle. Roll out dough on a lightly floured surface with a lightly floured rolling pin, then fit into a 9-inch pie plate. Trim and crimp edge.

2. Whisk together corn syrup, sugar, eggs, flour, butter, vanilla, and salt until combined. Stir in melted chocolate and pecans and pour into pie shell.

3. If dulce de leche is very thick, thin with 2 to 3 teaspoon water. Pour dulce de leche over top of pie and swirl with a fork (swirl will not be visible in baked pie). Arrange whole pecans on top. Bake until top is puffed but slightly wobbly in center, about 50 minutes. Cool to room temperature, at least 2 hours.

Thursday, September 29, 2011

Peanut Butter Cake Mix Cookies


This is an easy and fast recipe for peanut butter cookies. They start with a yellow cake mix (but if you are feeling adventurous, you might want to try devil's food cake mix!). They are chewy, especially if you take care to underbake them. My favorite parts were the caramellized, slightly crisp edges that surrounded the chewy centres of the cookies.

These come from a really cute little book called "101 things to do with a cake mix". Amazon users rate this as 4 1/2 stars! With recipes for brownies, cookies, bundt cakes, etc. you will never use the recipe on the back of the box again.


Peanut Butter Cake Mix Cookies
adapted from 101 Things to do with a Cake Mix

1 package (18.5 oz) yellow cake mix
1 cup peanut butter (either creamy or chunky)
1/3 cup vegetable oil
2 eggs
2 tablespoons water

1. Preheat oven to 350 degrees F. Pour the cake mix into a large bowl. Make a well in the center, and add peanut butter, oil, eggs, and water. Mix until well blended.

2. Drop by teaspoonfuls onto ungreased cookie sheets. Flatten slightly using a fork dipped in water if desired.

3. Bake for 10 to 12 minutes in the preheated oven. Let cookies set on cookie sheet for 2 to 3 minutes before carefully removing from the cookie sheet to cool on wire racks.

Tuesday, September 27, 2011

Orange Spice Whole Wheat Banana Muffins


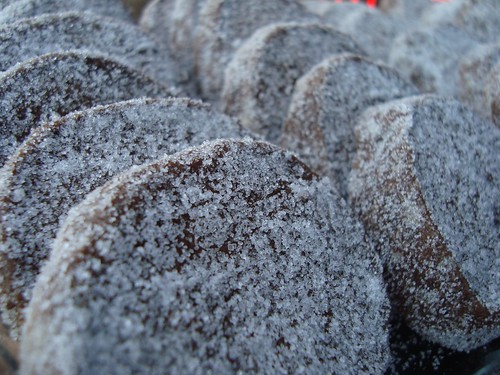
Sorry, no TWD today as I am in New York. Instead, I am posting these muffins I made the week before I left.

This banana bread is spiced with cinnamon and nutmeg and has orange zest strewn through the batter. Beneath its shiny, crispy, caramellized crust is a moist and tender muffin bursting with flavor. It is a refreshing change from the classic recipe without being too deviant. While baking this bread your home will be filled with an amazingly fragrant aroma and if you are like me, you will be hovering around the oven waiting for it to be done so you can have a taste.

Orange Spice Whole Wheat Banana Bread
6 muffins | adapted from Baking Illustrated

1 cup flour
1 cup whole wheat flour
3/4 cup sugar
3/4 tsp baking soda
1/2 tsp salt
1 tsp cinnamon
1/4 tsp nutmeg
2 tbsp orange zest
3 very ripe bananas, mashed (1 1/2 cups)
1/3 cup sour cream
2 eggs
6 tbsp butter, melted
1 tsp vanilla
3/4 cup walnuts, toasted and chopped (optional - I left them out)

1. Preheat oven to 350 degrees F. Line 6-9 cups of a muffin tin (depending on the size of your muffin tin).

2. Combine flours, sugar, soda, salt, cinnamon, nutmeg and zest.

3. In a large separate bowl combine banans, sour cream, eggs, butter and vanilla. Whisk together until fully combined.

4. Stir dry ingredients into wet ingredients until just combined. Fold in walnuts. Pour into prepared muffin pan and bake for approx 55 minutes or until toothpick comes out clean.

Thursday, September 22, 2011

Cappuccino Cheesecake Muffins


These muffins have a light hint of coffee flavor. They are a muffin-cheesecake hybrid. The base is a muffin/quickbread type mixture that gets topped with a cheesecake type topping. The whole thing bakes up into a batch of beautiful, elegantly domed muffins. Toasted, ground walnuts add a lot of flavor to this recipe but I think hazelnuts would also be fabulous! C'mon... what could be better than an excuse to eat cheesecake for breakfast?

Note: Don't over bake these or else the cheese filling becomes tough. Just as when you make a cheesecake, let them cool in the pans to set fully after removing from the oven. If you prefer a stronger coffee flavor I would increase the amount of instant coffee granules in the recipe.


Cappuccino Cheesecake Muffins
12 large muffins | adapted from Marcy Goldman, "A Passion for Baking"

Topping
8 oz. cream cheese, softened
3 tbsp sugar
2 tbsp flour
1 egg
1 tsp vanilla

Muffin
1/2 cup butter, softened
1 cup sugar
2 eggs
1 tsp vanilla
3 tbsp instant coffee granules
1 cup buttermilk
2 1/2 cups flour
1/4 tsp salt
1 tbsp baking powder
1/4 tsp baking soda
1/3 cup ground walnuts
Cocoa or cinnamon, for dusting

1. Preheat oven to 350 degrees F. Line twelve large (not standard sized) muffin tins with liners (I highly recommend using liners rather than greasing the pans, because of the cheesecake layer on these muffins). Spread out liners to cover bottoms of pans.

2. Topping: Combine all ingredients in food processor and blend until smooth.

3. Batter: Cream butter and sugar until smooth. Beat together eggs, vanilla and coffee granules. Add to the butter mixture and blend well. Combine all remaining dry ingredients. Add too butter mixture alternating with buttermilk. Mix until just combined into a thick but soft batter.

4. Scoop batter into prepared muffin pans. Top each evenly with the cream cheese topping. Bake until topping is set, 30-40 minutes. Cool fully before serving. Store in fridge. Dust with cocoa or cinnamon just before serving if desired.

Wednesday, September 21, 2011

Rustic Free-Form Apple Tart


I have a soft-spot for free-form tarts. Their imperfections make them homely, welcoming and unpretentious. This galette recipe comes from Alice Waters. The apple peels and cores are used to flavor a glaze that gets brushed on top of the tart.

Rustic Free-Form Apple Tart
9" Tart | Alice Waters

Dough:
1 cup unbleached all-purpose flour
1/2 teaspoon sugar
1/8 teaspoon salt
6 tablespoons unsalted butter, softened, cut in 1/2" pieces
3 1/2 tablespoons chilled water

Filling:
2 pounds tart, firm apples, peeled and sliced (save peels and cores)
2 tablespoons unsalted butter, melted
5 tablespoons sugar

Glaze:
1/2 cup sugar

1. Mix flour, sugar, and salt in a large bowl; add 2 tablespoons of the butter. Blend in a mixer until dough resembles coarse cornmeal. Add remaining butter; mix until biggest pieces look like large peas.

2. Drizzle in water, stir, then add more, until dough just holds together. Toss with hands, letting it fall through fingers, until it’s ropy with some dry patches. If dry patches predominate, add another tablespoon water. Keep tossing until you can roll dough into a ball. Flatten into a 4" disk; refrigerate. After at least 30 minutes, remove; let soften so it’s malleable but still cold. Smooth cracks at edges. On a lightly floured surface, roll into a 14-inch circle about 1/8 inch thick. Dust excess flour from both sides with a dry pastry brush.

3. Place dough in a lightly greased 9-inch round tart pan, or simply on a parchment-lined baking sheet if you wish to go free-form, or galette-style with it. Heat oven to 400 degrees F.

4. Overlap apples on dough in a ring 2 inches from edge if going galette-style, or up to the sides if using the tart pan. Continue inward until you reach the center. Fold any dough hanging over pan back onto itself; crimp edges at 1-inch intervals. Brush melted butter over apples and onto dough edge. Sprinkle 2 tablespoons sugar over dough edge and the other 3 tablespoons over apples.

5. Bake in center of oven until apples are soft, with browned edges, and crust has caramelized to a dark golden brown (about 45 minutes), making sure to rotate tart every 15 minutes. Make Glaze: Put reserved peels and cores in a large saucepan, along with sugar. Pour in just enough water to cover; simmer for 25 minutes. Strain.

6. Remove tart from oven, and slide off parchment onto cooling rack. Let cool at least 15 minutes. Brush glaze over tart, slice, and serve.

Tuesday, September 20, 2011

TWD: Salt and Pepper Cocoa Shortbread


Today it is my turn to host TWD! As we near the end of the book I was lucky enough to be chosen to pick a SECOND time. I am a huge fan of salt and pepper (and all condiments, come to think of it!). I usually sprinkle so much pepper on my bagel and cream cheese that you can't even see the cream cheese. No exaggerating.

These cookies really intrigued me and I'm happy to report that they were well received. Most people could not even distinguish the presence of the pepper, so it was really more like cocoa shortbread with a little "je ne sais quoi". I also dunked mine in a bowl of sugar before baking to give them a sugar-coated finish. To all the other Tuesdays with Dorie Bakers, thank you for taking the pepper challenge and baking along with me this week. This week is a bit of blur for me as my boyfriend and I count down to our long-awaited New York trip (leaving in 4 days!!!)

Salt and Pepper Cocoa Shortbread
"Baking" by Dorie Greenspan

1 1/2 cups all purpose flour
1/2 cup unsweetened cocoa powder
2 sticks unsalted butter, at room temperature
2/3 cup confectioners sugar
1 large egg yolk
1/2 tsp fine sea salt
1/4 tsp ground pepper
1 tsp vanilla extract

Mix the flour and cocoa together in a bowl and set aside. With an electric mixer beat the butter until smooth and add in the sugar, continue to beat until they incorporate. Add the yolk, salt, pepper and vanilla, beat until smooth. Add the flour and cocoa mixture in a few separate additions. Mix until combined.

Turn the dough out onto your workspace and divide the dough in half. You want to roll 2 six inch logs, wrap in plastic wrap and place in the refrigerator for 4 hours.

Once the dough has chilled cut the logs into 1/2 inch rounds (you will end up with 24 cookies) bake for 12-15 minutes in a 350 degree until firm. Let them cool a minute on the hot trays before moving to cooling racks.

Wednesday, September 14, 2011

Perfect Pound Cake


This golden, statuesque pound cake is tender and moist. The crisp, caramellized crust hides a fine grained cake with a slightly firm texture that results from the use of cake flour. Delicious plain or served with lemon curd. It also freezes extremely well and takes well to flavoring with different extracts and lemon or orange zest. The recipe is from the classic book by Rose Levy Berenbaum - The Cake Bible. It is not as heavy on the eggs and butter as many other pound cake recipes yet just as delicious. The recipe below is for a loaf cake but I doubled the recipe and baked it in a tube pan.


Perfect Pound Cake
8 x 5" loaf | The Cake Bible by Rose Levy Beranbaum

13 tbsp butter
3 tablespoons milk
3 large eggs
1 1/2 teaspoons vanilla
1 1/2 cups sifted cake flour
3/4 cup sugar
3/4 teaspoon baking powder
1/4 teaspoon salt
13 tablespoons, softened

1. Preheat oven to 350 degrees F. In a medium bowl lightly combine the butter, milk, eggs and vanilla.

2. In a large mixing bowl combine the dry ingredients and mix on low speed for 30 seconds to blend. Add the butter and half the egg mixture. Mix on low speed until the dry ingredients are moistened. Increase to medium speed and beat for 1 minute to aerate and develop the cake’s structure.

3. Scrape down the sides. Gradually add the remaining egg mixture in 2 batches, beating for 20 seconds after each addition to incorporate the ingredients and strengthen the structure. Scrape down the sides.

4. Scrape the batter into the prepared pan and smooth the surface with a spatula. The batter will be almost a 1/2" from the top of a 4-cup loaf pan. (If pan is smaller, use excess batter for cupcakes.)

5. Bake 55 to 65 minutes or until a wooden toothpick inserted in the center comes out clean. Cover loosely with buttered foil after 30 minutes to prevent overbrowning. The cake should start to shrink from the sides of the pan only after removal from the oven. Let the cake cool in the pan on a rack for 10 minutes and invert it onto a greased wire rack. If baked in a loaf pan, to keep the bottom from splitting, reinvert so that the top is up and cool completely before wrapping airtight.

Sunday, September 11, 2011

Chocolate Ricotta Muffins


I am enjoying a peaceful morning at my boyfriend's parents place in Port Angeles, WA. This is my first time visiting his parents here. They have a cozy and welcoming home in a beautiful setting. It is such a nice change from the city. When you stand outside and no one is talking all you hear is nature. No cars, no traffic, no humming electronics. I feel like I have been pulled in a million directions lately, so this weekend away is just what I needed to distract me from the stressfulness of September when everything gears back up after the summer.

I made these muffins one morning last week when my mind was racing and I woke up at 3AM. Baking always grounds me and brings my focus together. These muffins are deeply chocolate flavored with chocolate chips strewn throughout the batter. They are moist and taste even better the next day. Their richness comes from the ricotta - a low fat cheese - so you get the moistness without adding a whole lot of fat. To me, the ricotta flavor is not obvious, but it definitely adds that little something more to the recipe. I think they would be great with white chocolate chips next time.


Chocolate Ricotta Muffins
Makes 12-16 | adapted from Food.com

1 cup ricotta cheese
2 large eggs
1 1/3 cup milk
1 tablespoon vanilla extract
4 tablespoons butter, melted and cooled
2 cups all-purpose flour
1 1/4 cups sugar
2 teaspoons baking powder
1/2 teaspoon salt
2/3 cup cocoa powder
1 cup semisweet chocolate chips

1. Preheat oven to 350 degrees F. Place rack in the middle of the oven. Line 16 muffin pans with paper liners.

2. In a medium sized bowl, whisk the ricotta cheese and then add the eggs, one at a time, beating well after each addition. Add the milk, vanilla extract, and cooled and melted butter, mixing well. Set aside.

3. In a large mixing bowl, whisk together the flour, sugar, baking powder, salt, and cocoa powder. Add the ricotta mixture to the flour mixture. Stir just until combined and then fold in the chocolate chips. Do not over mix.

4. Divide the batter amongst the muffin cups. Bake about 20 minutes or until lightly browned and a toothpick inserted in the center of a muffin comes out clean.

Wednesday, September 7, 2011

Pudding Mix Chocolate Chip Cookies


The secret ingredient that makes (and keeps) these cookies chewy is the instant pudding mix. I recommend using butterscotch for the caramel undertones and deepened flavor. I used mini m & m's in these cookies and made them bitesized for my son to bring for snack in his lunchbox.


Pudding Mix Chocolate Chip Cookies
Makes 24

2 1/4 cups all-purpose flour
1 teaspoons baking soda
1 cups butter, softened
3/4 cups packed brown sugar
1/4 cup white sugar
1 (3.4 oz) pkg instant butterscotch (or vanilla) pudding mix
2 eggs
1 tbsp vanilla extract (yes, tablespoon)
2 cups semisweet chocolate chips

1.Preheat oven to 350 degrees F. Sift together the flour and baking soda, set aside.

2.In a large bowl, cream together the butter, brown sugar, and white sugar. Beat in the instant pudding mix until blended. Stir in the eggs and vanilla. Blend in the flour mixture. Finally, stir in the chocolate chips and nuts. Drop cookies by rounded spoonfuls onto ungreased cookie sheets.

3.Bake for 10 to 12 minutes. Edges should be golden brown.

Monday, September 5, 2011

Fat Witch's Cherry Oatmeal Bars


Where did the summer go? Has Labor day really come and gone already? Seems like July and August went by in the blink of an eye. Every weekend has been so fun and activity-filled that I have not noticed the time passing. Time to pack away the ice-cream maker and start looking towards autumn-inspired baked goods.

This is my son's last year in preschool before he goes to Kindergarten. He wants so much to go to school like the big kids. Letting him help me in the kitchen and help pack his own lunch makes him feel more grown-up. We had fun making these one-bowl bar cookies together. They are like overstuffed oatmeal cookies. Not quite as oat-y as granola bars but contain many of the same ingredients: oats, dried cherries, coconut. These will be a welcome treat for back-to-school or breakfast on the run.

Fat Witch's Cherry Oatmeal Bars
Makes 9" Pan | adapted from Fat Witch Brownies Cookbook

3/4 cup + 1 tbsp butter
1 1/2 tsp vanilla
1 1/2 cups quick oats
1 cup flour
1 cup brown sugar
1/4 tsp salt
1/2 tsp cinnamon
1 cup dried cherries
1/4 cup dried coconut
1/3 cup chopped nuts

1. Preheat oven to 350 degrees F. Grease 9" pan.

2.Melt butter and stir in vanilla. Combine all other ingredients in a bowl then add melted butter. Stir to combine fully.

3. Press into greased pan and bake for 30 minutes or until top is golden brown and edges start to pull away from the pan.