Showing posts with label Snacks. Show all posts

Monday, December 23, 2013

Pretzel Treats


Salty and sweet, festive and fun, easy peasy! These are a definite go-to treat for the holidays. They make great little gifts packaged in clear bags and tied with ribbon. My son enjoyed unwrapping all the Hershey's Kisses... occasionally popping one in his mouth when he thought I wasn't looking lol.

I probably won't be posting again before Christmas, so MERRY CHRISTMAS everyone!!! Hope you all have a wonderful holiday season with your families and friends.


Pretzel Treats
Makes as many as you want

Waffle shaped pretzels
Hershey's Kisses
M & M's

1. Heat the oven to 350 degrees F. Set a number of bite-size, waffle-shaped pretzels (one for each treat) in a single layer on a cookie sheet.

2. Bake for 4 to 6 minutes (the white chocolate will melt more quickly), until the chocolates feel soft when touched with a wooden spoon. Remove the cookie sheet from the oven and quickly press a candy coated chocolate (M & M) into the center of each kiss.

3. Allow the treats to cool for a few minutes, then place them in the refrigerator to set, about 10 minutes.

Saturday, March 10, 2012

Pretzel Kisses


These pretty little pretzel kisses are so easy to make and so yummy. The pretzels have just enough salt in them to make these pop. I especially like the ones made with the white chocolate "Hugs". I think they look so adorable with their stark stripes.

What I like best about this recipe is that it can be customized for any occasion with the color of M&M's you use. Pink, red and white for Valentine's day. Pastels for Easter, etc. I got a whole bunch of Hershey's Kisses for valentine's day so this was a great way to use them up.

Pretzel Kisses
Makes 24

24 square pretzels
24 milk chocolate candy kisses
1 (1.69 oz) pkg. M & M's

1. Preheat oven to 350 degrees F.

2. Place pretzels on baking sheets. Unwrap candy kisses and place one in the center of each pretzel.

3. Place in preheated oven 1 to 2 minutes, until kisses melt. Remove from oven and place one candy-coated chocolate in the center of each pretzel. Chill in refrigerator until set.

Friday, January 27, 2012

Easy Faux Petit Fours


"Petit Fours" literally means "Small Oven". French always makes everything sound fancier and prettier, doesn't it? These classy little cakes are traditionally eaten after a meal, served with coffee or tea. Please excuse the poor quality of the photos as they were taken with my Blackberry. I left my camera in a different purse that day.


The version I'm posting here is a fun, kid-friendly one. It is easy to make and relies on storebought vanilla frosting that you liquify in the microwave and tint with food coloring. Dip your cake cubes in to coat them and you are done! Easy and really really cute. We went all out with the color palette here as you can see.


Easy Faux Petit Fours
Makes 4 dozen cubes

1 recipe Classic Pound Cake <--click for recipe
1 can storebought vanilla frosting (not whipped)
food coloring
toothpicks

1. Cut the cooled pound cake into 1" cubes. Try to cut them as evenly as possible for the prettiest petit fours.

2. Scoop some frosting into a small bowl. Add a couple drops of food coloring and microwave for 15-20 seconds to melt. Stir to combine coloring.

3. Pierce a cake cube with the toothpick and dip it into the frosting to coat fully. Let the excess drip off. Place cubes on a cooling rack for a few hours to let the frosting set fully.

Monday, October 24, 2011

Parmesan Pesto Rolls


You know the huge $7.99 jar of pesto they sell at Costco, the one by the fresh pasta, right beside the produce freezer fridge, well I always buy that jar and end up throwing out half of it because it goes bad before I can use it all up. Well, these rolls are an answer to that problem or to any leftover pesto conundrum. On a side note, does anyone else put on their winter coat before stepping into that produce fridge? I mentally prepare myself, listing the things I need to run (literally, run) and grab from there because it is so cold.


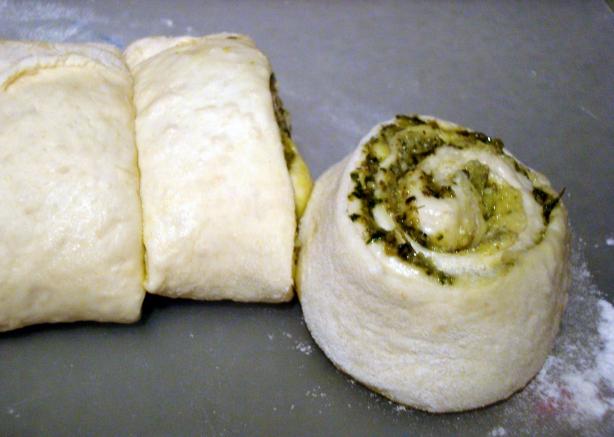
These soft, light, faintly sweet rolls are the perfect vehicle for all that lovely savory pesto filling. It is just a little something different - a little twist on a standard dinner roll. They are so tasty on their own and make a great lunchbox alternative to pizza pretzels.


You could also serve these instead of garlic bread with your next pasta meal.

Parmesan Pesto Rolls
12 rolls | adapted from savorysweetlife.com

1/2 cup warm water (110 degrees F)
1/2 cup warm milk
1 egg (room temperature), slightly beaten
1/2 cup butter, melted
2 tablespoons white sugar
1 teaspoon salt
3 1/2 – 4 1/2 cups bread flour (more if needed)
2 1/4 tsp instant dry yeast (1 sachet)
1/2 cup pesto
1/2 cup shredded Parmesan cheese

1. Place water, milk, egg, melted butter, sugar, and salt in a mixing bowl. Add 3 1/2 cups of flour on top of all the liquid mixture sprinkling yeast on top. Using the dough hook, knead until dough is smooth and elastic adding additional flour as needed just so the dough pulls away from the edges. The less flour you use the better for softer rolls. Remember, you can always knead in extra flour later if needed after the first rise.

2. Place dough in a greased bowl and cover with a wet towel. Allow the dough to rise until doubled in size, approximately 1 hour in a warm area.

3. Turn dough onto lightly floured surface and roll into a 10 x 14 inch rectangle. Spread surface evenly with pesto and sprinkle shredded Parmesan cheese on top. Roll dough into a log, pinching the seam to seal. Cut into 12 equal slices and place them in a greased muffin tin, cut side up. Cover with a damp towel and allow to rise for 30 minutes.

4. Preheat oven to 375 degrees F. Bake in preheated oven for 20 minutes or until golden brown. Remove from muffin cups and serve warm.

Wednesday, August 31, 2011

Bagel Chips


What a great way to use up bagels! These were inspired by Stacey's Bagel Chips or NY Deli Bagel Chips. I like the fact that they can be made with any kind of bagel and seasoning mixture. The ones here are blueberry bagels and cinnamon/sugar. They are shatteringly crisp and will satisfy a any cravings for crunch that you may have.

Try serving them with this super addictive Caramel Cheesecake Dip (this dip is also amazing with apples).


Bagel Chips

Bagels
Butter, softened
Cinnamon & Sugar (for sweet)
OR Garlic Powder & Herbs (for savory)

1. Preheat oven to 350 degrees F.

2. Slice bagels thinly. Melt butter and combine with either cinnamon sugar or garlic and herb. Brush bagels lightly with butter and place on large rimmed baking sheet.

3. Bake, rotating and turning bagel chips with tongs every 5 minutes until golden brown and crispy. Store airtight.

Thursday, July 7, 2011

Dried Apple Rings


These can be made either in the oven (recipe below) or in a food dehydrator (follow manufacturer's instructions). They are a healthy snack and a wonderful way to use up extra apples. Sometimes I sprinkle some cinnamon on the rings before baking. It makes your house smell amazing! My son likes snacking on them and taking them to school.

Another way to use these dried apples is to chop them up and add use them in baked goods. Because they are drier than fresh apples, you can use them in cookies without worrying about the cookies getting soggy. I also find that they work well in muffins. My ultimate favorite use for these is in cinnamon buns. Rather than using raisins, throw a cup of chopped dried apples into your cinnamon bun filling mixture and voila - apple cinnamon buns!

Dried Apple Rings
Reader's Digest

4 apples
2 cups cold water
2 tbsp lamon juice

1. Peel and core the apples. Slice the apples into rings, about 1/4-inch thick.

2. To keep the apple rings from browning, in a large bowl, combine 2 cups cold water and 2 tablespoons lemon juice. Add the apple rings, making sure each apple ring gets coated with the water-lemon mixture. Let stand for 5 minutes. Drain well; pat apple rings dry with paper towels.

3. Preheat oven to 300 degrees F. Lightly coat 2 wire racks with nonstick cooking spray. Arrange the apple rings in a single layer on the wire racks, making sure rings do not touch or overlap. Set each rack on a baking sheet. Bake for 15 minutes. Reverse positions of the baking sheets in the oven, moving the baking sheet from the top oven rack to the bottom oven rack and vice versa. Bake for 15 minutes more. Turn off the oven. Let the apple rings dry in the oven, with the door closed, for 3 hours. Remove from oven. Store airtight.

Thursday, May 26, 2011

Homemade Pita Chips


I was inspired to make my own pita chips after trying Stacy's Pita Chips - Simply Naked. They are simple and clean tasting and I could scarf down a whole bag just plain, no dip needed. They are that good. I love the satisfying crunch you get when you bite into one of these. The Neely's of the Food Network


Pita Chips
adapted from The Neely's

3 pitas (I used whole wheat)
4 tablespoons olive oil
1 clove garlic, smashed (optional)
freshly ground sea salt

Preheat heat oven to 375 degrees F.

Using scissors, trim around the perimeter of the pitas then pull the 2 circles apart. Cut each circle into 8 wedges (you will have 48 wedges in total). Pour olive oil into a bowl and add garlic, salt. Brush pita chips olive oil mixture.

Arrange pita chips on baking sheet and bake for 12 to 15 minutes, rotating and tossing midway through baking time.

Thursday, March 3, 2011

Herbed Bread Chips


Herbed bread chips make a delicious snack either by themselves or with a cheese spread or dip. They are like pita chips - baked, not fried. You can flavor them as elaborately or as simply as you like. Anything from plain olive oil with a sprinkling of sea salt to the medley of spices I used below. Pile 'em up high on a platter with your favorite dip or instead of crackers along with your soup. Mmmm... crunchy and addictive. They also keep for several days when stored airtight after they are fully cooled. I dare say they even improve in flavor the next day, if they last that long.


I used whole wheat bread and they tasted delicious. This recipe is also a great way to use up day old bread. However, they're so good that I would even go and buy bread with the sole purpose being to make these chips.

Pile 'em up high and serve them with soup.

Herbed Bread Chips
adapted from McCormick's

1 loaf (16 ounces) French bread
1/2 cup butter, melted
1 teaspoon Garlic Powder
1 teaspoon Parsley Flakes
1 teaspoon Rosemary Leaves
1 teaspoon Thyme Leaves
1/2 teaspoon Sage
1/4 teaspoon salt
1. Preheat oven to 300 degrees F. Using a serrated or electric knife, slice bread into very thin (1/8-inch thick) slices. Place bread slices in a large mixing bowl.

2. Combine remaining ingredients in a small bowl. Pour over bread slices; toss well to coat. Spread on lightly greased baking sheets. Bake 40 minutes, stirring occasionally, or until golden brown and crisp. Store in airtight container up to two weeks.

Saturday, January 22, 2011

Chocolate Puffed Wheat Squares


This recipe is one I had completely forgotten about until recently when my little sister asked me to make them. My sis is 5 years younger than me and I've always been a sort of second mother to her, especially since my mom doesn't like cooking or anything to do with the kitchen besides eating, lol.

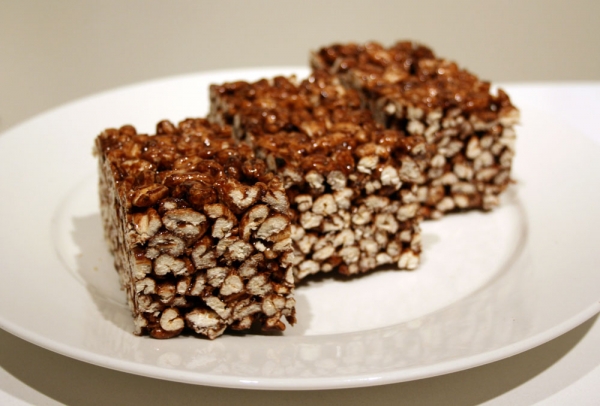
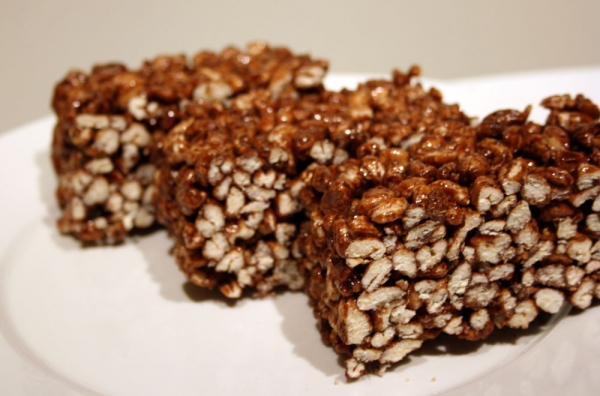
These squares are light, chewy and packed with a surprising amount of chocolate flavor. I find them extremely nostalgic too. Although my own mom never made them, I often had these at friends' houses during after school play-dates. They are probably one of the healthier things you could pack in your child's lunchbox. Oh yeah, and I also love the fact that puffed wheat has only 60 calories per cup!


Chocolate Puffed Wheat Squares

Makes 1- 9x13" Pan

1/2 c butter
1/2 cup corn syrup
1/2 cup brown sugar
3 tbsp cocoa
2 tsp vanilla
9 cups puffed wheat

Combine corn syrup, butter, brown sugar, vanilla and cocoa in heavy sauce pan. Boil for 5 minutes; remove from heat. Be careful to not let mixture boil longer than 5 minutes to ensure a chewy square. Add puffed wheat; stir. Using buttered pans; pour mixture into greased 9x13 inch cake pan. Pat into pan. Let cool; cut into squares. Store airtight.

Friday, November 12, 2010

Tomato Cheddar Foccacia Breadsticks


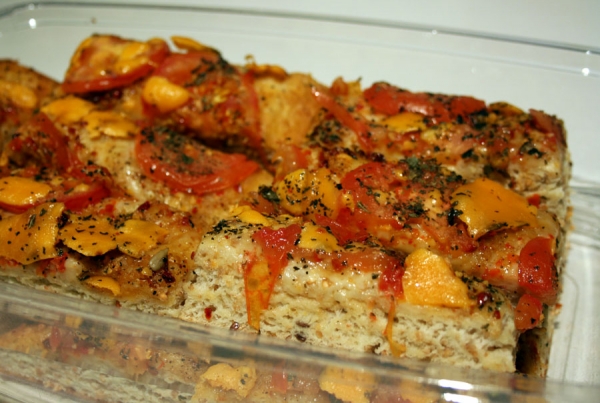
Today is crisp, cool cold, and clear. It's got that icy, Christmassy feel to it already. Hmm... this probably also has to do with the Christmas merchandise lining the shelves of most stores and the Lindt advent calendar that is already calling my name. I had a few people over and after baking the bread I cut it into strips and served it in a towel-lined basket. It was the perfect savory snack for the occasion and the weather. Even if you're afraid of yeast breads, this one is as easy as it gets.


This year I'm determined to get prepared early for the holidays. Believe it or not, one thing I often run out while entertaining is chairs for my guests. My plan is to get extra barstools for around my kitchen island. I like the homey, informal feel and the subtle invitation to gather round the kitchen. On the weekend I found myself on another one of CSN's online stores - allbarstools.com. Click on over there if you get a chance and check out their selection. They have everything from backless, metal, wood, contemporary, classic, etc!
As nice as it is to have holidays attached to weekends, every now and then it's fun to have them in the middle of the week just to break up the routine and get an energy boost. With the Remembrance Day Holiday yesterday, today I'm having one of those days where I keep thinking, 'What day is it?". I'm just glad it feels like a Monday while it's actually a Friday instead of the other way around :)

Tomato Cheddar Foccacia
adapted from allrecipes.com

1 tsp sugar
1 (.25 ounce) package active dry yeast
1/3 cup warm water (110 degrees F/45 degrees C)
2 cups all-purpose flour
2 tbsp olive oil
1/4 tsp salt
2 tbsp fresh basil, chopped (or 1 tbsp dried)
1 tomato, thinly sliced
1-2 cups cheddar cheese, grated

1. In a small bowl, dissolve sugar and yeast in warm water. Let stand until creamy, about 10 minutes.

2. In a large bowl, combine the yeast mixture with flour; stir well to combine. Stir in additional water, 1 tablespoon at a time, until all of the flour is absorbed. When the dough has pulled together, turn it out onto a lightly floured surface and knead briefly for about 1 minute. Lightly oil a large bowl, place the dough in the bowl and turn to coat with oil. Cover with a damp cloth and let rise in a warm place until doubled in volume, about 30 minutes.

3. Preheat oven to 475 degrees F (245 degrees C).

4. Deflate the dough and turn it out onto a lightly floured surface; knead briefly. Pat or roll the dough into a sheet and place on a lightly greased baking sheet. Brush the dough with oil and sprinkle with salt and basil. Lay the tomato slices on top and cover with cheese.

5. Bake focaccia in preheated oven for 10-20 minutes, depending on desired crispness. 10 minutes for moist and fluffy, 20 minutes for crunchier and darker. Cut into 1 1/2" wide strips and serve.

Monday, November 1, 2010

Milky Way Rice Krispie Squares


We had a great time last night trick-or-treating until Zach got so tired he wanted to be carried around and his words started slurring together. He got quite a lot of loot for a 3 year old. However, I think I like candy better than he does. He told me, "You're only allowed ONE candy a day Mommy!"

Seeing as his preschool doesn't allow them to bring candy in their lunchboxes, I came up with the next best thing:


I can't believe I'm posting a recipe for Rice Krispie Squares. But bear with me - these are special RK squares. The bottom layer is made from the standard recipe but with chocolate chips added in at the last minute before pressing into the pan. The chocolate layer is where things get interesting. It is probably the most sinful way you could eat cereal, but it is to die for. It is made from melted down Milky Way bars or (Mars bars in Canada since we don't have Milky Ways). You could probably melt down any unwanted Halloween chocolates (if is there such a thing?) and stir it into the cereal mixture.

I just learned this weekend that you can freeze Rice Krispie Squares! This makes me really happy as they are one of my son's favorite treats but they don't keep at room temperature for very long and I find it silly making a half batch. Once again, the freezer is my best friend :) I think I will be asking for a deep freezer from Santa this year. LOL - Some girls ask for diamonds, this girl asks for appliances.

Milky Way Rice Krispie Squares

6 tbsp butter or margarine
25 oz (2.5 - 10oz bags) marshmallows
1 tsp vanilla
2 full-sized Milky Way/Mars Bars (or 5-6 mini's)
10 cups Rice Krispies

1. In large saucepan melt butter over low heat. Add marshmallows and vanilla and stir until completely melted. In a separate pot, melt the chocolate bars. Remove from heat. ***For the gooiest RK squares the marshmallows should be JUST melted, don't over-melt them.

2. Add cereal. Stir until well coated.

3. Using buttered spatula or wax paper evenly press half of the mixture into 13 x 9 x 2-inch pan coated with cooking spray. Pour the melted chocolate bars over the remaining half and mix to combine. Press the chocolate rice krispies into the pan over the regular ones. Cool. Cut into squares. Best if served the same day. Store no more than two days at room temperature in airtight container. To freeze, place in layers separated by wax paper in airtight container. Freeze for up to 6 weeks. Let stand at room temperature for 15 minutes before serving.

Wednesday, October 27, 2010

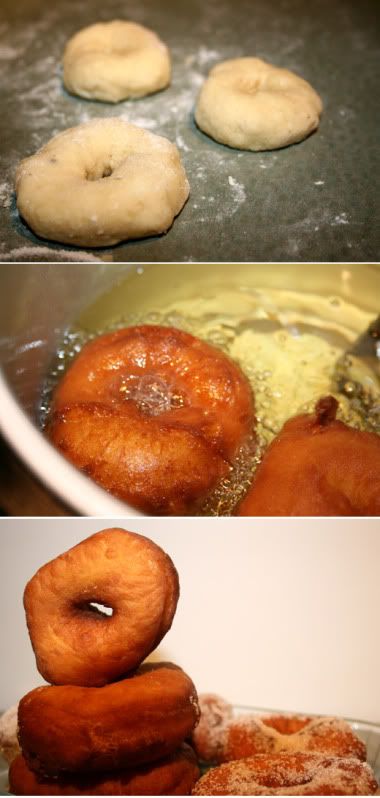
DB: Mini Cake Donuts


The October 2010 Daring Bakers challenge was hosted by Lori of Butter Me Up. Lori chose to challenge DBers to make doughnuts. She used several sources for her recipes including Alton Brown, Nancy Silverton, Kate Neumann and Epicurious.

I have been meaning to make donuts for a long time but kept putting off because it involved deep frying. But I have since overcome my fear of hot oil and have come to embrace its yummy goodness.

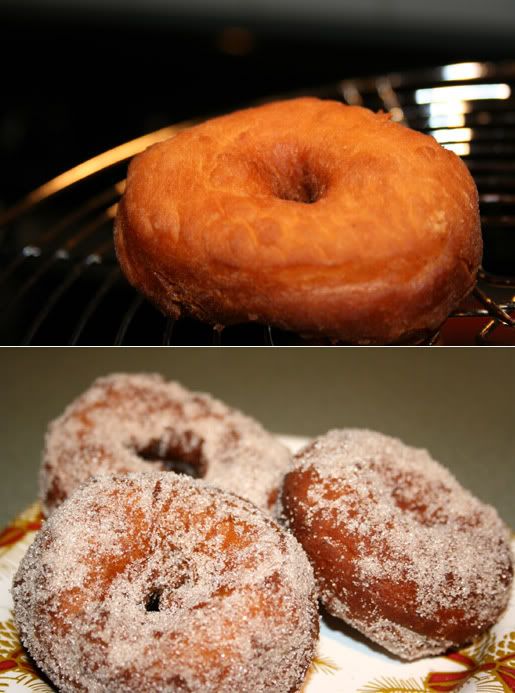
I used a cake donut recipe from Canadian Living magazine. I would have preferred to try a yeasted donut but didn't plan well enough ahead of time. These came together as easily as pancake batter, however, they required a 1 hour rest in the fridge. I am THRILLED with how they turned out. Super cute, 1 1/2" donuts or as the recipe directs, donut holes. I used my fingers to shape them.

My dad preferred them without the sugar, opting to have them dunked in his tea like a biscuit. Overall, a success! I will definitely be trying a yeasted version in the future and perhaps experimenting with a Krispy Kreme Copycat recipe.


Cake Donuts
from Canadian Living

3 cups flour
1 tbsp baking powder
3/4 tsp salt
1/2 tsp grated nutmeg
1/2 cup light cream (10% M.F.)
1/2 cup heavy cream
1 tsp vanilla
3 eggs
1 cup granulated sugar
Canola oil or safflower oil or vegetable oil, for deep-frying,

Cinnamon Sugar for coating

Preparation:
In bowl, whisk flour, baking powder, salt and nutmeg. In small bowl, whisk 10% and whipping creams and vanilla. Set aside.

In large bowl, beat eggs with sugar until pale; gradually beat in cream mixture. Stir in flour mixture to make soft sticky dough. Cover and refrigerate for 1 hour.

Spray a mini (1 tbsp) ice-cream scoop or 1 tbsp measure with nonstick spray. In deep fryer or deep saucepan, heat 2 inches oil until deep-fryer thermometer reads 350 degrees F. Drop batter by tablespoonfuls into oil, 6 at a time; deep-fry, turning once, until golden and puffed, 3 to 4 minutes. With slotted spoon, transfer to paper towels to drain. Transfer to rack; let cool slightly then toss in cinnamon sugar to coat.

Wednesday, October 13, 2010

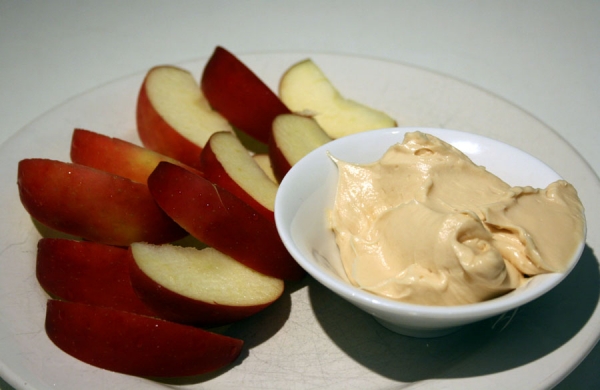
Caramel Apple Dip


This smooth, creamy caramel cream cheese dip has all the season's nostalgic flavor of caramel apples without the work. The cream cheese offsets the sugary sweetness of the caramel and addts a nice tang to the dip.

This is a good way to get your kids to eat more fruit. My 3 1/2 year old son ate 2 whole apples in one sitting because of this dip. I had to take it away from him so I would have some left for me! You can use it for dipping apples, spreading on crackers... or just eating by the spoonful (oops, did I just write that?)

There are a few variations of this recipe but you can tweak it to make it sweeter or more tangy depending on the ratio of caramel to cream cheese you put in.
Tip: You can dress it up for parties by sprinkling the top with chopped walnuts and drizzling it with some caramel sauce.

Why you must make this:
1) It's foolproof, versatile and EASY
2) It's yummy even with fat free/low fat cream cheese
3) It keeps well refrigerated - good for pot lucks and for make ahead snacks

Caramel Apple Dip I
16 individually wrapped caramels, unwrapped
1/4 cup water
1 (8 ounce) package cream cheese, softened
1/2 cup brown sugar

In a medium saucepan over medium-low heat, or in the microwave, melt caramels with water, stirring frequently. Remove from heat.
Cream together cream cheese and sugar. Fold in caramel mixture. Serve immediately or refrigerate.

Caramel Apple Dip II
1/4 cup sugar (optional)
3/4 cup brown sugar
1 teaspoon vanilla extract
1 (8 ounce) package cream cheese, softened

Combine all ingredients with an electric mixer until smooth. Serve immediately or refrigerate.

Caramel Apple Dip III
1 (8 ounce) package cream cheese, softened
1/2 - 3/4 cup bottled caramel sundae sauce

Combine all ingredients with an electric mixer until smooth. Serve immediately or refrigerate.

Wednesday, October 6, 2010

Domino's CinnaStix Copycat


This is a really easy recipe, especially if you have pre-made pizza dough on hand. Domino's Cinna Stix are just like savory breadsticks except instead of the garlic/cheese on top and a side of pizza sauce, they are sprinkled with a a cinnamon-sugar mixture and a side of sweet, vanilla icing for dipping. Me being a sucker for anything cinnamon, I think these are delicious.

When you're making your own pizza, make a little extra dough and try some of your own home made CinnaStix for literally, pennies! Check out and join in the monthly Copycat Club (see link in my header).

Domino's Cinnastix
Makes 8 sticks

1 package prepared pizza crust (or your favorite dough recipe)
1/4 cup melted butter

1/2 cup sugar
2 teaspoons cinnamon

Icing for dipping
1 lb powdered sugar
1 tablespoon milk
1 tablespoon melted butter
1/4 teaspoon vanilla extract

1. Preheat oven to 350 degrees F.
2. Roll out pizza dough into a large rectangle.
3. Brush melted margarine liberally over the dough. Slice the dough into either long sticks, or cut dough in half, and then slice into smaller sticks. Place on an lightly greased cookie sheet and bake for approximately 15 minutes or until done.
4. In a small bowl combine sugar, and cinnamon, mix well. Sprinkle the cinnamon and sugar mixture liberally over the hot breadsticks straight out of the oven.
5. While the sticks are cooking mix together the powdered sugar, milk, melted butter, and vanilla. Mix until smooth. Serve on the side for dipping.

Sunday, October 3, 2010

Soy-Glazed (Tamari) Almonds


These have a great brittle-like, salty crunch. Unlike tamari almonds, these ones are glazed, not dusted, with flavoring. The recipe comes from a book called Party Nuts by Sally Sampson. It has 50 recipes for all different types of nuts, different spices, salty, sweet, you name it. There is something for everyone in this book. My favorites so far are the peppered candied walnuts, vanilla walnuts and shellacked balsamic pecans. Yum!

Nuts make great gifts. Package them up in a pretty cellophane bag tied with a bow and a cute little gift card and you're good to go! I will probably be doing this for Christmas gifts this year. Fast, beautiful, tasty and best of all: easily prepared ahead of time. Better yet, you could give a copy of this book (Only about $10 at Amazon) with a gift bag of nuts. Trust me, you'll have some happy recipients.

I am submitting this recipe to brenda's canadian kitchen for Cookbook Sundays :)

Soy-Glazed [Tamari] Almonds
Makes 2 cups | adapted from Party Nuts

2 cups raw almonds (original recipe calls for walnuts)
1/4 cup tamari or soy sauce
1 tbsp butter, melted
2 tbsp sugar

1. Preheat oven to 300 degrees F. Line baking sheet with parchment. Place all ingredients in a bowl and toss until nuts are well coated.
2. Transfer nuts to prepared sheet in a single layer. Bake, stirring occasionally, for 20-35 minutes, until nuts are toasted and the glazes has caramellized on the nuts. Be careful not to burn them.
3. Remove from oven and immediately loosen nuts with a spatula then set aside to cool before serving.

Thursday, September 16, 2010

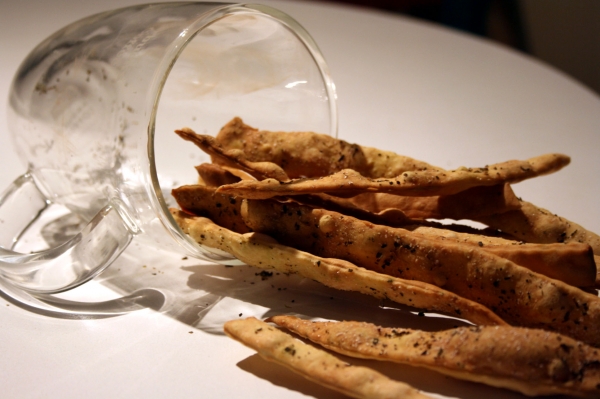
Olive Oil Crackers


These thin and snappy crackers are crisp, fragrant and addictive. They are infinitely versatile and easily adorned with seeds, salts, cheeses, spices, or oils to suit any menu. You can make them any shape: wide strips, thin ribbons (my fave), squares or simply baked in big sheets. Just right for nibbling.

The recipe is adapted from Ottolenghi: The Cookbook. This popular restaurant, Ottolenghi, has stores in London and believes in everything handcrafted from raw ingredients. Simple and clean. I've never even set foot in one of their stores but I love the style of the cookbook and their philosophy. And oh yes, the cracker recipe is a keeper too!


Olive Oil Crackers
adapted from Ottolenghi

1 cup flour
1 teaspoon baking powder
1/2 cup water
2 tablespoons olive oil + oil for brushing
salt
seeds/spices/seasonings

Sift flour with baking powder into a bowl. Make a well in the centre and pour in water and olive oil. Work to a dough, then turn out and knead on a very lightly floured bench until smooth. Wrap in plastic and refrigerate for 1 hour.

Preheat oven to 425 F and line a baking sheet.

Dust the bench and keep the flour close to hand. Divide dough into thirds. Roll each third out right on the baking sheet into a very thin rectangle. The thinner the better. Dust with flour as you work. Cut as desired with a pastry cutter or cookie cutters and space them apart slightly on the baking sheet (they won't spread much). Brush liberally with olive oil and sprinkle with coarse sea salt or whatever you like. Bake in batches for 6-8 minutes closely monitorting their progress. Pale gold is good; deep gold is burnt. Cool on a rack.

Monday, July 26, 2010

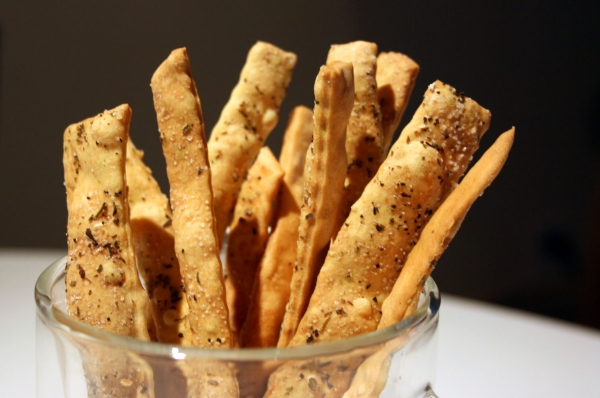
Cinnamon Grissini


Take a simple sweet dough, cut into thin strips, coat with butter, sugar and cinnamon and twist and bake. The longer the grissini the more elegant and breath-taking. They really make a statement standing tall in a canister for anytime snacking. Drizzled with a bright white vanilla icing, they become a chic party nibble.

Beyond their good looks there's also something wonderful about the satisfying "snap" these make as you bite into one of these sticks.


Cinnamon Grissini
20 long sticks

1 cup milk, lukewarm
1/3 cup sugar
1 pkg active dry yeast
1/3 cup butter, softened and cubed
3 1/2 cups flour
1/2 tsp salt

1/4 cup butter, melted
1/2 cup sugar
1 tbsp cinnamon

1. Dissolve sugar in warm milk. Add yeast, stir and let sit 5 mins or until slightly foamy. Add butter and mix with dough hook.

2. Mix 3 cups flour with salt. Add 1 cup at a time to mixer. Gradually add in 1/2 cup flour (if needed) to make dough come together into a ball that is slightly sticky but clings to the dough hook and pulls away from the sides of the bowl. Cover and let rise in warm place for 1 hr, until doubled.

3. Gently deflate risen dough. Turn onto lightly floured surface and roll out thin. Brush with a thin layer of butter. Not too much. Sprinkle with cinnamon sugar evenly.

4. With a pizza cutter cut the dough into thin strips. Pick up each strip of dough at the ends and gently stretch it then fold it in half to make it shorter. Pick it up and stretch it again, slightly twisting each end in opposite directions to give it the twisty look. Place on baking sheet and press ends down slightly to keep from unraveling.

5. Preheat the oven to 350F. Let the grissini rest while the oven is heating or while the prior batch is baking. Bake for 25 – 30 minutes (longer for thicker grissini) until browned and very crisp. Cool on a wire rack.

Friday, July 2, 2010

Cheesy Popcorn Cornbread


Every now and again my son drags out my air popcorn popper and asks if we can make some. Every time I say "yes" and every time I vow never to do it again. It never gets all eaten before it gets boring and goes stale which then leaves me feeling guilty for throwing it out. Plus, the microwaved stuff leaves a lingering smell of fake butter in your kitchen.

To the rescue, here's Jolly Time! This site has inventive, tasty ways to use leftover popcorn. From salty to sweet, easy to fanciful. I have a feeling I will be popping lots more corn now so I can try these recipes. Next I would especially like to try the Popcorn Cookies, Rocky Road PB Popcorn Bars and the Nutty Popcorn Fudge.

Cheesy Popcorn Cornbread
8" square | Jolly Time Popcorn Company

4 cups popped popcorn
1 cup yellow corn meal
2 tablespoons sugar
2 teaspoons baking powder
1/2 teaspoon salt
1 egg
1 cup milk
1/4 cup vegetable oil
1 cup shredded jack cheese

1. Preheat oven to 400 degrees F and grease an 8-inch square baking pan.
Process the popcorn in a blender or food processor until finely ground. Pour ground popcorn into a large bowl and stir in corn meal, sugar, baking powder and salt until blended.

2. Beat egg, milk and vegetable oil together in a small bowl and stir into popcorn mixture just until blended. Scatter cheese over batter and stir just until evenly distributed. Pour batter into prepared pan and bake for 25 minutes or until lightly browned at edges and tester comes out clean. Cut into squares.

Wednesday, May 5, 2010

Seeded Mustard Thyme Crackers


I've been baking more savory and healthy snacks lately. Maybe it's to try and get my son to eat more of my baking. The kid does not have a sweet tooth in the least. He would (honest-to-God) choose broccoli over chocolate. People often wonder how he could possibly be a child of mine seeing as I'm the kind of girl who eats dessert first if given the option (like at a buffet).

These sturdy crackers have a nice mixture of textures from the sesame seeds, poppy seeds, oats and whole wheat flour. There's no white flour in this recipe! They even TASTE healthy and that's not a bad thing! They are a little thicker than "thins" but they have an oh-so-satisfying crunch. With shredded cheese baked right into them, they are easy to pack for snacks. There's no need to fiddle with sliced cheese on the side when serving these, although you can never have too much cheese, so feel free top with sliced ham and cheese if you like.


Seeded Mustard Thyme Crackers
adapted from The Cookie and Biscuit Bible

1 1/2 cups whole wheat flour
2/3 cup rolled oats
2 tsp salt
2 tbsp sugar
2 tbsp sesame seeds
1 tbsp poppy seeds
1 cup grated cheddar
1 tbsp dried thyme

1/4 cup butter, diced
2 tbsp shortening
4 tbsp milk
2 tsp dijon mustard

1. Preheat oven to 400 degrees F. Line 2 baking sheets with parchment or silicone liners. Combine milk and mustard in a small bowl.

2. In a food processor combine flour, oats, salt, sugar and seeds. Add cheddar and thyme and pulse just to incorporate - don't overdo it, you still want the oat/cheese/seed texturedness.

3. Add butter and shortening and pulse. It should resemble coarse meal. Drizzle mustard/milk mixture into the food processor and pulse until it comes together slightly. Sparingly add more milk if needed, just enough to form a rollable dough.

4. On a floured surface roll out as thin as you can. Cut into desired shapes (I like squares) and bake for 5-8 minutes, rotating and watching closely as they can go from pale to burnt in seconds.

Wednesday, April 7, 2010

Crispy Vegetable Spring Rolls


I have been wanting to make my own spring rolls for a while now and I finally tackled this project over the long weekend. When I was looking for recipes I ran into the issue of egg rolls versus spring rolls. Are they the same thing?

From what I've read, the difference basically comes down to the wrappers. Egg rolls use a slightly thicker wrapper made with egg versus the paper-thin rice paper wrappers of spring rolls. They are also more substantial, often containing meat (ground pork) whereas spring rolls traditionally are packed solely with vegetables. The last twist is that spring rolls and egg rolls are fried but their cousin, the summer roll, is not. I felt adventurous so I also made some Summer Rolls for a nice, light lunch. Check out this post coming soon.

I adapted this recipe from Rasa Malaysia and Recipezaar. I was happy with the results but the key recommendation I would make is to TASTE IT as you go so the filling is perfectly seasoned the way you like it before you roll and fry.


Crispy Vegetable Spring Rolls
Makes 24 - 5" rolls

Filling:
4 cups (approx 1/3) green cabbage, chopped into thin pieces
2 cups mung bean sprouts
1 cup (approx 4) fresh shiitake mushrooms, julienned (or rehydrated dried shiitakes)
1 cup (approx 4) button mushrooms, julienned or 1 cup extra firm tofu cubed
1 cup (approx 5) green onions, chopped
1 cup (approx 1) carrot, grated

Sauce:
2 tbsp soy sauce
1 tsp chinese rice wine
1 tbsp sesame oil
2 tbsp oyster sauce
1 tsp white pepper
2 tsp cornstarch

spring roll wrappers
water
oil for deep frying

1. Combine all the vegetables in a large mixing bowl. Combine all sauce ingredients in a small bowl.

2. Heat some vegetable oil, about 2 tbsp, in a skillet over medium-high heat. Sauté your vegetables in the hot oil until quite soft. Push the veggies to the side of the pan and add your sauce. Toss to coat and continue cooking until veggies are fully cooked and sauce is well distributed throughout. Taste and adjust seasoning as you like.

3. Lay the spring roll wrapper with one of the corners facing you and spoon in 1/4 cup filling. Lightly moisten all 4 corners of the wrapper with a dab of water. Fold the bottom point over the filling, fold in the two sides and roll up (like a burrito). Set aside until all of them are rolled and you're ready to fry. (I lay them on a silicone mat covered loosely with a towel so they don't dry out).

4. In a deep fryer or in a heavy pot, heat 2" of canola oil to 375 degrees F. Deep fry spring rolls in small batches for 3-4 minutes. You don't need very long because all you are doing is crisping the wrappers since the filling is fully cooked. Drain on paper towels or paper bags. Serve with plum sauce or soy sauce.

**These refrigerate/freeze well. Just zap for a few seconds in the microwave to heat then re-crisp in the oven.