Showing posts with label Cookbook Sundays. Show all posts

Sunday, December 19, 2010

Gingerbread Bundt Cake


Less than 1 week to Christmas! It was a really weird feeling this weekend to be at the mall on the last weekend before Christmas and NOT have it packed with line-ups out the doors. I heard that online shopping has increased this year and I definitely feel that too when I am in the mall. Stores seem emptier and the sales seem better online. I know that personally, 75% of my shopping was done on eBay or Amazon this year. While baking delicious cakes at the same time!

If you like molasses spice cookies you will love this cake. Moist, spicy and comforting - it is especially good when served with a hot drink on a cold day. With a medley of cinnamon, cloves, nutmeg, ginger, it immediately awakens your palate and makes your house smell like Christmas with its light texture and creamy crumb. Even if you leave out the other spices and use only ginger, this recipe produces a really tasty cake that freezes well, double-wrapped in foil.


Sour Cream Gingerbread
1 - 10" Bundt | Fannie Farmer Cookbook

1 cup butter (2 sticks)
1 cup sour cream
2 cups sugar
1 cup molasses
4 eggs
3 cups flour
1 teaspoon baking soda
2 tsp baking powder
1 tsp salt
1 tbsp ground ginger
1 teaspoon cinnamon
1/2 teaspoon ground cloves
1/2 teaspoon ground nutmeg

Preheat oven to 350 degrees F. Butter and flour a 10-cup Bundt pan. Cream the butter and slowly add the sugar, beating until light. Add the molasses and sour cream and blend well. ADd the eggs, beating until well mixed. Mix together the flour, baking powder, soda, salt and spices. Add to the first mixture and bea until smooth. Pour into th pan and bake 40-50 minutes (or more) until toothpick comes out clean.

Sunday, December 5, 2010

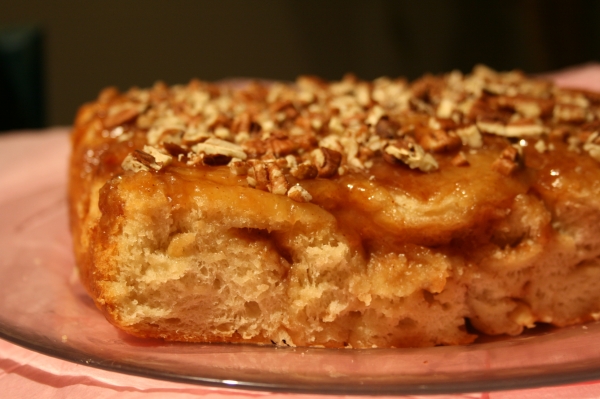
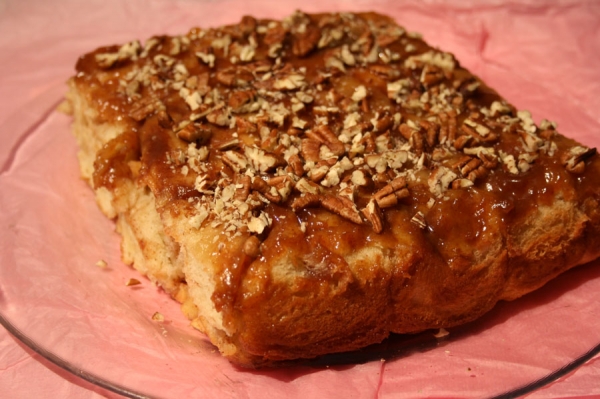
Caramel Apple Sticky Buns


There are a few more hours left to enter my Giveaway for a digital food scale, cookbook and holiday spreaders. Click over there to enter up until 11:59 PM PST Sunday, December 5, 2010.

These delicious, ooey gooey sticky buns are made with a delicious potato dough from on of my favorite recipe books. I was lucky enough to find the The Fannie Farmer Baking Book for $6.99 at Half Price Books when I last visited. This book is no longer in print but it should definitely be brought back. It is huge - no fancy pictures, only simple illustrations - but does it ever have a wealth of recipes for almost anything you ever wanted to bake, as well as interesting historical background. Information on baking techniques is clear and allows which allows for flexibility in altering recipes to suit your needs. It is the Joy of Cooking's equivalent in the baking domain.


If you can find one near you, Half Price Books is a great place to find cookbook gems and to trade in books for cash. It has become a "must visit" place every time I take a trip down to the States. I also found The Fannie Farmer Cookbook: Anniversary Edition for a steal. These buns are a combination of my favorite flavors: caramel, apples, cinnamon, pecans and sweet yeast bread. They are buttery and pillow-soft with a little crunch from the apple and a crisp-chewy texture around the edges from the baked caramel. Despite their sweet-sounding name, the buns were not overly rich. The dough contains 1/2 cup of mashed potato and uses the potato-water which makes it an excellent keeper. It stays nice and soft for longer than most other yeast doughs.


Caramel Apple Sticky Buns

Potato Sweet Dough
adapted from The Fannie Farmer Baking Book

1 1/4 cup warm potato cooking water (or milk)
1 pkg (2 1/4 tsp) active dry yeast
1/2 cup sugar
1 1/2 tsp salt
1/2 cup warm mashed potato
1/3 cup butter, softened
4 to 4 1/2 cups flour (all-purpose or mixture of a.p. and bread flour)

Caramel-Apple Filling
1 apple, peeled and diced
1 cup sugar
2 tbsp cinnamon
3/4 cup butter, softened
1/2 cup caramel sauce (bought or homemade)
1/2 cup chopped pecans

1. In a large mixing bowl (or stand mixer bowl) mix the yeast with the warm warm water and let dissolve, about five minutes. Add the sugar and salt and stir to combine. Then add the potato and butter, mixing to combine fully.

2. Using the dough hook, add 3 cups of the flour to the mixing bowl with the liquid ingredients. Mix dough on slow speed, adding flour until the dough is smooth and elastic. It should not stick to the bottom of the mixing bowl. If desired, you can do the final bit of kneading by hand. Put the dough in a large, greased bowl, cover and let rise until double in bulk (approx. 1 hr).

3. Combine apples, sugar and cinnamon in a small bowl and let sit to marinade while dough rises.

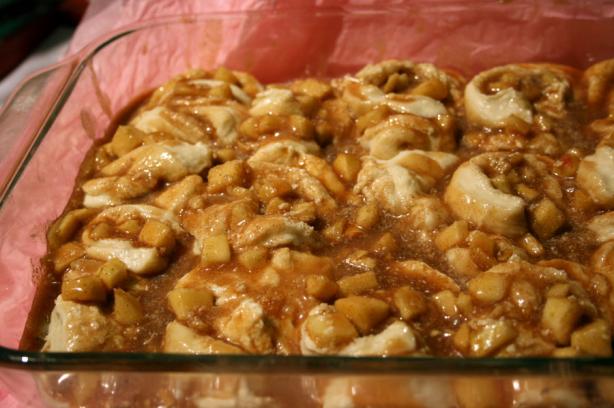
4. After dough has risen, punch down the dough, remove from bowl, and roll into a large rectangle 1/2" thick. Spread softened butter evenly over the dough and sprinkle with apple-cinnamon mixture. Drizzle caramel sauce evenly over the dough then roll up into a log and cut into buns. Place in a 9 x 13" baking pan. Cover and put in a warm place.

5. Let rise until almost doubled in bulk. Preheat oven to 375 degrees F. Bake for another 25 - 30 minutes or until golden brown and no longer "doughy". Cool in pan for 10 minutes then loosen the edges with a spatula and invert onto serving tray. Drizzle with extra caramel sauce (if desired) and sprinkle with chopped pecans.

Sunday, November 14, 2010

Chocolate Syrup Coffee Cake

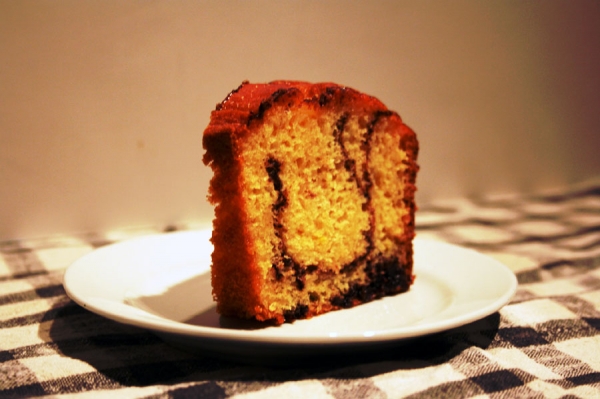
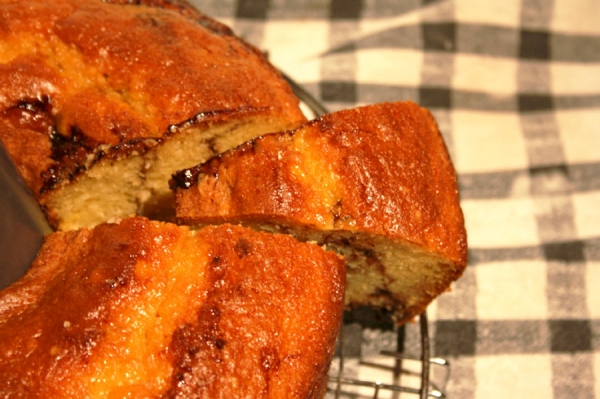
You can tell I'm super-busy when my baking starts to rely more on doctoring cake mixes and canned crescent rolls. I'm a huge proponent of baking from scratch, but life has been passing by so fast that sometimes a girl's just gotta cheat a little. If you are planning on using a cake mix anyway or if you need to make a cake quickly, I highly recommend this recipe. Your reward for all your "hard work" is a very vanilla-y, very moist and very chic tube cake with a swirl of chocolate syrup running through the middle. I love the way it split down the middle and has a tight crumb similar to that of pound cake. It even looks homemade! Chocolate Syrup Coffee Cake 1 Bundt | Cake Mix Magic 1 box (18.25 oz.) yellow cake mix 1 pkg vanilla instant pudding 1 cup sour cream 1/2 cup vegetable oil 4 large eggs 1/2 cup chocolate syrup 1. Place a rack in center of oven and preheat to 350 degrees F. Lightly grease a 10" tube pan with vegetable oil spray then dust with flour. Shake out excess flour and set pan aside. 2. Place cake mix, pudding mix, sour cream, oil and eggs in a large mixing bowl. Blend with electirc mixer on low for 1 min. Stop and scrape down sides of bowl. Increase speed to medium and beat 2 min. more. Batter should look thick and smooth. Pour half of the batter into the pan, smoothing it out with the rubber spatula. Pour the chocolate syrup evenly over the batter, making sure not to let the syrup touch the sides of the pan. Pour the remaining batter over the syrup and swirl gently with a knife, making sure to keep the chocolate syrup away from the sides of the pan. 3. Bake for 55-60 min. Remove from oven, cool for 20 min. Run a sharp knife around the edge of the cake and invert onto a rack then invert onto another rack so that the cake is right side up. Cool completely. Serve, no frosting needed.

Sunday, October 31, 2010

Pumpkin Whoopie Pies


Happy Halloween!!! I know everyone's probably pretty pumpkin'd out already, but I just had to feature a pumpkin recipe today. These whoopie pies are a twist on the classic chocolate version. The mellow pumpkin flavor of the cookie pairs perfectly with the icing which is studded spices to be interesting without being overpowering.

The recipe comes from King Arthur Flour's Cookie Companion. It makes soft, moist, cake-like cookies which are then sandwiched around a tangy-sweet cream cheese filling. The cookies are so good you almost don't need the filling, thus enabling you to save a few calories! ... Or rendering them more acceptable to serve for breakfast.

Pumpkin Whoopie Pies
24 - 2" sandwich cookies | adapted from KAF's Cookie Companion

1/2 cup soft butter
1/2 cup vegetable oil
2 cups packed brown sugar
2 tablespoons molasses
1 teaspoon baking powder
1/2 teaspoon baking soda
1 teaspoon salt
2 teaspoons cinnamon
1 teaspoon ground ginger
1/2 teaspoon ground nutmeg
1/4 teaspoon ground cloves
2 large eggs
1 1/2 cups (15 oz.) canned pumpkin puree
2 1/4 cups flour

8 oz cream cheese, room temperature
4 tablespoons soft butter
2 cups confectioners sugar, sifted
1 teaspoon vanilla extract
1/4 cup diced crystallized ginger, optional

1. Cookies: Preheat the oven to 375 degrees F. Grease/line two baking sheets. Beat together the butter, oil, sugar, molasses, cake enhancer, baking powder, baking soda, salt, and spices.

2. Scrape the bottom and sides of the bowl, then beat in the eggs one at a time, until fluffy. Stir in the pumpkin. Add the flour in two additions, mixing well after each addition.

3. Use a mini-muffin scoop to deposit the thick batter onto the prepared baking sheets, leaving about 2" around each mound. Bake until the cookies feel firm; a slight indentation will remain when you gently press them in the middle, about 14-16 minutes. Remove from the oven, cool on the baking sheets for 5 minutes, then move to a rack to cool completely.

4. Filling: Beat the cream cheese and butter until smooth and fluffy. Beat in the sugar in two additions. Add the vanilla and beat for 2 to 3 minutes, until very fluffy. Stir in the crystallized ginger.

5. Assemble: Sandwich two cookies around 1 tablespoon of filling.

Tuesday, October 19, 2010

Overnight Belgian Waffles


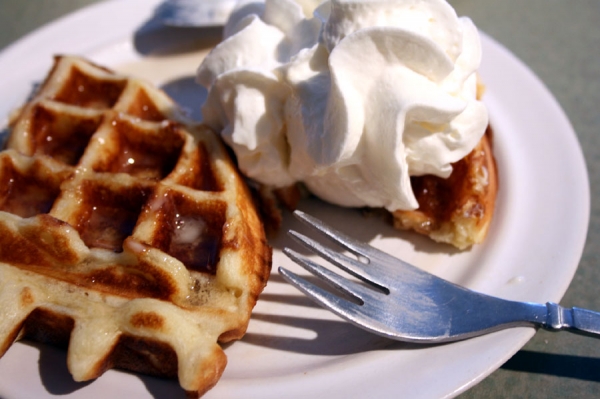
This tried and true recipe, originally from Marion Cunningham, has David Lebovitz's stamp of approval here. They are easier than pancakes and you can prep the night before to wake up to worry-free waffles that are crispy and golden outside, and moist and soft inside.

Belgian waffles use a yeast-leavened batter which makes them lighter, thicker, and crispier. The waffle irons also make bigger, deeper pockets. American waffles are made from a batter leavened with baking powder and are usually served topped with butter and syrups. They are generally denser and thinner than the Belgian waffle.

I freeze leftover waffles. Then on weekday mornings I nuke them for 20-30 seconds, pop them in the toaster and serve em up. They're almost as good as fresh and definitly better than Eggo.

Raised Overnight Waffles
Fannie Farmer Cookbook

1/2 cup warm water
1 package dried yeast
2 cups warm milk
1/2 cup melted butter
1 teaspoon salt
1 teaspoon sugar
2 cups all-purpose flour
2 large eggs
1/4 teaspoon baking soda

Use a large mixing bowl. The batter will rise to double its original volume. Put the water in the mixing bowl and sprinkle in the yeast. Let stand to dissolve for 5 minutes. Add the milk, butter, salt, sugar, and flour to the yeast mixture and beat until smooth and blended (I do this by hand). Cover tightly and let stand overnight in the fridge.

Take it out 1 hour before you plan to use it. Just before cooking the waffles, beat in the eggs and add the baking soda and stir until well mixed. The batter will be thin. Pour into a very hot waffle iron (amount of batter will vary based on your iron). Bake until golden and crisp. This batter will keep for a few days in the refrigerator.

Sunday, October 10, 2010

Two-Bite Blondies


Hmm... It's gotta be a good day because today is 10-10-10 :)

These little gems are a buttery, blonde version of the popular "two bite brownies" sold in every North American supermarket (or at Costco in huge plastic tubs - lol). These baby blondies are dense, rich and filled with the mellow sweetness of brown sugar studded with melty chocolate chips. These are downright sinful.


They are also a great way to use up the crumbs at the bottom of your bag of chips. The potato chip crumbs are not distinguishable in the finished product, however, they add a hint of saltiness and "je ne sais quoi" to the texture. The recipe doesn't call for salt because of the salt from the chips. Potato flakes are often added to breads and doughs to improve their texture (says Cook's Illustrated). Just so you don't think I'm crazy, Emeril Lagasse also has a Potato Chip Cookie recipe on the Food Network. So throw your skepticism out the window and give these a try! Just make sure you use a thinner chip rather than the thick, rippled Kettle Chips.

I'm submitting this to Brenda's Canadian Kitchen for Cookbook Sundays.

Two-Bite Blondies
Makes 24 | adapted from Marcy Goldman

1 cup butter, melted
1 1/3 cups brown sugar
1/4 cup sugar
2 eggs
1 tsp vanilla
1 tsp baking soda mixed with 1 tbsp hot water
2 cups flour
2 1/2 cups mini chocolate chips
1/2 cup crushed plain potato chips

1. Preheat oven to 350 degrees F. Spray a 24 cup mini muffin pan with nonstick spray.
2. With paddle attachment on mixer, cream utter and sugars together until fluffy. Add egg, vanilla and the baking soda mixture. Once combined, add the flour and salt and stir in the chocolate chips and potato chips.
3. Pack the batter into the mini muffin cups but do not over-fill. Bake 15-17 minutes or until golden brown on top and set. Cool completely on wire racks then freeze for 45-60 minutes in the pan (to make for easier removal). Remove frozen tartlets from the pan and store in an airtight container so they stay soft and chewy.

Sunday, September 26, 2010

Lemon Pull-Apart Loaf


This recipe has been bookmarked for the past few months in my copy of Baking for All Occasions by Flo Braker. I adore making yeast bread because it is so versatile. It's the closest thing to adult play-doh! I am always game for trying new shaping methods, so this loaf practically jumped off the page, screaming to be made. Pull-apart loaves are so much fun. No knife needed; the thin layers separate easily and quite frankly, it's pretty addictive!


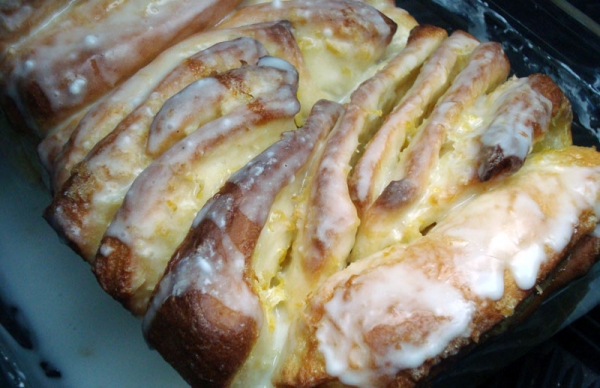
It is a beautiful, stunning loaf filled with bright and sunny lemon flavor. The loaf is made up of thin layers of sweet bread, sprinkled with aromatic lemon sugar, baked in a loaf pan. The bread is fluffy, sweet, soft, and saturated with citrus. You’re able to peel off a layer, no knifes or messy rips needed. If it couldn’t get better, a tangy cream cheese icing gets spread over the cooling cake, melting into the ridges, cooling into a sweet, stick mess. It’s incredible.

Lemon-Scented Pull-Apart Loaf
1 9x5" loaf | adapted from Baking for All Occasions

Sweet Yeast Dough
Approx 2 3/4 cups (12 1/4 ounces) all-purpose flour
1/4 cup (1 3/4 ounces) granulated sugar
2 1/4 teaspoons (1 envelope) instant yeast
1/2 teaspoon salt
1/3 cup (2 1/2 fluid ounces) milk
2 ounces unsalted butter
1/4 cup (2 fluid ounces) water
1 1/2 teaspoons pure vanilla extract
2 large eggs, at room temperature

Lemon Sugar Filling
1/2 cup (3 1/2 ounces) granulated sugar
4 tablespoons finely grated lemon zest (4 lemons)
2 ounces unsalted butter, very soft

Tangy Cream Cheese Icing
3 ounces cream cheese, softened
1/3 cup (1 1/4 ounces) powdered sugar
1 tablespoon whole milk
1 tablespoon fresh lemon juice

1. Sweet Yeast Dough: Mix two cups flour, the sugar, yeast, and salt in a medium bowl with a rubber spatula. Meanwhile, in a small saucepan or in the microwave, combine the milk and the butter and heat until the butter is melted. Remove from the heat, add the water, and let rest a minute until just warm. Stir in the vanilla extract.

2. Pour the milk and melted butter into the flour and mix with a rubber spatula until the flour is evenly moistened. Beat in the eggs one at a time.

3. Pour the milk mixture over the flour-yeast mixture and, using a rubber spatula, mix until the dry ingredients are evenly moistened. Attach the bowl to the mixer, and fit the mixer with the paddle attachment. With the mixer on low speed, add the eggs, one at a time, mixing after each addition just until incorporated. Stop the mixer, add 1/2 cup of the remaining flour, and resume mixing on low speed until the dough is smooth, 30 to 45 seconds. Add 2 more tablespoons flour and mix on medium speed until the dough is smooth, soft, and slightly sticky, about 45 seconds.

4. Lightly flour a work surface and knead the dough gently until smooth and no longer sticky, about one minute. Add an additional 1-2 tablespoons of flour only if the dough is too sticky to work with. Place the dough in a large bowl, cover it with plastic wrap, and let it rise in a warm place for 45-60 minutes or until doubled in size. An indentation made with your finger should keep its shape.

5. Meanwhile, make the lemon sugar filling. Mix the sugar and lemon zest. It’ll draw out the citrus oils and make the sugar sandy and fragrant.

6. Center a rack in the oven and preheat the oven to 350 degrees F. Grease a 9x5" loaf pan. Gently deflate the dough with your hand. Flour a work surface and roll the dough into a 20″ x 12″ rectangle. The more accurate you are, the prettier the loaf will be and the better it will fit in the pan. Use a rubber spatula or pastry brush to spread the butter evenly and liberally over the dough.

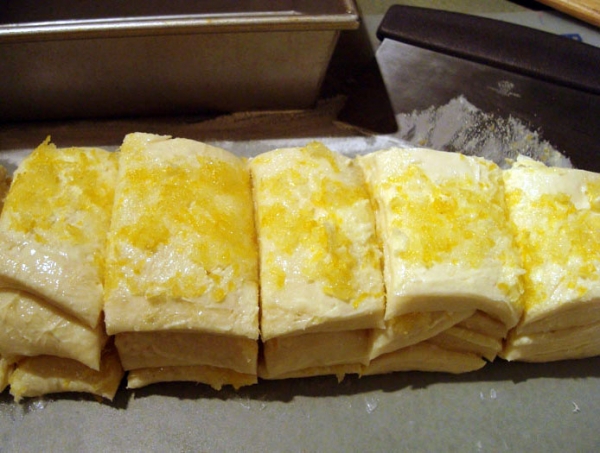
7. Use a pizza cutter to cut the dough crosswise in five strips, each about 12″ by 4″. Sprinkle 1 1/2 tablespoons of the lemon sugar over the first buttered rectangle. Top it with a second rectangle, sprinkling that one with 1 1/2 tablespoons of lemon sugar as well. Continue to top with rectangles and sprinkle, so you have a stack of five 12″ by 4″ rectangles, all buttered and topped with lemon sugar.

8. Slice this new stack crosswise, through all five layers, into 6 equal rectangles (each should be 4″ by 2″) Carefully transfer these strips of dough into the loaf pan, cut edges up, side by side. You might have some extra room around the edges but the bread will rise and expand during baking. Loosely cover the pan with plastic wrap and let the dough rise in a warm place until puffy and almost doubled in size, 30 to 50 minutes. When you gently press the dough with your finger, the indentation should stay.

9. Bake the loaf until the top is golden brown, 30 to 35 minutes. Test with a cake tester to make sure it's done, and covering the top with foil if it's browning too quickly. Transfer to a wire rack and let cool in the pan for 10 to 15 minutes.

10. While cake is cooling, make the cream cheese icing. Beat the cream cheese and powdered sugar in a medium bowl with a wooden spoon until smooth, then add the milk and lemon juice. Stir until creamy and smooth.

11. Carefully run a knife around the edges of the pan to release. Flip the loaf over onto a cooling rack, then flip onto another rack so that it’s right side up. Spread the top of the warm cake with the cream cheese icing, using a pastry brush to fill in all the cracks. Put a pan or waxed paper underneath to catch any drips. Serve warm or at room temperature. You can also cut the cake with a knife, but wait for it to cool if you plan to do so.

Thursday, September 16, 2010

Olive Oil Crackers


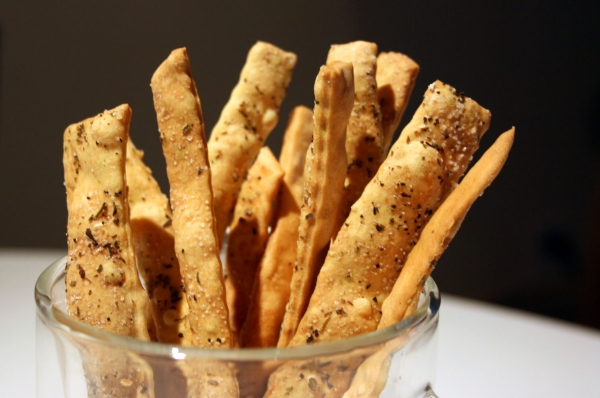
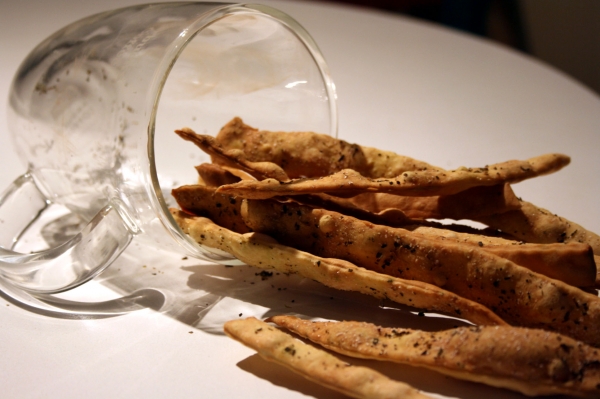
These thin and snappy crackers are crisp, fragrant and addictive. They are infinitely versatile and easily adorned with seeds, salts, cheeses, spices, or oils to suit any menu. You can make them any shape: wide strips, thin ribbons (my fave), squares or simply baked in big sheets. Just right for nibbling.

The recipe is adapted from Ottolenghi: The Cookbook. This popular restaurant, Ottolenghi, has stores in London and believes in everything handcrafted from raw ingredients. Simple and clean. I've never even set foot in one of their stores but I love the style of the cookbook and their philosophy. And oh yes, the cracker recipe is a keeper too!


Olive Oil Crackers
adapted from Ottolenghi

1 cup flour
1 teaspoon baking powder
1/2 cup water
2 tablespoons olive oil + oil for brushing
salt
seeds/spices/seasonings

Sift flour with baking powder into a bowl. Make a well in the centre and pour in water and olive oil. Work to a dough, then turn out and knead on a very lightly floured bench until smooth. Wrap in plastic and refrigerate for 1 hour.

Preheat oven to 425 F and line a baking sheet.

Dust the bench and keep the flour close to hand. Divide dough into thirds. Roll each third out right on the baking sheet into a very thin rectangle. The thinner the better. Dust with flour as you work. Cut as desired with a pastry cutter or cookie cutters and space them apart slightly on the baking sheet (they won't spread much). Brush liberally with olive oil and sprinkle with coarse sea salt or whatever you like. Bake in batches for 6-8 minutes closely monitorting their progress. Pale gold is good; deep gold is burnt. Cool on a rack.

Sunday, September 12, 2010

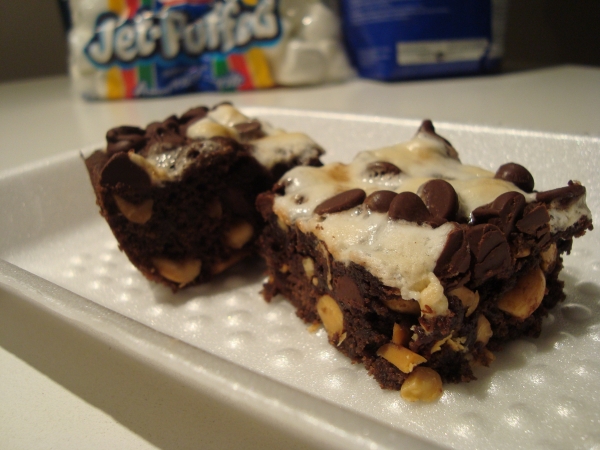
Rocky Road Brownies


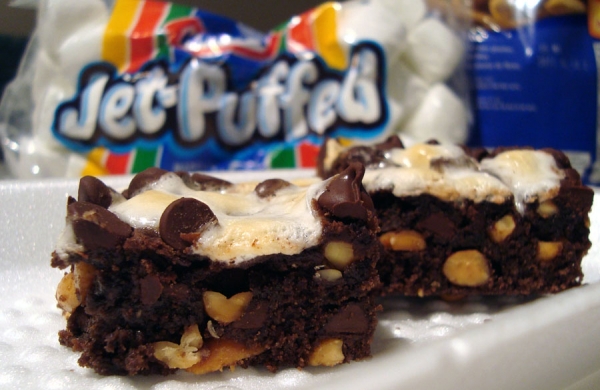
The popular kids ice-cream flavor has been turned into a bar cookie! These flavors appeal to my inner child while the use of almonds instead of peanuts makes them more of a 'grown up' bar.

They are also very attractive, showing off their chunky contrast of textures and colors from the nuts, chocolate chips and marshmallows. The brownie part holding all these goodies together is fudgy and moist. The recipe comes from The King Arthur Flour Cookie Companion.

Note: In the printed version of this recipe the baking time is wrong. It says 15 minutes but online it says 22 minutes. I ended up baking mine for 24 minutes and they were perfect. Use your own discretion and just bake them until they are almost done but not quite. All you are doing after you add the marshmallows/chips is browning the marshmallows and melting the chips slightly. The actual brownie part should be basically done by that point or you risk burning the topping before the base is ready.


Rocky Road Brownies
9 x 13 pan | King Arthur Flour Cookie Companion

1 cup (2 sticks, 8 ounces) butter
1/2 cup (3 3/4 ounces) brown sugar
1/2 cup (3 1/2 ounces) granulated sugar
2 teaspoons baking powder
1/2 teaspoon salt
1 teaspoon vanilla extract
2 large eggs
1 2/3 cups (7 ounces) All-Purpose Flour
1/3 cup (1 ounce) Dutch-process cocoa
3 cups (18 ounces) chocolate chips
1 cup (4 ounces) roasted salted almonds, coarsely chopped (or peanuts)
1 cup (2 ounces) miniature marshmallows

Preheat the oven to 350 degrees F. Lightly grease a 9 x 13-inch pan.

Cream together the butter, sugars, baking powder, salt, and vanilla. Beat in the eggs. Stir in the flour, cocoa, 2 cups of the chocolate chips, and the almonds.

Pat the dough into the prepared pan. Bake the bars for 22-25 minutes, till they're set around the edge but still soft in the center. Sprinkle with the remaining chocolate chips and the marshmallows, and bake till they soften, about 3 minutes more. Remove from the oven and cool completely before cutting into bars. (Using a plastic knife to cut these is the neatest way I have found to do this).

Sunday, September 5, 2010

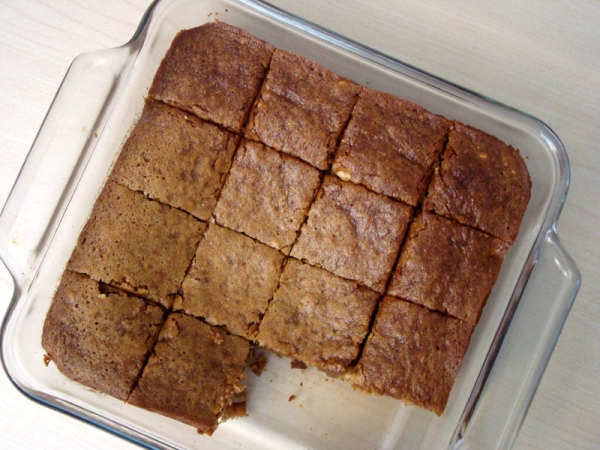
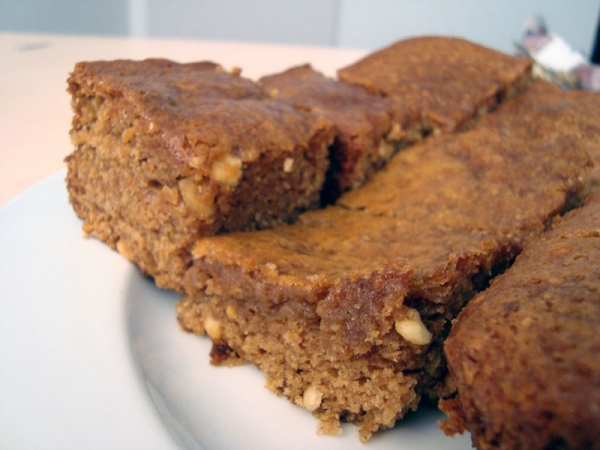
Butterscotch Peanut Chews


If you are even slightly interested in heirloom baking or the history of baked goods, this book is a great one to take a peek at. It's a thick book - maybe 2" thick? - but despite the plentiful information it is not boring. I found it really enlightening to see how the recipes we know today originally came to be. It was like touching a piece of the past as though through act of baking I was participating in something bigger, something woven deeply through all aspects of our history.

Besides needing food to survive, there can be great pleasure derived from eating. Food is present in every celebration or gathering. It evokes memories. Special foods are reserved for special occasions.

The description in the book reads, "The candylike batter for this cookie is made quickly in a saucepan". Well, they ain't lying. I had this ready to go into the oven before the oven had even finished preheating. There's nothing fancy about these other than the simple beauty of carmelized brown sugar with a slight nuttiness from the peanuts. At the time I made this I wasn't sure what the author meant in step 5 where you're supposed to tamp down the sides of the 'cake', so I skipped it. It was still good but in retrospect I think it might have been more "chewy" if I had used a measuring cup or back of a metal spoon to press down the finished product so it was more compact and hence, more chewy and less cake-like.

I am submitting this recipe to Brenda's Canadian Kitchen for Cookbook Sundays - a great, easygoing bakealong that I highly recommend joining. Brenda is an awesome cook and I had the pleasure of creating the badge below for her, so click on over and check out her site :)


Peanut Butterscotch Chews
8" pan | Baking in America

1 cup flour
1/2 tsp baking soda
1/4 tsp salt
1 tsp cinnamon
1/4 cup butter
1 cup brown sugar
1/3 cup evaporated milk
1 egg
1 tsp vanilla
1/3 cup roasted peanuts, finely chopped

1. Preheat oven to 325 degrees F. Grease an 8" square pan.
2. Combine dry ingredients.
3. In a medium saucepan over medium heat, melt butter then add brown sugar, stirring constantly. Add evaporated milk and bring to a boil for exactly 1 minute, stirring once or twice. Cool to warm.
4. Beat in egg then vanilla. Stir in flour mixture only until incorporated, then add peanuts. Scrape into prepared pan and spread evenly.
5. Bake for 30 minutes or until toothpick comes out with a few moist crumbs sticking to it. Don't overbake they should be very moist. Cool for 5 minutes then tamp down sides of the "cake" to level it. Cool completely before cutting into squares.

Sunday, August 22, 2010

Make-Ahead Coffee Cake


This recipe baffled me from a science perspective. From a technical perspective this was easy as pie!

It has been so engrained from years of baking that you should immediately bake quickbreads/muffins the moment the wet and dry ingredients are mixed otherwise the baking powder loses its leavening power. This recipe asks you to leave the mixture for up to 24 hours in the refrigerator before baking! It even says you can freeze it unbaked for up to 1 month! Out of sheer curiosity I had to give it a shot.

For scientific reasons, you make the streusel and divide it in half. Half of it gets nuts, which goes on the top only because the steam released from the moisture in the nuts during baking made the cake around them soggy. Those folks at Cooks Illustrated are so smart. That would be my dream job - baking for a living!


without icing and without nuts


I was skeptical. I kept peeking through the little oven window to check. At first the sides rose really high while the middle remained sunken. I was just about to say, "I told you it wouldn't work" but by the time it was fully baked it had reached a gorgeous, level height. This one goes in the "keeper" file.

This recipe produces two small cakes, which can be baked on different days if desired (unbaked cakes can be frozen for up to 1 month). If you don’t have two 9" round pans use two 8" square pans instead.

I am submitting this to Brenda's Canadian Kitchen for Cookbook Sundays.

Make-Ahead Coffee Cake
2 round or square pans | Cook’s Country

STREUSEL:
2/3 cup packed light brown sugar
2/3 cup granulated sugar
2/3 cup all-purpose flour
1 1/2 tablespoons ground cinnamon
1/2 cup cold unsalted butter cut into 1/2-inch pieces
1/2 cup chopped pecans or walnuts

CAKE:
3 1/2 cups all-purpose flour
1 cup packed light brown sugar
1 cup granulated sugar
2 teaspoons baking powder
1 teaspoon baking soda
1 1/2 teaspoons ground cinnamon
1/2 teaspoon salt
3/4 cups butter, softened
3 large eggs
1 3/4 cups sour cream (I used yogurt)

1. For the streusel: Pulse sugars, flour, cinnamon, and butter in food processor until mixture resembles coarse meal. Divide streusel in half. Stir pecans into one half and reserve separately.
2. For the cake: Grease two 9-inch cake pans. With electric mixer on medium-low speed, mix flour, sugars, baking powder, baking soda, cinnamon, and salt in large bowl. Beat in butter, 1 tablespoon at a time, until mixture is crumbly with pea-sized pieces, 1 to 2 minutes. Add eggs, one at a time, until combined. Add sour cream in 3 additions, scraping down bowl as necessary. Increase speed to medium-high and beat until batter is light and fluffy, about 2 minutes.
3. Divide half of batter between prepared pans. You may need to spread the dough around. Using spoonsful of dough around the pan then spreading with dampened fingers worked well for me. Sprinkle streusel without nuts evenly over each pan. Divide remaining batter evenly between pans and top with nutty streusel. Wrap pans with plastic wrap and refrigerate for up to 24 hours or freeze for up to 1 month.
4. When ready to serve: Adjust oven rack to middle position and heat oven to 350 degrees. Unwrap cakes and bake until golden brown and toothpick inserted in center comes out with a few dry crumbs attached, about 40-45 minutes (about 55 minutes if frozen). Cool at least 15 minutes. Serve.

Saturday, August 7, 2010

Sara Lee's Iced Banana Cake


This recipe evokes childhood memories of eating frozen sheet cake straight out of its aluminum pan. Unlike today's tall, nutty coffee shop banana loaves, this one is shorter, sweeter and reminiscent of simpler days. It is a true American classic. Plus, how can you say no to a cake crowned with rich and creamy banana frosting for a double-dose of banana-y goodness?


I must also add that I love those thin aluminum pans that Sara Lee pound cakes come baked in. Maybe it's the pack-rat in me or maybe it's the "green" mentality, but either way I find it really challenging to throw anything out. So, my cupboards are full of containers, pans and boxes 'just in case' I might need them for something in the future. Being an avid baker, I often bake more than I (and my family) can consume, so disposable pie plates and loaf pans come in handy. Plus it makes me feel warm and fuzzy to know I'm saving the environment - one baking tray at a time.

Note: I pureed the banana very well in the food processor (rather than leaving it semi-chunky like I usually do for banana bread). I think it helped achieve a processed, fine texture like Sara Lee's.

Sara Lee's Iced Banana Cake
9 x 13" pan | Bite Me Cookbook

2 1/2 cups flour
2 tsp baking soda
1/4 tsp salt
1/2 cup butter
1 cup sugar
3/4 cup brown sugar
2 eggs
1 tsp vanilla
2/3 cup buttermilk
4 ripe bananas, mashed
2 tsp lemon juice

Icing:
1/4 cup butter
1 mashed banana
1/2 tsp lemon juice
1/2 tsp vanilla
3 1/2 cups icing sugar

1. Preheat oven to 350 degrees F. Grease a 9x13" pan. Combine flour, baking soda and salt.

2. Cream butter, sugar, brown sugar together. Add eggs one at a time then vanilla. Alternate adding flour and buttermilk until combined. Stir in mashed bananas and lemon juice. Pour into greased pan.

3. Bake for 35-40 minutes or until toothpick comes out clean. Cool in pan.
4. Icing: Beat butter, bananas and lemon juice until combined. Add icing sugar until smooth consistency is reached. Spread onto fully cooled cake.

Friday, July 23, 2010

Waffle House Buttermilk Waffles


Sorry for the plain, boring picture. However, however... Don't let appearances fool you. This waffle is just like a blank canvas, waiting to be be painted with a variety of flavors. Summer fruits such as juicy peaches or ripe strawberries would be the perfect complement.

The recipe for these waffles is from Top Secret Recipes. It's a clone of the waffles from Waffle House - a U.S. chain restaurant with a few stores in Canada. The closest one to me is across the border and quite a drive south to Olympia, WA. You can also find this recipe at Food.com (formerly known as Recipezaar) but just be aware that the amount of sugar in the 'zaar recipe is a typo and is way too high.

I read over everyone's comments and came up with this adapted version. It is quite a sweet waffle compared to other recipes such as Cook's Illustrated that only has just a tiny bit of sugar in it. For that reason I find these more suited to serving with berries and whipped cream than doused in syrup.

Waffle House Buttermilk Waffles

1 1/2 cups all-purpose flour
1 teaspoon salt
1/2 teaspoon baking soda
1 egg
1/2 cup malt powder (or in a pinch use 1/3 cup flour)
1 tablespoon granulated sugar
2 tablespoons butter, softened
2 tablespoons shortening
1/2 cup half-and-half
1/2 cup milk
1/4 cup buttermilk
1/4 teaspoon vanilla

1. Combine flour, salt and baking soda in a medium bowl and stir to combine. Lightly beat the egg in another medium bowl and combine with sugar, butter, and shortening, mixing well until smooth.

2. Add the half & half, milk, buttermilk and vanilla and mix well. Add the dry flour mixture to the wet mixture while beating and mix until smooth. If you can, cover and chill overnight, though the batter can be used right away.

3. Rub a light coating of vegetable oil on a waffle iron, and preheat it. Leave the batter out of the refrigerator to warm up a bit as your waffle iron is preheating. Spoon 1/3 to 1/2 cup of batter into the waffle iron and cook for 3 to 4 minutes or until the waffles are light brown.

Sunday, July 4, 2010

Junior's Caramel Apple Cheesecake


If you often experience the problem of cheesecakes cracking along the top, this recipe is perfect for you. The apple topping hides any potential cracks in the cake while adding a wonderful, homey, comforting flare to this deliciously smooth cheesecake. It's like the best of both worlds - apple pie and creamy cheesecake, all topped off with a drizzle of caramel.

The flavors seem more suited to autumn than to summer, but with the weather we've been having, it sure feels more like October than July! I'm sitting indoors wrapped up in 2 blankets with the heater on wearing a fleece hoodie for goodness sake!


Junior’s Apple Caramel Cheesecake
1 - 9" Cake | adapted from Junior's Cheesecake Cookbook

1 prepared 9" graham crust

Apple Topping:
3 large firm, crisp red-skinned apples
1/2 cup apple cider or apple juice
1 tablespoon cornstarch
1/4 teaspoon ground cinnamon

Cheesecake:
Three 8-ounce packages cream cheese (use only full fat), room temperature
1 1/3 cups sugar
1/4 cup cornstarch
1 tablespoon pure vanilla extract
2 extra-large eggs
2/3 cup heavy or whipping cream

1 cup caramel or butterscotch ice cream topping

1. Filling, peel and core the apples for the filling into 1/2" bite-size pieces. Combine the cider, cornstarch, sugar, and cinnamon in a small saucepan and whisk until completely dissolved. While stirring constantly, bring to a full boil over medium heat and continue to boil until thickened, about 2 minutes. Remove from the heat and stir in the apples. Set aside to cool while you make the cake.

2. Put one package of the cream cheese, 1/3 cup of the sugar, and the cornstarch in a large bowl. Beat with an electric mixer on low until creamy, about 3 minutes, scraping the bowl down several times. Blend in the remaining cream cheese, one package at a time, scraping down the bowl after each one. Increase the mixer speed to medium and beat in the remaining 1 cup of sugar, then the vanilla. Blend in the eggs, one at a time, beating well after adding each one. Beat in the cream just until completely blended. Be careful not to over mix! Gently spoon the batter on top of the crust, then spoon the apple mixture over the batter, gently spreading it almost to the edge of the pan, completely covering the cake.

3. Place the cake in a large shallow pan containing hot water that comes about 1 inch up the sides of the springform. Bake until the edges are light golden brown and the top is slightly golden tan, about 1 1/4 hours. Remove the cheesecake from the water bath, transfer to a wire rack, and let cool for 2 hours (just walk away—don’t move it). Leave the cake in the pan, cover loosely with plastic wrap, and refrigerate until completely cold, preferably overnight or at least 4 hours.

4. Warm the caramel ice cream topping then drizzle it from the tip of a small spoon in stripes across the top of the cake, all around the edges, and some down the sides. Return the cake to the freezer until the caramel has set, 30 minutes. Refrigerate the cake until ready to serve. Slice with a sharp straight-edge knife, not a serrated one. Cover any leftover cake and refrigerate.

Thursday, July 1, 2010

Sugar Cookies for Canada Day


Today is July 1 - Happy Canada Day! This also marks exactly half of this year being gone. Yikes... OK... don't want to think about that right now. It always sends me into a bit of a panic when I realize how quickly time is going by and how little I've done during that time. So, let's focus on baking :)


These simple sugar cookies are a dream to roll out and delicious to eat.
They are buttery but not oily. They are not too sticky, not too stiff, with the right ratio of crispness to softness. Best of all, they were sturdy enough to decorate (we didn't break a single one while decorating!) I think their amazing texture comes from the use of icing sugar in the dough and a short chilling period of 20 minutes in the fridge.


Of course, in line with the National holiday, it is only fitting that I picked a recipe from a Canadian cookbook called Bite Me, by sisters Julie Albert and Lisa Gnat from Toronto. The 175 recipes in the book are simple. Although some recipes call for pre-made ingredients like ketchup, canned peaches or Ritz crackers, even Food Snobs shouldn't dismiss this book. Its pages are peppered with pop-culture inspired humour and sassy photos of plastic sumo wrestlers hoisting pieces of cake or Vegas showgirls wearing spoons. It also provides practical kitchen tips such as how to buy fish or soften cream cheese, and their take on cooking gadgets. The only catch, I can't seem to find it on Amazon.com… maybe that's because it's not a widely published book… but it should be!


Perfect Sugar Cookies
2 dozen | adapted from Bite Me Cookbook

1 cup butter
1 1/2 cups powdered sugar
1 egg
1 tsp vanilla
2 1/2 cups flour
1 tsp baking soda
1 tsp cream of tartar
1/4 tsp salt

1. Line cookie sheets with parchment or silicone liners. Mix dry ingredients together and set aside.

2. Using paddle attachment, cream together butter and powdered sugar, scraping down mixer bowl a few times in between. Add in egg and mix to combine. Add vanilla.

3. Add flour mixture to the butter mixture and mix until the dough comes together to form a ball, sort of the texture of play-doh. Refrigerate for 20-30 minutes (or longer/frozen if well wrapped. If you do this, just thaw at room temperature enough so it is rollable). Preheat oven to 375 degrees F.

4. Roll dough out to 1/4" thickness and cut into shapes. Transfer to lined cookie sheets with just a little room between cookies to allow for spreading. Try to keep the unbaked cookies on cookie sheets in the fridge while waiting for the oven to preheat or between batch rotations. This helps the cookies maintain their shape and spread less.

5. Bake for 10-15 minutes until they are very lightly golden around the edges. The time can vary a lot depending on cookie thickness, size, your oven.
*******


Lastly, here are a few Canadian fun facts:
*According to studies and research, Vancouver in British Columbia is tied with Zurich Switzerland for having the highest quality of life of any other city in the world. [That's my city!!! Go Vancouver!]
*A little over 16% of Canada’s population are immigrants.
*The original Star Trek owes much to Canada. Two of its stars – William Shatner (Captain Kirk) and James Doohan (Scotty) were Canadian.
*Canada sources approximately 20 to 30% of the world’s annual uranium output. As such, Canada is the largest producer of natural uranium in the world.
*Some of my fave Canadian musicians: Sarah McLachlan, Our Lady Peace, Alanis Morrissette, Chantal Kreviazuk & Jann Arden

Monday, June 28, 2010

Grandma's Soft Oatmeal Raisin Cookies - Copycat


Think back to your school lunches... what was your favorite food to find inside? Did you get sandwiches or hot lunches? Storebought foods or homemade? Did you get notes from your mom wishing you a good day?

My mom can't cook/bake or boil water (no exaggeration). Additionally, my parents both worked full time so time was always an issue. As a result, my school lunch memories revolve around pre-packaged food with my most vivid association being with Grandma's soft oatmeal raisin cookies.

It's silly of me to think of sharing a piece of my childhood with my son by putting these cookies in his lunch-bag, but the truth is it secretly makes me happy. It does a little tug at my nostalgic heart strings. At least I'm packing him the homemade version - preservative free and fresh from the oven.


GrandMa’s Cookie Company was founded back in 1914 by Foster Wheeler, but it wasn’t until 1977 that the company introduced the "Big Cookie". This large, soft cookie comes in a 2-pack. The company offers several varieties.

These cookies are soft and chewy even after they cool. The secret to their softness is the moisture from the pureed raisins in the dough itself. Be sure to take them out when they are just beginning to turn light brown around the edges. Even if you aren't a raisin-lover, don't click away just yet! You can use the same technique with dried apricots or other dried fruit. Just be aware of the sweetness of the dried fruit is and adjust the sugar in the recipe accordingly, because raisins don't have as much sugar as say, dried mangoes or pineapples. These keep really well without drying out. Grandma knows best!

This recipe is from one of Todd Wilbur's "Top Secret Recipes" books that has copycat recipes of famous or restaurant foods. It also qualifies as an entry for Cookbook Sundays hosted by Brenda's Canadian Kitchen. I love the simplicity of this group. All you do is make one recipe - any recipe - from any cook book - then post on Sundays! It's so simple yet such a great motivator to get busy in the kitchen.

Grandma's Soft Oatmeal Raisin Cookies
adapted from Top Secret Recipes | Makes 20

1/2 cup raisins
1/3 cup water
1/2 cup vegetable shortening
1 egg
1 1/2 cups dark brown sugar
1 1/2 teaspoons vanilla
2 cups all-purpose flour
1 1/4 cups rolled oats (not instant)
2 teaspoons baking soda
3/4 teaspoon cinnamon
1 teaspoon salt
1/2 cup raisins

1. Preheat oven to 300 degrees F. Combine 1/2 cup raisins with water. Puree in a food processor until very smooth.

2. Combine raisin puree with the vegetable shortening, egg, brown sugar, and vanilla in a large bowl. Mix well until smooth.

3. In a separate bowl, combine flour with oats, baking soda, cinnamon, and salt. Pour this dry mixture into the wet mixture and mix well until ingredients are incorporated. Mix in 1/2 cup raisins.

4. Roll 3 tablespoon-size portions of the dough into a ball in your hands and press to 1/2" flat on an ungreased baking sheet. Bake for 18-20 minutes until just browning around edges. Be careful not to overcook, or the cookies will not be chewy. Cool then store in an airtight container.

Sunday, August 9, 2009

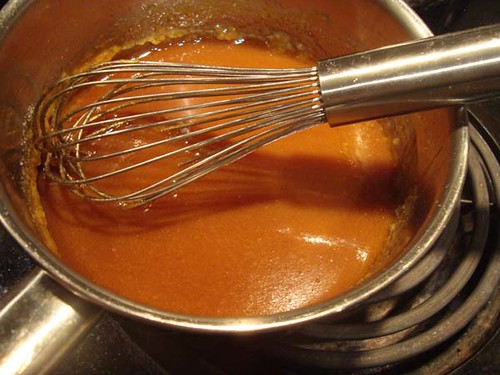
Caramel Sauce

One of the best foods ever! A pure rush of sugar. What could be better? It's even better when it's home made, not to mention cheaper. David Lebovitz has some great tips to simplify caramel making and an explanation of why he does not recommend using a thermometer.
See: Making Perfect Caramel and Ten Tips for Caramel.

The recipe I used is a liquid (sugar & water) not a dry caramel (just sugar) from pastry chef Anna Olson. By the way, there are some really great recipes in her little book named after the TV show she hosts: Sugar

Caramel Sauce
Makes 1 cup

3/4 cup sugar
1/4 cup white corn syrup
1/2 cup water
3/4 cup whipping cream

1. Bring sugar, corn syrup and water up to a boil in a heavy-bottomed saucepan. Boil without stirring, brushing the sides of the pan occasionally with a brush dipped in water.
2. Cook for about 10 minutes, until sugar turns an amber colour - like the color of a copper penny.
3. Remove from heat and whisk in cream, taking care as it will rise and steam. Allow to cool, then chill until ready to use.

Monday, July 27, 2009

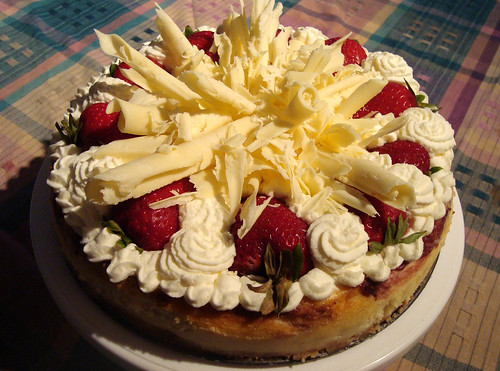
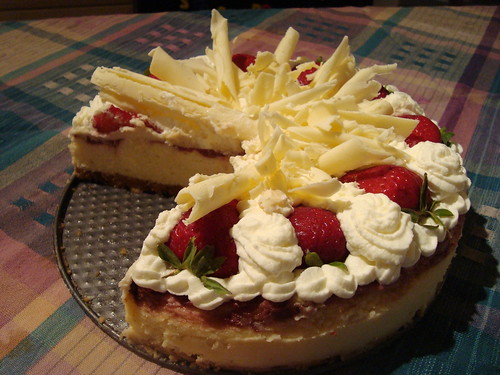
Junior's White Chocolate Strawberry Cheesecake

This is the cake I made for my birthday on July 21. The first day it was yummy but the next day and then day after it was even better as the cake settled and 'ripened'. If you don't have the book already and you like cheesecake, go get the "Junior's Cheesecake Cookbook". I'm submitting this post to Brenda's Canadian Kitchen for Cookbook Sundays where the only requirement is to make something from a cookbook you own. I highly recommend joining as it gives you a little more push to get cooking from the cookbooks on your shelf.

Everything I've made from this Junior's cookbook has been fabulous. They're famous for a reason! With the heat and humidity it was a real challenge making white chocolate curls and decorating before the whipped cream melted. All in all I'm loving the heat though since in general I'm so cold. The air conditioning at work is so strong I keep a wooly scarf at my desk and a fleece blanket! They make fun of me for it but I would freeze to death without them, lol.

My birthday gifts were all baking-related (of course). I got more stuff to feed my obsession. I don't know how/when I will be able to bake my way through the mountains of new recipes I have collected but I still can't stop collecting. I got:

  • Canadian Living Baking Book
  • King Arthur Flour's Baking Companion
  • Wilton Cake Decorating Revolving Turntable
  • America's Test Kitchen Family Cookbook
  • Pizza stone and pizza peel

    Junior's White Chocolate Strawberry Cheesecake
    Adapted from Junior's Cheesecake Cookbook

    one 9" Graham cracker crust

    three 8-ounce packages cream cheese (full fat)
    1 1/3 cups sugar
    2 tablespoons cornstarch
    1 tablespoon vanilla extract
    2 extra-large eggs
    6 oz. white chocolate, melted & cooled
    1/2 cup whipping cream

    2 cups fresh strawberries plus more for garnish
    1 tbsp cornstarch
    1/4 cup sugar

    1. Prepare the strawberry swirl by pureeing the strawberries in a food processor or blender and then mixing in the sugar and cornstarch. Let stand to thicken.

    2. Preheat the oven to 350°F. Put one package of the cream cheese, 1/3 cup of the sugar, and the cornstarch in a large bowl. Beat with an electric mixer on low until creamy, about 3 minutes, scraping down the bowl several times. Blend in the remaining cream cheese, one package at a time, scraping down the bowl after each one. Increase the mixer speed to medium and beat in the remaining 1 cup sugar, then the vanilla. Blend in the eggs, one at a time, beating well after adding each one. Beat in the whipping cream just until completely blended. Fold in melted and cooled white chocolate. Don't overmix!
    3. Pour the cheese mixture over the prepared graham cracker crust. Using a teaspoon, drop the strawberry mixture on top of the cheese batter, pushing it down slightly as you go. Using a thin, pointed knife, cut through the batter a few times in a swirling “figure 8” design, just until strawberry swirls appear.
    4. Place the cake (with the base wrapped in foil) in a large shallow pan containing hot water that comes about 1 inch up the sides of the springform. Bake until the edges are light golden brown and the top of the cake is golden with deep red swirls, about 1 hour and 15 minutes. Remove the cake from the water bath, transfer to a wire rack, and let cool for 2 hours (just walk away—don’t move it). Leave the cake in the pan, cover loosely with plastic wrap, and refrigerate until completely cold, at least 4 hours or preferably overnight.
    5. To serve, release and remove the sides of the springform, leaving the cake on the bottom of the pan. Place on a cake plate and garnish with whipped cream, strawberries and white chocolate curls. Refrigerate until ready to serve. Slice with a sharp straight-edge knife, not a serrated one. Cover leftover cake and refrigerate for up to a week or freeze up to 1 month.

  • Sunday, July 26, 2009

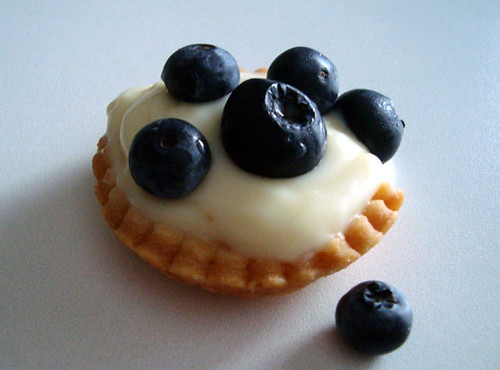
    Classic Mini Fruit Tarts


    So simple, so cute, so summery. These might just be making an appearance several times this summer at my place. Good thing they are so easy too!

    Mini Fruit Tarts

    Ingredients:
    Pastry for Single Crust Pie:
    1 1/2 cups all-purpose flour
    2 tablespoons sugar
    3/4 teaspoon salt
    1/2 cup plus 2 tbap very cold or frozen butter, cut into chunks
    2 1/2 tbsp very cold or frozen shortening, cut into chunks
    1/4 - 1/2 cup ice water

    1 recipe pastry cream
    Blueberries, Strawberries or other fresh fruit

    Directions:
    1. Put the flour, sugar and salt into a food processor fitted with a metal blade; pulse just to combine the ingredients. Drop in the butter and shortening and pulse only until the butter and shortening are cut into the flour. Don't overdo the mixing - what you're aiming for is to have some pieces the size of peas and others the size of barley. Pulsing, gradually add 3 tablespoons water and pulse once, add some more water, pulse again and keep going. Then a few long pulses to get the water into the flour. If, after a dozen or so pulses, the dough doesn't look moistened or form soft curds, pulse in as much of the remaining water as necessary, or even a few drops more, to get a dough that will stick together when pinched.
    2. Scrape the dough onto a work surface and shape into a disk. Wrap in plastic wrap and refrigerate for at least 1 hour or for up to 2 days before using.
    3. Preheat oven to 350 degrees F. Roll out dough to 1/4" thickness. Cut into rounds and place each round in a muffin tin to form mini tart shells. Bake for 10-15 minutes or until fully baked and golden brown. Cool fully before using. TIP: You can make these in advance and freeze in a large Ziploc bag to be filled later.
    4. To serve: Scoop pastry cream into each tartlet shell and top with fruit of choice.

    Wednesday, July 1, 2009

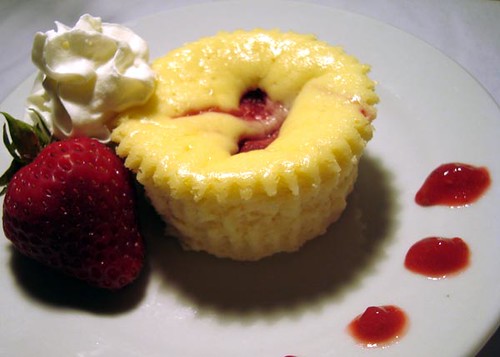
    Junior's Cheesecake - Raspberry Swirl "Little Fellas"

    Happy Canada Day! These treats fit Canada's colors perfectly. It was really weird having a day off in the middle of the week. I kept thinking it was Saturday or Sunday. I can't believe 1/2 the year has gone by already. 2009 is halfway gone!

    As promised, here is the recipe for the very easy and soooo yummy Junior's Cheesecake little fellas. There are also other variations in the Junior's Cheesecake Cookbook. Basically the cheesecake part is the same, only the swirl part is different. You could do strawberry, mocha, chocolate or whatever other creative swirl you can think up. These baked up perfectly, probably because of the water bath under the muffin tins (genius!) However, I was disappointed that they didn't have any kind of crust. I love graham cracker crusts and next time I think I might sprinkle some graham crumbs or put a Nilla wafer at the bottom of each little fella, for tradition's sake.

    Raspberry Swirl "Little Fellas"

    Raspberry Filling

    1 1/2 cups raspberries
    2 tbsp lemon juice
    1/3 cup sugar

    Combine all filling ingredients in a saucepan and bring to a boil, stirring constantly. Simmer until thickened, about 5-10 minutes. You may have some leftover filling which you can use to drizzle on top later on.
    Alternatively, you could just use raspberry jam although it will be a lot sweeter and thicker.

    Cheesecake:

    2 (8 oz.) pkg. cream cheese, room temperature
    2/3 cup sugar
    3 tablespoons cornstarch
    1 tablespoon pure vanilla extract
    2 extra large eggs
    1/2 cup whipping cream

    1. Preheat oven to 350 degrees F. Line 12 standard muffin cups with liners. You might need a 13th cup depending on the size of your muffin tins (use a custard cup if needed).

    2. Put one package of cream cheese, 1/3 cup of sugar, and the cornstarch in a large bowl. Beat with an electric mixer on low until creamy, about 3 minutes, scraping down the bowl a few times. Blend in the remaining cream cheese and 1/3 cup sugar, then the vanilla. Blend in the eggs, one at a time, beating well after adding each one. Beat in the cream just until it's completely blended. Be careful not to be overmix.

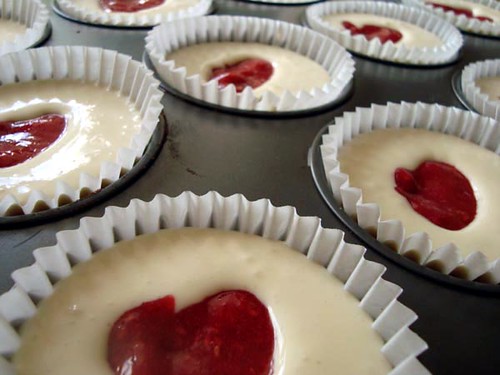
    3. Divide the batter among the muffin cups(fill each one almost up to the top). Drop a heaping teaspoon of the raspberry puree in the center of each, pushing each down slightly. Using a small knife or skewer, cut through the batter until raspberry swirls appear. Do not mix in the puree completely or the cakes will turn pink and the swirls will disappear.

    4. Place the muffin tin in a large shallow pan and add hot water until it comes about 1 inch up the sides of the tin. Bake the cakes until set and slightly puffy, about 30-45 minutes. Remove the cakes from the water bath, transfer the tin to a wire rack, and let cool for 2 hours. Transfer the cakes to a container and chill for at least 4 hours. (I chilled min quickly in the freezer still in the muffin tins and they were fully chilled in 2 hours)

    5. Top with fresh raspberries and drizzle with white chocolate just before serving if you wish. If there are any leftovers, cover with plastic wrap and store in the refrigerator or wrap and freeze for up to 1 month.