Tuesday, January 31, 2012

Cinnamon Sugar Breakfast Sticks


I love the familiar smell of cinnamon and sugar baking in the oven. Yum! These little twists are very similar to cinnamon buns but shaped into twists instead of rolls. They feature a sweet yeast dough covered generously with butter, sugar and cinnamon. 3 of my favorite ingredients!

My boyfriend fiance sometimes works on Saturdays (I still have to get used to the word "fiance", lol). I made these for him to bring to work on Saturday morning. If you've gotta work on the weekend, you owe yourself a treat and some sugar to get you through the day! These are also especially good with a hot cup of coffee!


Cinnamon Sugar Breakfast Sticks
Makes 24 | Taste of Home

1 package (1/4 ounce) active dry yeast
3/4 cup warm water (110° to 115°), divided
4 to 4-1/2 cups all-purpose flour
1/4 cup sugar
1-1/2 teaspoons salt
1/2 cup warm 2% milk (110° to 115°)
1/4 cup butter, softened
1 egg

FILLING:
1/4 cup butter, melted
1/2 cup packed brown sugar
4 teaspoons ground cinnamon

1. In a large bowl, dissolve yeast in 1/4 cup warm water. Add 2 cups of flour, sugar, salt, milk, butter, egg and remaining water; beat on medium speed for minutes. Stir in enough remaining flour to form a soft dough.

2. Turn onto a floured surface; knead until smooth and elastic, about 6-8 minutes. Place in a greased bowl, turning once to grease top. Cover and let rise in a warm place until doubled, about 1 hour.

3. Punch down dough. Roll into a 16-in. x 12-in. rectangle. Brush with butter. Combine brown sugar and cinnamon; sprinkle over butter. Let dough rest for 6 minutes. Cut lengthwise into three 16-in. x 4-in. strips. Cut each strip into sixteen 4-in. x 1-in. pieces. Twist and place on greased baking sheets. Cover and let rise until doubled, about 30 minutes.

4. Bake at 350° for 15 minutes or until golden brown.

Saturday, January 28, 2012

Coconut Butter Bars


These look more difficult to make than they really are. The recipe was from Gourmet Magazine (December 1993). Oh, the 90's. They don't even seem that long ago but the recipe was printed almost 20 years ago! Wow, I sound old... reminiscing about days gone by and I'm only 27! They are a traditional recipe that was once known as "London Bars" although I'm not sure why.
Not only are they easy to make, they are different from other bars, don't require a lot of ingredients, and are delish. They are dense without being tough. They are also versatile. Try them with pecans and milk chocolate or macadamia nuts and dried pineapple.


If you let them sit for at least a day or two, the flavor improves greatly. They are a thinner bar, so if you like a thicker bar, consider using a 9" square baking pan instead of the 9x13" one.

Buttery Coconut Bars
9x13" pan | Gourmet, Dec. 1993

1 1/2 cups firmly packed light brown sugar
1 cup plus 3 tablespoons all-purpose flour
1 stick (1/2 cup) unsalted butter, melted and cooled
1 1/2 cups sweetened flaked coconut
1 cup chopped blanched almonds
2 large eggs, beaten lightly
1 teaspoon vanilla
1/2 teaspoon salt

1. reheat the oven to 350 degrees F. Combine 1/2 cup brown sugar, 1 cup of the flour, and the butter until the mixture is combined well.

2. Press the mixture evenly onto the bottom of a 9 x 13 inch baking pan, and bake for 10 minutes.

3. Combine the remaining 1 cup brown sugar, the remaining 3 tablespoons flour, the coconut, the almonds, the eggs, the vanilla, and the salt and blend the mixture well. Spread the coconut mixture evenly over the crust and bake the mixture for 20 minutes, or until it is pale golden. Cool completely in the pan on a rack. If time allows, let these stand a day or two before serving in order to let the flavors develop. ***May be made 1 month in advance and kept frozen airtight.

Friday, January 27, 2012

Tia the "Baker" is Engaged!


I've been sitting on a piece of news for a little while now because this is a baking blog and I don't usually talk about personal stuff here. BUT... I can't keep a secret any longer. I'm too excited and I want to share it with everyone. I am engaged!!! My fiance's last name is Baker. Couldn't be more perfect for a girl like me who has always been a baker at heart.

I adore my amazingly sparkly solitaire engagement ring. Not only because it is GORGEOUS but because it symbolizes the life we have to look forward to and that I have found the kind of love that runs deep into your soul and brings tears of joy to your eyes.

We broke the news on facebook today too and it puts a smile on my face reading all the wonderful comments and seeing all the "likes" from friends and family.

Right now we are looking at a December wedding this year. That leaves us with 10 months of planning! I hope to still keep up with my baking, but with all the busy-ness ahead it might be a challenge. I look forward to being able to share some of the wedding planning here as well as lots of yummy treats (as usual).

xoxo

Easy Faux Petit Fours


"Petit Fours" literally means "Small Oven". French always makes everything sound fancier and prettier, doesn't it? These classy little cakes are traditionally eaten after a meal, served with coffee or tea. Please excuse the poor quality of the photos as they were taken with my Blackberry. I left my camera in a different purse that day.


The version I'm posting here is a fun, kid-friendly one. It is easy to make and relies on storebought vanilla frosting that you liquify in the microwave and tint with food coloring. Dip your cake cubes in to coat them and you are done! Easy and really really cute. We went all out with the color palette here as you can see.


Easy Faux Petit Fours
Makes 4 dozen cubes

1 recipe Classic Pound Cake <--click for recipe
1 can storebought vanilla frosting (not whipped)
food coloring
toothpicks

1. Cut the cooled pound cake into 1" cubes. Try to cut them as evenly as possible for the prettiest petit fours.

2. Scoop some frosting into a small bowl. Add a couple drops of food coloring and microwave for 15-20 seconds to melt. Stir to combine coloring.

3. Pierce a cake cube with the toothpick and dip it into the frosting to coat fully. Let the excess drip off. Place cubes on a cooling rack for a few hours to let the frosting set fully.

Thursday, January 26, 2012

Salty Sweet Peanut Butter Cookies


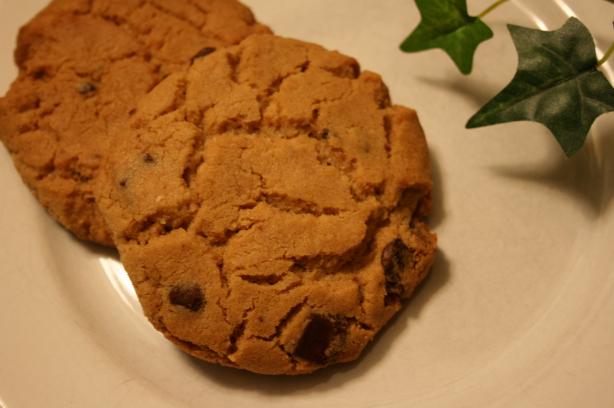
Have you ever noticed that Reese's PB Cups have a saltiness to them that harmonizes beautifully with the sweetness of the chocolate coating? I tried to copy that salty-sweet flavor in these cookies by using crushed pretzels. The dough surrounds chunks of milk chocolate in a giant cookie. These turned out to be 4-5" in diameter!


To make them even more decadent and a little bit fancier I suggest dipping them in melted chocolate before serving!


Salty Sweet Peanut Butter Cookies
Makes 12

1 1/2 cup flour
1/2 tsp baking soda
3/4 cup (1 1/2 sticks) butter, room temperature
1 1/4 cups sugar
1 cup creamy peanut butter
2 eggs, at room temperature
2 1/2 cups pretzels, crushed
1 cup milk chocolate chunks

1. Preheat oven to 350 degrees F.

2. In a large bowl, combine butter, sugar and peanut butter and beat with an electric mixer until light and fluffy. Add eggs and mix until combined. Add flour and baking soda and mix until combined. Mix in crushed pretzels and chocolate chunks.

3. Using a large cookie scoop, drop balls of dough onto cookie sheet and bake for 12 minutes or until lightly golden brown. Don't over bake!

Thursday, January 12, 2012

Copycat California Pizza Kitchen Kung Pao Spaghetti


One of my New Year’s resolutions this year is to do more cooking. I usually do a lot of baking and desserts and not a whole lot of cooking (thank God for fast food and pizza!). Here is my first step towards my resolution!

On our first visit to California Pizza Kitchen (CPK) the first weekend of December, we ordered this delicious pasta dish and I have been meaning to try replicating it ever since. I finally found a copycat recipe on Food.com and it was amazing. Tastes just like the original if not better. It looks like a long ingredient list but it is really easy to make. All you do is throw all the sauce ingredients into a pot and simmer, cook the chicken and pasta then toss it all together. I did omit coating the chicken with the egg white-cornstarch mixture and deep frying it and it tasted great.


CPK’s Kung Pao Spaghetti
Serves 4 | adapted from food.com

Kung Pao Sauce
1/2 cup chicken stock
2 tablespoons cornstarch
3/4 cup soy sauce
1/2 cup dry sherry
3 tablespoons red chili paste with garlic
1/4 cup sugar
2 tablespoons red wine vinegar or white vinegar
2 tablespoons toasted sesame oil

Egg White-Cornstarch Mixture (optional)
2 egg whites
2 tablespoons cornstarch
1/2 teaspoon salt

Pasta
1 lb spaghetti
2 tablespoons olive oil
1 lb boneless skinless chicken breast, cubed
10 -15 whole Chinese dried red chili peppers (optional)
1 cup dry roasted peanuts
1/4 cup minced garlic
3 cups green onions, chopped
1. Kung Pao Sauce: In a medium saucepan, whisk together the chicken stock and cornstarch until the cornstarch is fully dissolved. Stir in all the remaining sauce ingredients and bring to a boil over medium-high heat. Reduce the heat and simmer until the sauce is thick enough to coat the back of a spoon, 15 to 20 minutes. Set aside.

2. Egg White-Cornstarch Mixture: In a mixing bowl, use a whisk to stir together the egg whites, cornstarch, and salt until thoroughly blended; be careful not to beat them into a froth. Set aside.

3. Pasta: Bring a large pot of salted water to a rapid boil. Add the pasta and cook until al dente, 8 to 10 minutes.

4. Meanwhile, in a large nonstick frying pan over high heat, heat enough olive oil for deep-frying for about 1 minute. Add the chicken pieces to the Egg White-Cornstarch Mixture and toss to coat them. Taking care to avoid splattering, add the coated chicken to the pan and cook like a solid pancake until the egg mixture sets; then, using a large spatula, carefully flip the chicken pieces over together and, with a wooden spoon, gently separate the pieces. [NOTE: I didn’t do this step. I just pan-fried the chicken without the egg white/cornstarch mixture].

5. Gently stir the Chinese peppers and roasted peanuts into the pan. As soon as they darken in color, after no more than 1 minute, stir in the garlic and scallions. Once the garlic begins to brown, after no more than 30 seconds, add the Kung Pao Sauce and toss and stir to coat the ingredients.

6. When the pasta is ready, drain it well and, in a large mixing or serving bowl, toss it thoroughly with the sauce.

Saturday, January 7, 2012

Copycat Club: January 2012

I started this Copycat Club in 2010 because I love making restaurant recipes at home and wanted to find others who also enjoyed this. However, as life got busy, I stopped doing the round-ups. Here we are in 2012 and I'm going to try and get this started again. For more info, click on the link just below my banner. Basically, on the 7th day of each month I will post a collection of cloned/copycat recipes submitted to me through the previous month.
Please feel free to email me any copycat blog posts you have this month or any future months. [starrysugar AT hotmail DOT com].

Here are the submissions for this month:


Payday Bars from "Kudos Kitchen" by Renee.


Almond Roca Candy by Tia of "Buttercream Barbie".


Longhorn's Shrimp and Lobster Dip from "MakinCakin" by Michele.


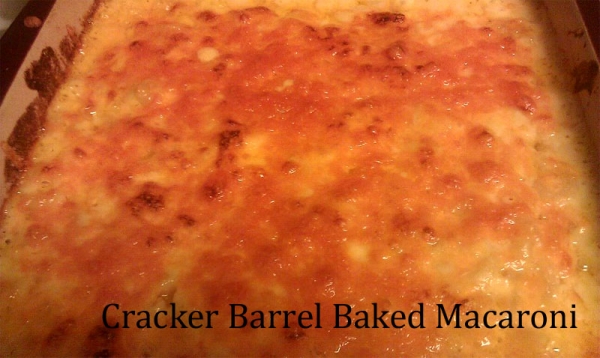
Cracker Barrel Baked Macaroni by Michelle of "Something New is Cooking".


Blueberry Nutrigrain Bars by Tia of "Buttercream Barbie".

Sonic Root Beer Freeze from "Something New is Cooking" by Michelle

Tuesday, January 3, 2012

Brown Butter Cookies


This recipe is case in point for why I love old cookbooks and compilations from years gone by. I especially enjoyed this one, published after Conde Nast stopped publishing the magazine (so sad!) The Gourmet Cookie Book (The Single Best Recipe from Each Year 1941-2009).

Other good compilations are:
The Essential NY Times Cookbook- Classic Recipes for a New Century
Baking Illustrated by Cooks Illustrated
Baking in America - Traditional and Contemporary Favorites from the Past 200 Years.

People sometimes tell me it's odd that I "read" cookbooks, but to me, they are like storybooks that I can incorporate into my own life and family memories.


Brown Butter Cookies
Makes 24 | adapted from Gourmet, June 1961

1 cup butter
2/3 cup sugar
2 1/3 cups flour
1 teaspoon baking powder
Walnut halves, to decorate

1. In a small, heavy-bottomed saucepan, melt butter on low heat, stirring occasionally, until browned. Stir in sugar and vanilla sugar and remove from heat. Let cool.

2. Combine flour and baking powder and beat in cooled butter mixture to form a smooth dough.

3. Preheat oven to 325 degrees F. Roll small balls of dough into balls about 1 inch in diameter. Place dough balls about an inch apart on a baking sheet lined with parchment paper. Press each ball of dough down using the tines of a fork. Top with half of a blanched almond or an almond slice.

4. Bake at 325 degrees F for 20 minutes, or until edges just start to turn golden. Remove from baking sheet after 1 minutes and let cool on wire racks.

Sunday, January 1, 2012

French Macarons - 1 recipe; 4 variations


Happy 2012!!! May this year bring you much happiness and good times in the kitchen challenging yourself to new recipes and techniques. I spent the day learning to snowboard. This is something I have wanted to do for over 5 years and today I finally did it! I think my arms, legs, butt, shoulders will be sore for the next few days. Judging by the way the year has started, it's going to be a good one.

As for new recipes in the kitchen, macarons intrigue me. Like cupcakes, their popularity seems to have skyrocketed in the past few years. I have always enjoyed Martha Stewart's Recipes and used to watch her home/cooking/gardening show on TV before the whole jail thing happened. After that, she lost a lot of fans but she didn't lose me! I was thrilled when I found out that we had to do a case study on Martha Stewart Omnimedia (MSO) as an assignment for my accounting designation.

This macaron recipe has flavor variations - both for the cookie itself and for the filling. With one batch you can get a variety of cookies that makes it look like you put in so much more work than you actually did!


French Macarons with Flavor Variations
Makes 16 filled macarons | Martha Stewart

1 1/4 cups plus 1 teaspoon confectioners sugar
1 cup (4 ounces) finely ground sliced, blanched almonds
6 tablespoons fresh egg whites (from about 3 extra-large eggs)
Pinch of salt
1/4 cup granulated sugar

1. Macarons: Preheat oven to 350 degrees F. In a medium bowl, whisk together confectioners sugar and ground almonds. In the bowl of an electric mixer fitted with the whisk attachment, whip egg whites with salt on medium speed until foamy. Increase speed to high and gradually add granulated sugar. Continue to whip until stiff glossy peaks form. With a rubber spatula, gently fold in the confectioners sugar mixture until completely incorporated.

2. Line baking sheets with parchment paper; set aside. Fit a pastry bag with a 3/8" #4 round tip, and fill with batter. Pipe 1-inch disks onto prepared baking sheets, leaving 2 inches between cookies. The batter will spread a little. Let stand at room temperature until dry, and a soft skin forms on the tops of the macarons and the shiny surface turns dull, about 15 minutes.

3. Bake, with the door of the oven slightly ajar, until the surface of the macarons is completely dry, about 15 minutes. Remove baking sheet to a wire rack and let the macarons cool completely on the baking sheet. Gently peel off the parchment. Their tops are easily crushed, so take care when removing the macarons from the parchment. Use immediately or store in an airtight container, refrigerated for up to 2 days or frozen for up to 1 month.

4. To fill the macarons: Fill a pastry bag with the filling. Turn macarons so their flat bottoms face up. On half of them, pipe about 1 teaspoon filling. Sandwich these with the remaining macarons, flat-side down, pressing slightly to spread the filling to the edges. Refrigerate until firm, about 1 hour.

Variations:
*Coffee-flavored macarons: In step 1, add 2 drops brown food coloring to the egg whites after they are whipped. In step 4, blend 1/2 cup macaron filling with 1 1/2 teaspoons espresso powder dissolved in 1/2 teaspoon warm water for the filling.
*Cassis-flavored macarons: In step 1, add 2 drops purple food coloring to the egg whites after they are whipped. In step 4, use 1/3 cup good-quality cassis jam for the filling.
*Pistachio-flavored macarons: In step 1, add 2 drops green food coloring to the egg whites after they are whipped. In step 4, combine 1/2 cup macaron filling with 1 tablespoon pistachio paste for the filling.

Macaron Filling
Makes filling for 16 macarons

3 large egg whites
1 cup sugar
1 cup butter, room temperature, cut into pieces

1. In the bowl of an electric mixer, whisk egg whites and sugar. Set mixer bowl over a saucepan of simmering water and heat mixture, whisking often, until it feels warm to the touch and sugar is dissolved, 3 to 5 minutes.

2. Transfer bowl to the mixer, and fit with the whisk attachment. Whip on high speed until mixture is stiff and shiny, 3 to 5 minutes. Add butter, one piece at a time, and continue mixing until butter is thoroughly incorporated. The filling can be kept, covered and refrigerated, up to 1 week. Bring to room temperature before stirring.

Variation:
*Hazelnut-honey filling: In a small bowl, combine 1/2 cup of macaron filling with 1/3 cup finely ground hazelnuts and 2 tablespoons good-quality honey.