There are two camps of people: vanilla people and chocolate people. I am most definitely a vanilla person. I prefer white chocolate over dark, angel food over devil's food cake, vanilla bean ice cream over double fudge and of course BLONDIES over brownies.
I made these blondies for an office cookie exchange. I can't say enough how wonderful cookie exchanges are. You get a whole array of cookies for the effort of making only one. Plus, you get to sample your friends' favorites and find new favorites of your own. Thanks to all the ladies I exchanged cookies with this year!
This recipe came from the December 2011 issue of Bon Appétit. It has a nice salty-sweet flavor from the pretzels contrasted against the homemade caramel. The blondie beneath the topping is chewy and filled with brown sugary goodness. I doubled the recipe and baked it in a jelly roll pan below to make 72 - 1" x 2" bars.

Butterscotch Blondies with Peanut Pretzel Caramel
9 x 13 pan | Bon Appétit, Dec/11
Blondie
1 1/2 cups all-purpose flour
2 teapsoons baking powder
1 teaspoon kosher salt
3/4 cup (1 1/2 sticks) unsalted butter
2 cups (packed) light brown sugar
2 large eggs
1 teaspoon vanilla extract
Peanut-pretzel caramel
4 cups roasted unsalted peanuts
2 cups sugar
1/4 cup honey
1/4 cup (1/2 stick) unsalted butter
1/2 cup heavy cream
1 1/2 cups thin twisted pretzels, coarsely crushed
1. Blondie: Preheat oven to 350 degrees F. Line baking pan with parchment paper, leaving a 1" overhang on long sides of pan. Whisk flour, baking powder, and salt in a medium bowl; set aside. Stir butter in a medium skillet over medium heat until browned bits form at bottom of pan, 7–8 minutes. Transfer to a medium bowl. Add brown sugar. Using an electric mixer, beat until well combined and mixture resembles wet sand, 2–3 minutes. Add eggs and vanilla; beat until fluffy and well combined, about 2 minutes. Add dry ingredients; beat until smooth (batter will be thick). Using an offset or regular spatula, evenly spread batter in prepared pan.
2. Bake blondie until golden brown, edges pull away from sides of pan, and a tester inserted into center comes out with a few moist crumbs attached, 20–25 minutes. Let cool completely in pan on a wire rack.
3. Peanut-pretzel caramel: Stir sugar and 1/2 cup water in a large saucepan over medium-low heat until sugar dissolves. Increase heat; boil without stirring, occasionally swirling pan and brushing down sides with a wet pastry brush, until caramel is deep amber, 12–15 minutes. Add honey; return to a boil, stirring often, about 1 minute longer. Add butter; stir until blended. Add cream (mixture will bubble vigorously); whisk until smooth. Stir in peanuts and pretzels. Pour over cooled blondie. Chill until cool, about 30 minutes.
DO AHEAD: Chill for up to 1 week in an airtight container. Bring to room temperature before serving.
 Happy August 1st!!! A new month, a new slate, a new start. I love that feeling.If you like peanut butter, you will love these waffles. The recipe comes from the May 2011
  These can be made either in the oven (recipe below) or in a food dehydrator (follow manufacturer's instructions). They are a healthy snack and a wonderful way to use up extra apples. Sometimes I sprinkle some cinnamon on the rings before baking. It makes your house smell amazing! My son likes snacking on them and taking them to school.Another way to use these dried apples is to chop them up and add use them in baked goods. Because they are drier than fresh apples, you can use them in cookies without worrying about the cookies getting soggy. I also find that they work well in muffins. My ultimate favorite use for these is in cinnamon buns. Rather than using raisins, throw a cup of chopped dried apples into your cinnamon bun filling mixture and voila - apple cinnamon buns!
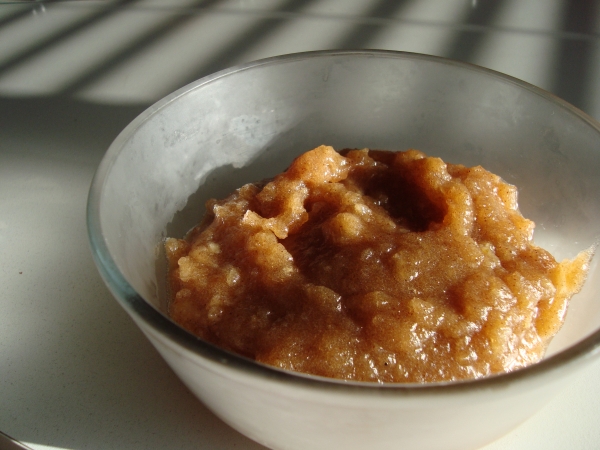
Dried Apple RingsReader's Digest4 apples2 cups cold water2 tbsp lamon juice1. Peel and core the apples. Slice the apples into rings, about 1/4-inch thick.2. To keep the apple rings from browning, in a large bowl, combine 2 cups cold water and 2 tablespoons lemon juice. Add the apple rings, making sure each apple ring gets coated with the water-lemon mixture. Let stand for 5 minutes. Drain well; pat apple rings dry with paper towels.3. Preheat oven to 300 degrees F. Lightly coat 2 wire racks with nonstick cooking spray. Arrange the apple rings in a single layer on the wire racks, making sure rings do not touch or overlap. Set each rack on a baking sheet. Bake for 15 minutes. Reverse positions of the baking sheets in the oven, moving the baking sheet from the top oven rack to the bottom oven rack and vice versa. Bake for 15 minutes more. Turn off the oven. Let the apple rings dry in the oven, with the door closed, for 3 hours. Remove from oven. Store airtight.
These can be made either in the oven (recipe below) or in a food dehydrator (follow manufacturer's instructions). They are a healthy snack and a wonderful way to use up extra apples. Sometimes I sprinkle some cinnamon on the rings before baking. It makes your house smell amazing! My son likes snacking on them and taking them to school.Another way to use these dried apples is to chop them up and add use them in baked goods. Because they are drier than fresh apples, you can use them in cookies without worrying about the cookies getting soggy. I also find that they work well in muffins. My ultimate favorite use for these is in cinnamon buns. Rather than using raisins, throw a cup of chopped dried apples into your cinnamon bun filling mixture and voila - apple cinnamon buns!
Dried Apple RingsReader's Digest4 apples2 cups cold water2 tbsp lamon juice1. Peel and core the apples. Slice the apples into rings, about 1/4-inch thick.2. To keep the apple rings from browning, in a large bowl, combine 2 cups cold water and 2 tablespoons lemon juice. Add the apple rings, making sure each apple ring gets coated with the water-lemon mixture. Let stand for 5 minutes. Drain well; pat apple rings dry with paper towels.3. Preheat oven to 300 degrees F. Lightly coat 2 wire racks with nonstick cooking spray. Arrange the apple rings in a single layer on the wire racks, making sure rings do not touch or overlap. Set each rack on a baking sheet. Bake for 15 minutes. Reverse positions of the baking sheets in the oven, moving the baking sheet from the top oven rack to the bottom oven rack and vice versa. Bake for 15 minutes more. Turn off the oven. Let the apple rings dry in the oven, with the door closed, for 3 hours. Remove from oven. Store airtight.
 Pretty swirls of pink run through this mousse-like cheesecake. It is lighter and fluffier than most cheesecakes, making it a perfect spring dessert. This makes use of the fresh strawberries available this time of year. However, feel free to use frozen berries (thaw and drain excess water first) or raspberries or blueberries or a mixture.
 The only change I would recommend to the recipe is that rather than dropping the strawberry topping all on top before swirling it in, I would alternate the layers between cheesecake, pureed berries, cheesecake, berries, for a better distribution of strawberry throughout.
 Strawberry Marble Cheesecake9" Cake | adapted from Cooking Light3/4 cup graham cracker crumbs 1/3 cup sugar1/3 cup melted butter
2 cups cottage cheese, well drained
1/4 cup flour
2 cups (16 ounces) light cream cheese, well softened
1/2 cup sugar
2 teaspoons vanilla extract
3 eggs
1/2 cup strawberries
1 teaspoon water
1. Preheat oven to 450 degrees F. Combine graham crackers with 1/3 cup sugar and 1/3 cup butter. Press into bottom of a 9-inch springform pan.
2. Place cottage cheese in a food processor, and process until smooth. Lightly spoon flour into a dry measuring cup; level with a knife. Combine flour, cream cheese, and sugar in a large bowl; beat with a mixer at low speed until smooth. Beat in cottage cheese and vanilla. Add eggs 1 at a time, beating well after each addition. Pour cheese mixture into prepared pan.
3. Combine strawberries and water in a blender, and process until smooth. Swirl strawberry mixture into cheese mixture using the tip of a knife. Bake at 450 degrees F for 15 minutes. Reduce oven temperature to 250 degrees F (do not remove cheesecake from oven); bake an additional 45 minutes or until cheesecake center barely moves when pan is touched. Remove cheesecake from oven; run a knife around the outside edge. Cool to room temperature then cover and chill fully - overnight is best.
Strawberry Marble Cheesecake9" Cake | adapted from Cooking Light3/4 cup graham cracker crumbs 1/3 cup sugar1/3 cup melted butter
2 cups cottage cheese, well drained
1/4 cup flour
2 cups (16 ounces) light cream cheese, well softened
1/2 cup sugar
2 teaspoons vanilla extract
3 eggs
1/2 cup strawberries
1 teaspoon water
1. Preheat oven to 450 degrees F. Combine graham crackers with 1/3 cup sugar and 1/3 cup butter. Press into bottom of a 9-inch springform pan.
2. Place cottage cheese in a food processor, and process until smooth. Lightly spoon flour into a dry measuring cup; level with a knife. Combine flour, cream cheese, and sugar in a large bowl; beat with a mixer at low speed until smooth. Beat in cottage cheese and vanilla. Add eggs 1 at a time, beating well after each addition. Pour cheese mixture into prepared pan.
3. Combine strawberries and water in a blender, and process until smooth. Swirl strawberry mixture into cheese mixture using the tip of a knife. Bake at 450 degrees F for 15 minutes. Reduce oven temperature to 250 degrees F (do not remove cheesecake from oven); bake an additional 45 minutes or until cheesecake center barely moves when pan is touched. Remove cheesecake from oven; run a knife around the outside edge. Cool to room temperature then cover and chill fully - overnight is best.
 The home inspection went great yesterday! The place is in "above average" condition and there were only 2 very minor things to be fixed. Now my next project will be to focus on getting the flooring changed from carpet to engineered hardwood and from linoleum to tile. The nice thing is that I'm still living at home right now so I don't have to rush to move in. I can take my time with the renovations and then move in once everything is done.This veggie-packed bread recipe comes from an old (2001 or 2002) Cooking Light Magazine summer edition. It is a wonderful way to trick your kids into eating veggies and an inventive way to use up leftover roasted vegetables. You can maximize your time by roasting the vegetables while the dough rises. You can make this ahead of time and set the whole thing in the fridge after slicing the rolls so they are ready to be popped into the oven and baked fresh just before dinner.
 Roasted Vegetable RollsMakes 15 | Cooking Light
1 1/4 cups whole milk
2 tablespoons sugar
1 envelope instant yeast
1 large egg, lightly beaten
4 - 4 1/4 cups all-purpose flour
1 1/2 teaspoons salt
1/2 cup softened butter
1 cup finely chopped onion
1 cup finely chopped carrot
1 cup finely chopped broccoli
3/4 cup finely chopped red bell pepper
1/2 cup sliced green onions
2 tbsp olive oil
2 tbsp parmesan
1 cup grated cheddar cheese
3/4 cup light mayo
1/2 tsp salt
1/4 tsp black pepper
1 tsp dried thyme
1 tsp oregano
2 tbsp chopped garlic
1. Heat milk and sugar together in small saucepan or in microwave until mixture is lukewarm (about 100 degrees). Whisk in yeast and egg and set aside. Combine 4 cups of flour and salt in bowl of standing mixer fitted with paddle and mix at lowest speed to blend, about 15 seconds. With mixer running at low speed, add liquid mixture in steady stream; mix until flour is moistened, about 1 minute. With mixer still running, slowly begin to add 8 tablespoons softened butter, 1 piece at a time, until incorporated into dough. Increase speed to medium and beat until dough is thoroughly combined and scrappy, about 2 minutes longer.
3. Replace paddle with dough hook and knead dough at medium speed until smooth but still sticky, about 6 minutes, adding flour in 1 tablespoon increments, if necessary for dough to clear sides of bowl. Scrape dough out of mixing bowl and onto lightly floured work surface; knead by hand until very smooth and soft, but no longer sticky, about 1 minute. Transfer dough to very lightly oiled large bowl, cover with plastic wrap, and place in warmed oven until dough doubles in bulk, about 45 minutes.
4. Filling: Combine all the vegetables in a 9 x 13 pan and toss with olive oil. Bake at 400 degrees F for 20 minures or until vegetables are lightly browned. Remove from oven and cool slightly. Toss with parmesan. Reduce oven temperature to 350 degrees F. Combine mayo and spices in a small bowl. Set aside.
5. Once dough has doubled, press down and roll out into a large rectangle, about 1/4 inch thick. Spread evenly with mayo mixture and sprinkle with cheeses, reserving 1/4 cup cheese for later. Roll the dough up into a log and slice into 15 equal sized rolls. Set rolls in a lightly greased pan, leaving a bit of room between for rising. Let rise in warm place until almost doubled, about 45 minutes. Sprinkle reserved cheese on top. When rolls are almost fully risen, heat oven to 375 degrees F. Bake rolls until golden brown, 25-30 minutes.
Roasted Vegetable RollsMakes 15 | Cooking Light
1 1/4 cups whole milk
2 tablespoons sugar
1 envelope instant yeast
1 large egg, lightly beaten
4 - 4 1/4 cups all-purpose flour
1 1/2 teaspoons salt
1/2 cup softened butter
1 cup finely chopped onion
1 cup finely chopped carrot
1 cup finely chopped broccoli
3/4 cup finely chopped red bell pepper
1/2 cup sliced green onions
2 tbsp olive oil
2 tbsp parmesan
1 cup grated cheddar cheese
3/4 cup light mayo
1/2 tsp salt
1/4 tsp black pepper
1 tsp dried thyme
1 tsp oregano
2 tbsp chopped garlic
1. Heat milk and sugar together in small saucepan or in microwave until mixture is lukewarm (about 100 degrees). Whisk in yeast and egg and set aside. Combine 4 cups of flour and salt in bowl of standing mixer fitted with paddle and mix at lowest speed to blend, about 15 seconds. With mixer running at low speed, add liquid mixture in steady stream; mix until flour is moistened, about 1 minute. With mixer still running, slowly begin to add 8 tablespoons softened butter, 1 piece at a time, until incorporated into dough. Increase speed to medium and beat until dough is thoroughly combined and scrappy, about 2 minutes longer.
3. Replace paddle with dough hook and knead dough at medium speed until smooth but still sticky, about 6 minutes, adding flour in 1 tablespoon increments, if necessary for dough to clear sides of bowl. Scrape dough out of mixing bowl and onto lightly floured work surface; knead by hand until very smooth and soft, but no longer sticky, about 1 minute. Transfer dough to very lightly oiled large bowl, cover with plastic wrap, and place in warmed oven until dough doubles in bulk, about 45 minutes.
4. Filling: Combine all the vegetables in a 9 x 13 pan and toss with olive oil. Bake at 400 degrees F for 20 minures or until vegetables are lightly browned. Remove from oven and cool slightly. Toss with parmesan. Reduce oven temperature to 350 degrees F. Combine mayo and spices in a small bowl. Set aside.
5. Once dough has doubled, press down and roll out into a large rectangle, about 1/4 inch thick. Spread evenly with mayo mixture and sprinkle with cheeses, reserving 1/4 cup cheese for later. Roll the dough up into a log and slice into 15 equal sized rolls. Set rolls in a lightly greased pan, leaving a bit of room between for rising. Let rise in warm place until almost doubled, about 45 minutes. Sprinkle reserved cheese on top. When rolls are almost fully risen, heat oven to 375 degrees F. Bake rolls until golden brown, 25-30 minutes.
 My family loves cheesecake. Especially New York Cheesecake. However, my dad dislikes "low fat" baking. I made this cake for his birthday without telling him it was a "light" version. He loved it! I knew this recipe was a hit when he went back for seconds. Most New York Cheesecakes call for 4 or 5 bricks of cream cheese whereas this one from Cooking Light only uses 2. Best of all, you can't even tell the difference. It is creamy, dense and everything a full-fat version should be. By using pureed cottage cheese (I used 2%) as a substitute for some of the cream cheese, you get the classic texture and tang but without the fat. Feel free to use low-fat cream cheese and low-fat sour cream in this recipe.This recipe makes a tall - 3 inch - cake. Make sure your pan is deep enough to accommodate the filling. Alternately, use a 10" springform for a wider, shorter cake.
  ***Tip: Storing Cheesecake*** Put a paper towel between the cheesecake and the plastic wrap when storing the cheesecake in the fridge. This will absorb the condensation that forms on the plastic wrap, thus keeping your cheesecake top dry with no beads of moisture on top.
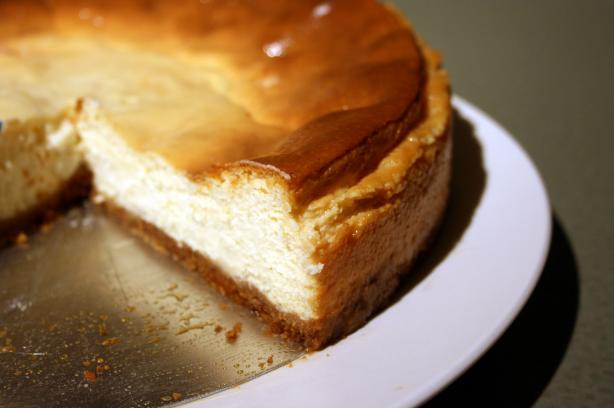 Light New York Cheesecake1 - 9" cake | adapted from Cooking Light
2 cups graham cracker crumbs
1/4 cup sugar
1/3 cup melted butter4 cups 2% cottage cheese
2 cups sugar
Two 8-ounce blocks cream cheese, softened
1/4 cup flour
1/2 cup sour cream
1 tablespoon grated lemon rind
1 tablespoon vanilla extract
1/4 teaspoon salt
5 large eggs
1. Preheat oven to 325 degrees F. To prepare crust, combine graham crumbs, sugar and melted butter. Press evenly into bottom of a 9" springform pan with 3" sides. Note: If you don't have a pan with 3" sides, use a 10" springform instead.
2. To prepare filling, strain the cottage cheese well to remove excess liquid. Place strained cottage cheese in food processor; process until smooth.
3. Place 2 cups sugar and cream cheese in a large bowl; beat with a mixer at medium speed until smooth. Lightly spoon 1/4 cup flour into a dry measuring cup; level with a knife. Add 1/4 cup flour, sour cream, and remaining ingredients to cream cheese mixture; beat well. Add cottage cheese, stirring until well blended. Pour mixture into prepared crust.
4. Bake at 325 degrees for 1 hour and 30 minutes or until almost set. Turn oven off. Cool cheesecake in oven for 1 hour. Remove cheesecake from oven; run a knife around outside edge. Cool to room temperature. Cover and chill at least 8 hours.
Light New York Cheesecake1 - 9" cake | adapted from Cooking Light
2 cups graham cracker crumbs
1/4 cup sugar
1/3 cup melted butter4 cups 2% cottage cheese
2 cups sugar
Two 8-ounce blocks cream cheese, softened
1/4 cup flour
1/2 cup sour cream
1 tablespoon grated lemon rind
1 tablespoon vanilla extract
1/4 teaspoon salt
5 large eggs
1. Preheat oven to 325 degrees F. To prepare crust, combine graham crumbs, sugar and melted butter. Press evenly into bottom of a 9" springform pan with 3" sides. Note: If you don't have a pan with 3" sides, use a 10" springform instead.
2. To prepare filling, strain the cottage cheese well to remove excess liquid. Place strained cottage cheese in food processor; process until smooth.
3. Place 2 cups sugar and cream cheese in a large bowl; beat with a mixer at medium speed until smooth. Lightly spoon 1/4 cup flour into a dry measuring cup; level with a knife. Add 1/4 cup flour, sour cream, and remaining ingredients to cream cheese mixture; beat well. Add cottage cheese, stirring until well blended. Pour mixture into prepared crust.
4. Bake at 325 degrees for 1 hour and 30 minutes or until almost set. Turn oven off. Cool cheesecake in oven for 1 hour. Remove cheesecake from oven; run a knife around outside edge. Cool to room temperature. Cover and chill at least 8 hours.
 These squares are tangy and sweet, smooth and crisp all at the same time. 3 layers of lemony bliss. The top layer is a silky sour cream topping. Beneath that is a classically tart citrusy filling atop a tender, flaky shortbread crust. These beauties are well worth the effort - and trust me, it's not that much effort.They are one of the prettier squares out there. Perfect for pot-lucks. I don't know many people who don't like a good lemon square.
  These cinnamon buns are livened up with bright, perky orange flavor. They are not too heavy nor too rich. The light lemony glaze provides a little sugar jolt adds a hint of sweetness which makes them just right for a breakfast treat.
 The texture is light, fluffy and tender from the milk and eggs. You can also freeze the baked rolls for a few weeks and thaw on the day you want to eat it. A quick heat in the microwave makes them almost as good as the day they were baked. I like to wrap them individually so I can quickly pull out one at a time for easy lunchbag treats. By lunchtime they are thawed and ready to be eaten!
 Sunshine Cinnamon Rollsmakes 12 | adapted from Southern LivingROLLS
1 (1/4 ounce) package yeast
1/4 cup warm water
1 cup warm milk
1/4 cup shortening [or softened butter]
1/4 cup sugar
1 teaspoon salt
1 egg, lightly beaten
3 1/2 to 3 3/4 cups flour
FILLING
1 cup sugar
1/2 cup butter, softened
2 tablespoons orange zest
2 tsp cinnamon
GLAZE
1 cup powdered sugar
4 teaspoons butter, softened
4-5 teaspoons milk
1/2 teaspoon lemon extract
1. In small bowl, dissolve yeast in water. In a large bowl, mix milk, shortening, sugar, salt, and egg. Add yeast mix; blend well. Stir in enough flour to make a soft dough. Knead on floured board for about 7 minutes.
2. Put in greased bowl and turn to grease top. Cover and let rise until doubled, about 1 hour. While the dough is rising, mix filling ingredients until smooth.
3. After the hour, punch dough down. Roll out into a large rectangle. Spread the filling on the rectangle. Roll up tightly starting with the long end. Cut into 12 rolls. Place rolls side by side a 9x13" baking pan or two round 9" pans. Cover and let rise until doubled, about 45 minutes.
4. Bake at 375 degrees F for 25-30 minutes, until golden brown and bread is fully cooked through. While the rolls are baking mix glaze ingredients. Spread over warm rolls.
Sunshine Cinnamon Rollsmakes 12 | adapted from Southern LivingROLLS
1 (1/4 ounce) package yeast
1/4 cup warm water
1 cup warm milk
1/4 cup shortening [or softened butter]
1/4 cup sugar
1 teaspoon salt
1 egg, lightly beaten
3 1/2 to 3 3/4 cups flour
FILLING
1 cup sugar
1/2 cup butter, softened
2 tablespoons orange zest
2 tsp cinnamon
GLAZE
1 cup powdered sugar
4 teaspoons butter, softened
4-5 teaspoons milk
1/2 teaspoon lemon extract
1. In small bowl, dissolve yeast in water. In a large bowl, mix milk, shortening, sugar, salt, and egg. Add yeast mix; blend well. Stir in enough flour to make a soft dough. Knead on floured board for about 7 minutes.
2. Put in greased bowl and turn to grease top. Cover and let rise until doubled, about 1 hour. While the dough is rising, mix filling ingredients until smooth.
3. After the hour, punch dough down. Roll out into a large rectangle. Spread the filling on the rectangle. Roll up tightly starting with the long end. Cut into 12 rolls. Place rolls side by side a 9x13" baking pan or two round 9" pans. Cover and let rise until doubled, about 45 minutes.
4. Bake at 375 degrees F for 25-30 minutes, until golden brown and bread is fully cooked through. While the rolls are baking mix glaze ingredients. Spread over warm rolls.
 This scone recipe from
  They are really flaky with an appetizing crunch from the cornmeal. Hint: Baking these on a silicone mat facilitates their removal and prevents the bottoms from browning too quickly.Flaky Cornmeal Cheddar SconesMakes 12 | adapted from Chatelaine, May 2010
3/4 cup buttermilk plus 1 tbsp for brushing
2 tsp dijon mustard
1/4 cup cornmeal plus 2 tbsp for dusting
1 3/4 cups all-purpose flour
1/4 tsp cayenne
1 tbsp baking powder
1 tbsp sugar
3/4 tsp salt
1/4 cup cold butter, cubed
1 cup grated old cheddar
1/4 cup grated parmesan
2 green onions, sliced
1 egg
1. Preheat oven to 400 degrees F. Lightly spray or coat a rimmed baking sheet with oil. In a medium bowl, add 3/4 cup buttermilk, dijon mustard and 1/4 cup cornmeal and stir to combine.
2. In a large bowl, using a fork, stir flour and cayenne with baking powder, sugar and salt until evenly mixed. Cut in butter until flour mixture is crumbly. Stir in cheeses and onions.
3. Whisk egg into buttermilk mixture. Then pour into flour mixture. Using a wooden spoon, stir until just combined. Gently gather into a ball then divide into 2 equal-sized portions.
4. Sprinkle remaining 2 tbsp cornmeal on a cutting board. Place 1 portion of dough on top and gently pat into a 6" circle. Cut into 6 wedges. Repeat with remaining dough, pressing into remaining cornmeal on counter before cutting.
5. Place wedges on baking sheet at least 1" apart. Lightly brush with remaining 1 tbsp buttermilk. Bake in centre of oven until lightly golden, 15-18 mins.
***To Make ahead: Prepare scones up to step 4, then place scone wedges on a baking sheet. Freeze, uncovered, until firm, then place in a freezer bag and keep, frozen, up to 1 month. To bake, remove scones to a baking sheet. Defrost, uncovered, about 1 1/2 hours. Continue with step 5.
They are really flaky with an appetizing crunch from the cornmeal. Hint: Baking these on a silicone mat facilitates their removal and prevents the bottoms from browning too quickly.Flaky Cornmeal Cheddar SconesMakes 12 | adapted from Chatelaine, May 2010
3/4 cup buttermilk plus 1 tbsp for brushing
2 tsp dijon mustard
1/4 cup cornmeal plus 2 tbsp for dusting
1 3/4 cups all-purpose flour
1/4 tsp cayenne
1 tbsp baking powder
1 tbsp sugar
3/4 tsp salt
1/4 cup cold butter, cubed
1 cup grated old cheddar
1/4 cup grated parmesan
2 green onions, sliced
1 egg
1. Preheat oven to 400 degrees F. Lightly spray or coat a rimmed baking sheet with oil. In a medium bowl, add 3/4 cup buttermilk, dijon mustard and 1/4 cup cornmeal and stir to combine.
2. In a large bowl, using a fork, stir flour and cayenne with baking powder, sugar and salt until evenly mixed. Cut in butter until flour mixture is crumbly. Stir in cheeses and onions.
3. Whisk egg into buttermilk mixture. Then pour into flour mixture. Using a wooden spoon, stir until just combined. Gently gather into a ball then divide into 2 equal-sized portions.
4. Sprinkle remaining 2 tbsp cornmeal on a cutting board. Place 1 portion of dough on top and gently pat into a 6" circle. Cut into 6 wedges. Repeat with remaining dough, pressing into remaining cornmeal on counter before cutting.
5. Place wedges on baking sheet at least 1" apart. Lightly brush with remaining 1 tbsp buttermilk. Bake in centre of oven until lightly golden, 15-18 mins.
***To Make ahead: Prepare scones up to step 4, then place scone wedges on a baking sheet. Freeze, uncovered, until firm, then place in a freezer bag and keep, frozen, up to 1 month. To bake, remove scones to a baking sheet. Defrost, uncovered, about 1 1/2 hours. Continue with step 5.
 This recipe is adapted from an award winning recipe from Country Living's website, originally from the Iowa State Fair Cookbook. I love the sweet and savory combination and these potato chip cookies fit the bill. Kinda like a chewy oatmeal cookie with a little something extra - a little bit more depth you might say.They're also a wonderfully creative way to use up the crushed chips at the bottom of the bag. I put the crumbs into a ziplock bag and stick them in the freezer until I have enough to make these cookies.
Potato Chip Cookies
This recipe is adapted from an award winning recipe from Country Living's website, originally from the Iowa State Fair Cookbook. I love the sweet and savory combination and these potato chip cookies fit the bill. Kinda like a chewy oatmeal cookie with a little something extra - a little bit more depth you might say.They're also a wonderfully creative way to use up the crushed chips at the bottom of the bag. I put the crumbs into a ziplock bag and stick them in the freezer until I have enough to make these cookies.
Potato Chip Cookies


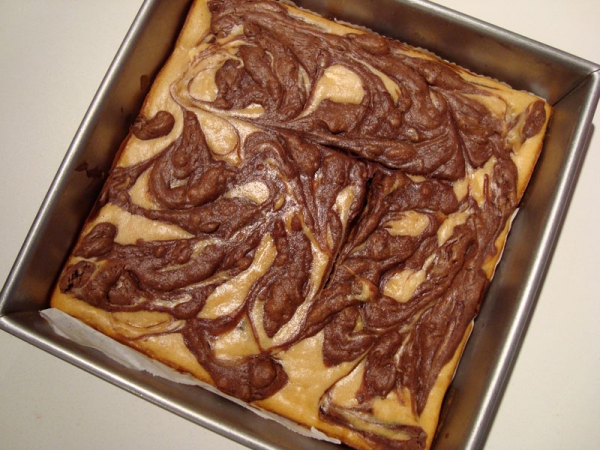
 This chocolate & vanilla swirl bundt cake recipe is a clone of a cake you can find at a bakery in L.A. called