Thursday, September 30, 2010

Strawberry Lemonade Squares


These squares remind me of strawberry lemonade. The sweetness of the strawberries plays nicely against the tartness of the lemon, all atop a tender shortbread crust. Not to mention the stark and stunning contrast of bright pink strawberry against vibrant yellow filling.

I brought them to an end of summer barbecue/potluck where they were well received. I don't know many people who don't like the fresh, perky flavor of lemon, so I find lemon desserts a sure-thing for potlucks, especially summer-themed ones. For the prettiest presentation be sure not to sift the powdered sugar on too early - do it just before serving - or else it gets absorbed and disappears into the squares.

Please check out my new group - the Copycat Club. Please join the fun in cooking up some copycat recipes to share in the monthly round-up here. Email me at starrysugar@hotmail.com. The first round-up will be on October 7th, so email me your links if you'd like to be included :)

Strawberry Lemonade Squares
8" square pan | adapted from Jill Snider

Crust:
1 cup flour
1/4 cup sugar
1/2 cup butter, cubed

Filling:
3 eggs
1 cup sugar
3 tbsp flour
2 tsp lemon zest
1/2 cup lemon juice
1/4 cup pureed strawberries (approx 4-5 strawberries)

powdered sugar, for dusting

1. Preheat oven to 350 degrees F. Line an 8" square pan with parchment paper.
2. Crust: Combine flour and sugar. Cut butter into flour until resembles coarse crumbs. Press evenly into prepared pan and bake in preheated oven until lightly browned around the edges, 12-15 minutes.
3. Filling: Whisk together all the filling ingredients except the strawberries. Don't overbeat. Pour over hot, baked crust. Spoon drops of strawberry puree on top of the lemon mixture. Return to oven and bake until just set, 25-30 minutes. Let cool completely in pan on rack. Store in freezer. Sift powdered sugar over squares just before serving.

Monday, September 27, 2010

Caramel Apple Upside Down Cake


This week, Leslie of Lethally Delicious decided on Tarte Fine on page 315.


Confession: I had a puff pastry dilemma this week - To buy or to make? I really didn't want to buy it when I know I can make it for cheaper and better at home, but then I ran outta time because of my indecision and procrastination. So, I apologize, there is no Tarte Fine aux Pommes for moi this week.

Instead, I made this deliciously moist, super-cute apple cake that tastes just like a caramel apple. There's a nice, thick layer of sugar and butter that gets put into the pan first. This carmellizes in the oven creating a gooey, caramelly topping after it's baked. The apples soften up and absorb some of the caramel during baking. They are tender and flavorful gems on the top of the cake. Psst...see the middle of the cake? The centre apple has still got its stem. :)

Caramel Apple Upside Down Cake
9" cake | adapted from Land-o-Lakes

1/2 cup firmly packed brown sugar
3 tablespoons cold butter, cut into cubes
3 Granny Smith apples, peeled, cored, sliced

1 1/2 cups all-purpose flour
1 teaspoon baking powder
1/2 teaspoon salt
1/2 tsp cinnamon
2/3 cup firmly packed brown sugar
1/3 cup butter, softened
1 egg
1 teaspoon vanilla
1/2 cup milk

1/4 cup caramel sundae topping

Heat oven to 350 degrees F. Place 1/2 cup brown sugar in small bowl; cut in 3 tablespoons butter with pastry blender or fork until mixture resembles coarse crumbs. Press onto bottom of greased 9" round cake pan. Arrange apple slices on top. Set aside.

Combine flour, baking powder and salt in medium bowl. Set aside.

Combine 2/3 cup brown sugar and 1/3 cup butter in another medium bowl. Beat at medium speed, scraping bowl often, until creamy. Add egg and vanilla; continue beating until smooth. Add flour mixture alternately with milk until well mixed.

Spoon batter over apple layer; spread evenly. Bake for 40 to 45 minutes or until toothpick inserted in center comes out clean. Cool 5 minutes; invert onto serving plate. Serve warm or cool, drizzled with caramel topping.

Introducing: The Copycat Club


Introducing: The Copycat Club.

I would like to invite you lovely food bloggers to join my group.
The idea for this group was born out of my fascination with copycat recipes - clones of famous restaurant dishes, coffeeshop bakes or even grocery store products or pre-packaged foods. Reasons to make copycat recipes at home: save money, challenge yourself, impress others and just because IT'S FUN!

This group will be doable no matter what your schedule is. Submit as many or as few copycat recipes as you wish, from past or present blogs. They can be from cookbooks, from websites, from other blogs or from your own imagination. I will post a monthly round-up on the 7th of every month (just because 7 is my lucky number). If you want your post to be included in the round-up on the 7th, send me an Email by the 1st of the month to starrysugar@hotmail.com with the subject "Copycat Club: Recipe Name" and include a link to your post along with your name and blog.

I'm hoping to find more winning clones to try in my own kitchen and to get to know more bloggers along the way. We've still got a few days left this month, so please send me your links and let's get copycat cooking. Here are some recipes to get you started:

America's Most Wanted Recipes by Ron Douglas
Top Secret Recipes by Todd Wilbur
Recipe Secrets
Copy Kat
Recipe Goldmine Clones
CD Kitchen Copycat Recipes

I am working on a badge for the Copycat Club and hope to post that soon. If you have any ideas or suggestions for me plese let me know.

xoxo
Tia

DB: Sugar Cookie Pops


The September 2010 Daring Bakers’ challenge was hosted by Mandy of “What the Fruitcake?!” . Mandy challenged everyone to make Decorated Sugar Cookies based on recipes from Peggy Porschen and The Joy of Baking.

I made these sugar cookie pops as part of the baking catering I did for a co-worker for her grandson's dedication earlier this year. I didn't have time to do intricate sugar cookies this month so I apologize, but wanted to share these with you for Daring Baker's this month as I'm pretty happy with how they turned out and back when I originally made them, it certainly was a challenge!

I have never made cookie pops before but these turned out so well that I would definitely do it again. I made the sugar cookies a little thicker than normal and reinforced the backs of the sticks with extra dough. Not one fell off the stick even when the kids bit into them. The feedback I received was that they were the highlight of the party. They were such a huge hit that the kids just held onto them and admired them, not wanting to eat them for the longest time. Aww... I love that I can make people happy with my baking. It brings a smile to my face.
One more thing: I can't speak highly enough about this sugar cookie icing recipe (below). It is the kind of icing you'd find at a bakery. It dries shiny, smooth and hard enough to stack the cookies. It is a pleasure to work with and very yummy!


Sugar Cookie Cutouts
Makes 15 cookie pops | Adapted from Land-O-Lakes

1 cup butter, softened
1 cup sugar
1 egg
2 1/2 cups flour
2 tbsp lemon juice
1 tbsp vanilla
1 tsp baking powder

1. Combine butter, sugar and egg in large bowl. Beat at medium speed until creamy. Reduce speed to low; add all remaining cookie ingredients. Beat until well mixed. Divide dough into thirds; wrap in plastic food wrap. Refrigerate until firm (at least 2 hours).

2. Heat oven to 400 degrees F. Roll out dough to 1/4-inch thickness. Press the lollipop sticks into the cookies then cover the sticks with a small, flattened piece of dough so the stick is not visible. Flip the cookie over and place onto ungreased cookie sheet. Bake for 6 to 10 minutes or until edges are lightly browned. Cool 1 minute before removing from cookie sheets. Cool completely before frosting.


Better than Bakery Icing
adapted from allrecipes.com

1 cup icing sugar
2 teaspoons milk
2 teaspoons light corn syrup
1/4 teaspoon vanilla extract
food coloring
In a small bowl, stir together confectioners' sugar and milk until smooth. Add corn syrup and vanilla extract until icing is smooth and glossy. If icing is too thick, add more corn syrup.

Sunday, September 26, 2010

Lemon Pull-Apart Loaf


This recipe has been bookmarked for the past few months in my copy of 
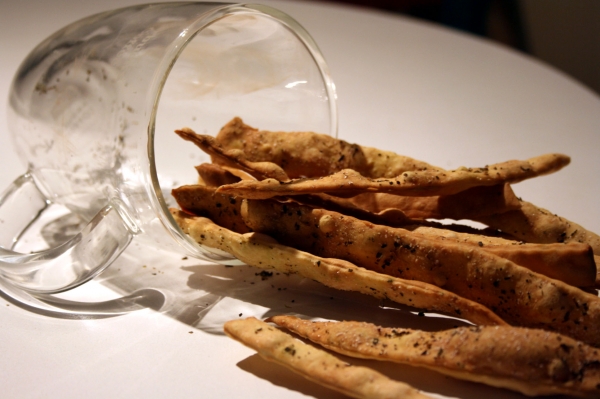
Baking for All Occasions by Flo Braker. I adore making yeast bread because it is so versatile. It's the closest thing to adult play-doh! I am always game for trying new shaping methods, so this loaf practically jumped off the page, screaming to be made. Pull-apart loaves are so much fun. No knife needed; the thin layers separate easily and quite frankly, it's pretty addictive!


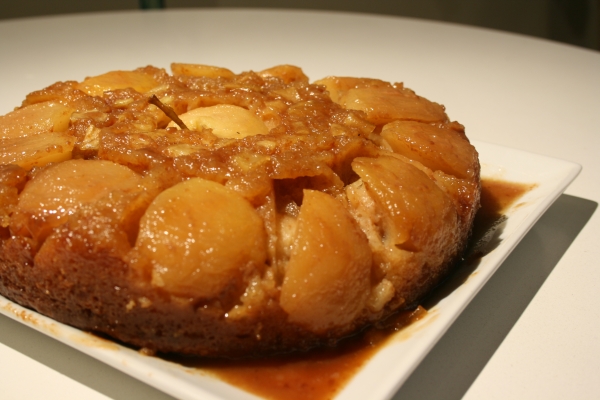
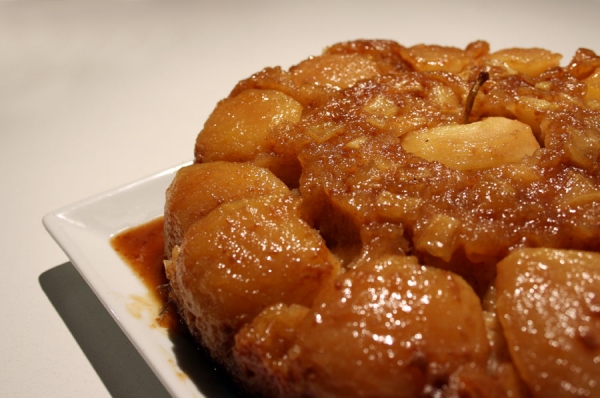
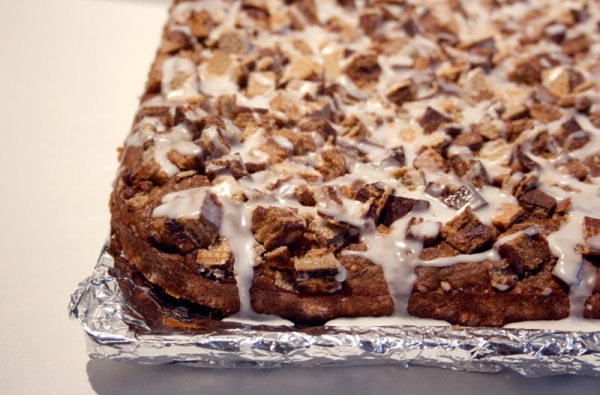
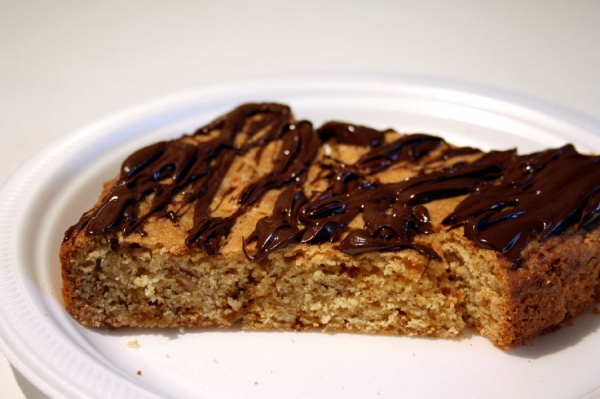
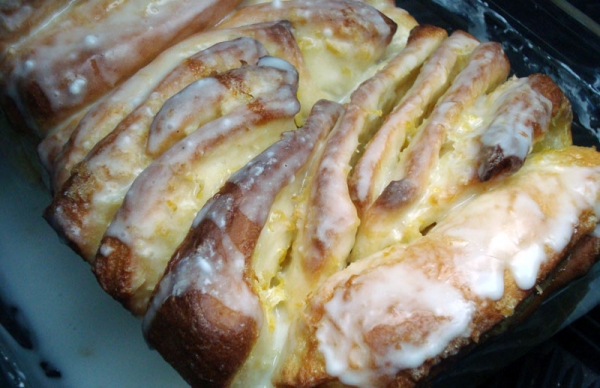
It is a beautiful, stunning loaf filled with bright and sunny lemon flavor. The loaf is made up of thin layers of sweet bread, sprinkled with aromatic lemon sugar, baked in a loaf pan. The bread is fluffy, sweet, soft, and saturated with citrus. You’re able to peel off a layer, no knifes or messy rips needed. If it couldn’t get better, a tangy cream cheese icing gets spread over the cooling cake, melting into the ridges, cooling into a sweet, stick mess. It’s incredible.

Lemon-Scented Pull-Apart Loaf
1 9x5" loaf | adapted from Baking for All Occasions

Sweet Yeast Dough
Approx 2 3/4 cups (12 1/4 ounces) all-purpose flour
1/4 cup (1 3/4 ounces) granulated sugar
2 1/4 teaspoons (1 envelope) instant yeast
1/2 teaspoon salt
1/3 cup (2 1/2 fluid ounces) milk
2 ounces unsalted butter
1/4 cup (2 fluid ounces) water
1 1/2 teaspoons pure vanilla extract
2 large eggs, at room temperature

Lemon Sugar Filling
1/2 cup (3 1/2 ounces) granulated sugar
4 tablespoons finely grated lemon zest (4 lemons)
2 ounces unsalted butter, very soft

Tangy Cream Cheese Icing
3 ounces cream cheese, softened
1/3 cup (1 1/4 ounces) powdered sugar
1 tablespoon whole milk
1 tablespoon fresh lemon juice

1. Sweet Yeast Dough: Mix two cups flour, the sugar, yeast, and salt in a medium bowl with a rubber spatula. Meanwhile, in a small saucepan or in the microwave, combine the milk and the butter and heat until the butter is melted. Remove from the heat, add the water, and let rest a minute until just warm. Stir in the vanilla extract.

2. Pour the milk and melted butter into the flour and mix with a rubber spatula until the flour is evenly moistened. Beat in the eggs one at a time.

3. Pour the milk mixture over the flour-yeast mixture and, using a rubber spatula, mix until the dry ingredients are evenly moistened. Attach the bowl to the mixer, and fit the mixer with the paddle attachment. With the mixer on low speed, add the eggs, one at a time, mixing after each addition just until incorporated. Stop the mixer, add 1/2 cup of the remaining flour, and resume mixing on low speed until the dough is smooth, 30 to 45 seconds. Add 2 more tablespoons flour and mix on medium speed until the dough is smooth, soft, and slightly sticky, about 45 seconds.

4. Lightly flour a work surface and knead the dough gently until smooth and no longer sticky, about one minute. Add an additional 1-2 tablespoons of flour only if the dough is too sticky to work with. Place the dough in a large bowl, cover it with plastic wrap, and let it rise in a warm place for 45-60 minutes or until doubled in size. An indentation made with your finger should keep its shape.

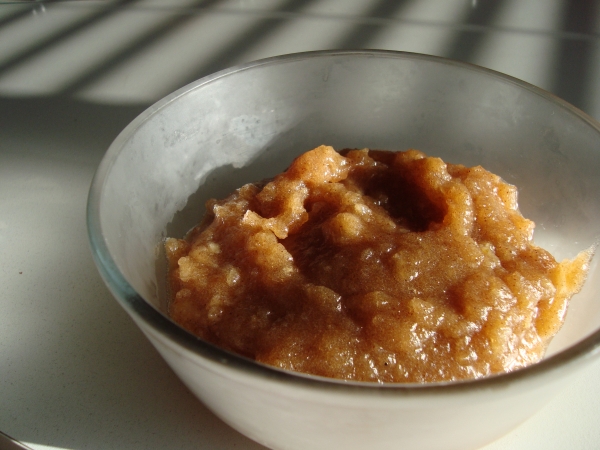
5. Meanwhile, make the lemon sugar filling. Mix the sugar and lemon zest. It’ll draw out the citrus oils and make the sugar sandy and fragrant.

6. Center a rack in the oven and preheat the oven to 350 degrees F. Grease a 9x5" loaf pan. Gently deflate the dough with your hand. Flour a work surface and roll the dough into a 20″ x 12″ rectangle. The more accurate you are, the prettier the loaf will be and the better it will fit in the pan. Use a rubber spatula or pastry brush to spread the butter evenly and liberally over the dough.

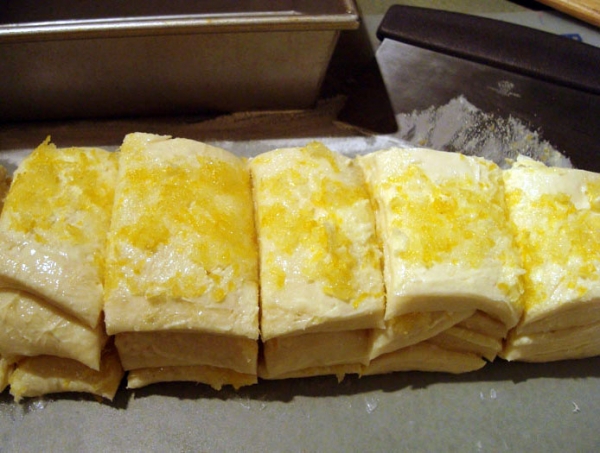
7. Use a pizza cutter to cut the dough crosswise in five strips, each about 12″ by 4″. Sprinkle 1 1/2 tablespoons of the lemon sugar over the first buttered rectangle. Top it with a second rectangle, sprinkling that one with 1 1/2 tablespoons of lemon sugar as well. Continue to top with rectangles and sprinkle, so you have a stack of five 12″ by 4″ rectangles, all buttered and topped with lemon sugar.

8. Slice this new stack crosswise, through all five layers, into 6 equal rectangles (each should be 4″ by 2″) Carefully transfer these strips of dough into the loaf pan, cut edges up, side by side. You might have some extra room around the edges but the bread will rise and expand during baking. Loosely cover the pan with plastic wrap and let the dough rise in a warm place until puffy and almost doubled in size, 30 to 50 minutes. When you gently press the dough with your finger, the indentation should stay.

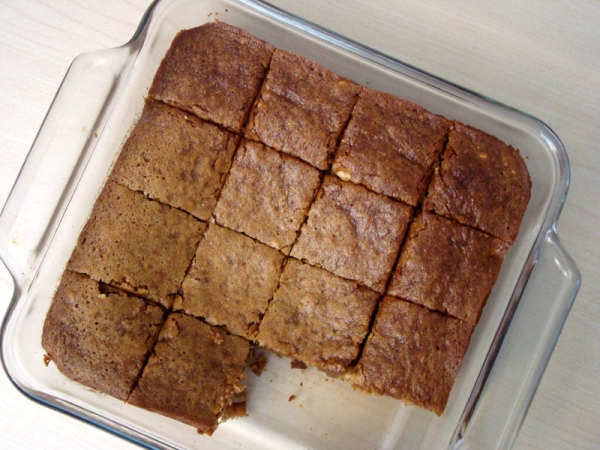
9. Bake the loaf until the top is golden brown, 30 to 35 minutes. Test with a cake tester to make sure it's done, and covering the top with foil if it's browning too quickly. Transfer to a wire rack and let cool in the pan for 10 to 15 minutes.

10. While cake is cooling, make the cream cheese icing. Beat the cream cheese and powdered sugar in a medium bowl with a wooden spoon until smooth, then add the milk and lemon juice. Stir until creamy and smooth.

11. Carefully run a knife around the edges of the pan to release. Flip the loaf over onto a cooling rack, then flip onto another rack so that it’s right side up. Spread the top of the warm cake with the cream cheese icing, using a pastry brush to fill in all the cracks. Put a pan or waxed paper underneath to catch any drips. Serve warm or at room temperature. You can also cut the cake with a knife, but wait for it to cool if you plan to do so.

Thursday, September 23, 2010

Apple Butter Cookies


This recipe is the pick for September's Cookie Carnival run by Tami's Kitchen Table Talk. This is a no pressure, easygoing and fun group. (Tami is a sweetheart!)

The recipe comes from Anna Olson of Food Network Canada. It's like a little taste of Fall in every bite. The apple butter is mixed right into the cookie dough and also sandwiched between dollops of dough before it is baked.

A couple of days ago I made my own Honey-Spiced Apple Butter which made my entire house smell better than any air freshener I've ever plugged in. Cinnamonny-sweet apples on a cool, rainy day. I highly suggest making your own apple butter if you haven't already. You can do so many great things with it including these comforting apple butter cookies that remind me of muffin tops. I love muffin tops so by extension, I love these cookies! Have you tried those soft Voortman's brand cookies? These are kinda like that texture. Mmmmm.
I also like to think that with all the apple butter in them, I'm squeezing a fruit serving into my diet too :)

Apple Butter Cookies
Makes 24 | adapted from Anna Olson

1/2 cup butter, room temperature
1 cup sugar
2 tablespoons fancy molasses
3/4 cup sour cream
1/2 + 1/2 cup apple butter
2 large egg yolks
1 large egg
2 cups pastry flour
1/2 cup whole wheat flour
1 teaspoon cinnamon
1/4 teaspoon nutmeg
3/4 teaspoon baking powder
3/4 teaspoon baking soda
1/2 teaspoon salt

1. Preheat oven to 325 degrees F.

2. Beat butter, sugar and brown sugar together until smooth. Stir in molasses, sour cream and 1/2 cup apple butter. Stir in yolks and eggs.
In a separate bowl, sift dry ingredients and gently stir into butter mixture. Spoon or pipe 2/3 of batter by tablespoonfuls onto prepared baking tray, leaving 1 ½-inches between them. Spoon a teaspoonful of remaining apple butter into centre of each cookie and top each with remaining batter. Bake for 15 to 18 minutes, until cookies lift easily from tray.

Tuesday, September 21, 2010

TWD: Coffee Break Coffee Cake/Muffins


This recipe this week was chosen by Rhiani of Chocoholic Anonymous for Tuesday's with Dorie.

I did both the muffin version and a coffee-coffee cake version topped with chopped up Coffee Crisp chocolate bars and a simple icing drizzle.

They were definitly not mild mannered muffins/cake. They packed a jolt of bold coffee flavor studded with large chunks of rich, melty chocolate. I hardly noticed the whole wheat flour and I actually liked the little bit of extra texture the muffins had as a result of it. If you are a coffee fiend you could even add extra instant coffee powder or pure espresso rather than just brewed coffee, as I will likely do next time.

Monday, September 20, 2010

Honey-Spice Apple Butter


I am sooo excited because it's apple season again! To me, the scent of apples and cinnamon is one of my very favorite combinations. The sweet and spicy combination is a hallmark Autumn scent and it makes all the rainy weather and "back to school blues" just that much more tolerable. Just knowing that a whole season of apple pies, cakes, squares and cookies lies ahead makes me happy.

On the weekend I made honey spice apple butter from Fine Cooking magazine. Apple butter is essentially a thicker and spicier version of applesauce, traditionally made by slow-cooking sliced or pureed apples in copper kettles for up to 12 hours or more. The apples are constantly stirred with long paddles. The heat causes the fruit's natural sugars to caramelize, thus giving apple butter its distinctive deep brown color. It goes wonderfully on toast and can also be used to complement and heighten the flavor of apple recipes or to replace some of the fat in muffin and cake recipes.

I am submitting this to Ivonne of Cream Puffs in Venice for Magazine Mondays.

Honey-Spice Apple Butter
Makes 1 1/2 cups | adapted from Fine Cooking, October 2004

2 lbs apples, peeled, cored, and cut into 1-inch chunks
1 cup apple cider
1/4 cup dark brown sugar
1/4 cup honey
1/8 tsp cinnamon
pinch ground cloves, all-spice and/or nutmeg (to taste)
pinch salt

Combine the apples and cider in a heavy 3-quart saucepan. Bring to a boil over medium-high heat and then reduce the heat to a maintain a simmer. Cook, stirring occasionally, until the apples have mostly broken down, about 30 minutes.

Use a rubber spatula to force the mixture through a medium sieve into a bowl. Rinse out the saucepan and return the mixture to the pan. Whisk in the brown sugar, honey, cinnamon, allspice, and salt. Bring back to a simmer over medium heat and adjust the heat to maintain a vigorous simmer. Cook until the mixture reduces and thickens to a spreadable consistency, about 75 minutes.

As the mixture cooks, stir occasionally at first and then more frequently as it thickens; keep in mind that the apple butter will thicken a little more as it cools. Scrape the apple butter into a storage container and press a piece of plastic wrap directly on the surface to prevent a skin from forming as it cools. Once completely cool, you can remove the plastic, cover with a lid, and refrigerate for up to two weeks.

Friday, September 17, 2010

English Toffee Cookie Wedges


These are pretty much a toffee infused version of a blondie. A simple bar cookie dressed up with homemade toffee pieces. It's so cheap to make your own, but you could just as easily use storebought toffee bits or crushed Heath/Skor bars.

The simple drizzle of melted chocolate on top makes these party presentable while still being picnic portable. Or you can just bake them as regular drop cookies for everyday snacking.

English Toffee Cookie Wedges
2 – 9" round pans (with a little left over) | adapted from 400 Sensational Cookies

2 3/4 cups flour
2 tsp baking powder
1/4 tsp baking soda
1/4 tsp salt
1 cup butter, softened
2/3 cup sugar
2/3 cup brown sugar
2 eggs
2 tsp vanilla
2 cups toffee bits
1/2 cup chopped unsalted almonds

3/4 cup semisweet chocolate or chocolate chips
1 tsp shortening

1. Preheat oven to 350 degrees F. Combine flour, powder, soda, salt.
2. Cream butter and sugars until light and fluffy. Add eggs and vanilla until well combined. Add in vanilla then flour mixture, scraping down sides of bowl.
3. Scrape cookie dough into two lightly greased 9" round pans. You might have a bit of extra dough for a few extra cookies to bake on their own later. Or, if you don't want to bake these as wedges then drop them by the tablespoon onto cookie sheets as you would chocolate chip cookies.
Spread dough evenly in the pans. Bake for approximately 15 minutes until lightly golden. *Watch the temperature and time on these – you might need to turn the oven down to 325 if they are browning too quickly.
4. Cool until they are firm enough to invert onto a cooling rack then continue to cool thoroughly. Cut into wedges
5. Melt the chocolate with the shortening and drizzle over top then let stand to set.

Thursday, September 16, 2010

Olive Oil Crackers


These thin and snappy crackers are crisp, fragrant and addictive. They are infinitely versatile and easily adorned with seeds, salts, cheeses, spices, or oils to suit any menu. You can make them any shape: wide strips, thin ribbons (my fave), squares or simply baked in big sheets. Just right for nibbling.

The recipe is adapted from Ottolenghi: The Cookbook. This popular restaurant, Ottolenghi, has stores in London and believes in everything handcrafted from raw ingredients. Simple and clean. I've never even set foot in one of their stores but I love the style of the cookbook and their philosophy. And oh yes, the cracker recipe is a keeper too!


Olive Oil Crackers
adapted from Ottolenghi

1 cup flour
1 teaspoon baking powder
1/2 cup water
2 tablespoons olive oil + oil for brushing
salt
seeds/spices/seasonings

Sift flour with baking powder into a bowl. Make a well in the centre and pour in water and olive oil. Work to a dough, then turn out and knead on a very lightly floured bench until smooth. Wrap in plastic and refrigerate for 1 hour.

Preheat oven to 425 F and line a baking sheet.

Dust the bench and keep the flour close to hand. Divide dough into thirds. Roll each third out right on the baking sheet into a very thin rectangle. The thinner the better. Dust with flour as you work. Cut as desired with a pastry cutter or cookie cutters and space them apart slightly on the baking sheet (they won't spread much). Brush liberally with olive oil and sprinkle with coarse sea salt or whatever you like. Bake in batches for 6-8 minutes closely monitorting their progress. Pale gold is good; deep gold is burnt. Cool on a rack.

Tuesday, September 14, 2010

TWD: White Peach Upside Downer


I haven't seen any cranberries around my grocery store quite yet, so I had to improvise this week and take advantage of the last of the summer-fruit bounty. I had some gorgeous, plump white peaches that fit the bill. I did a mini-happy-dance when I flipped the cake over and it unmolded perfectly - not a single stuck peach slice! However, since I used white peaches, the fruit didn't stand out the way I would have like it to. Cranberries would have been much prettier.

The nutty, caramel topping that gets poured into the pan before the peaches and the batter was a definite winner in my books. It suited the cake and fruit flavors to a tee. I imagine this recipe working well with any fruit - berries, apple, plums?

Sabrina of Superfluous chose Cranberry Upside-Downer on page 206 for this week's Tuesdays with Dorie bake-along recipe. Check out her blog for the recipe.

Sunday, September 12, 2010

Rocky Road Brownies


The popular kids ice-cream flavor has been turned into a bar cookie! These flavors appeal to my inner child while the use of almonds instead of peanuts makes them more of a 'grown up' bar.

They are also very attractive, showing off their chunky contrast of textures and colors from the nuts, chocolate chips and marshmallows. The brownie part holding all these goodies together is fudgy and moist. The recipe comes from The King Arthur Flour Cookie Companion.

Note: In the printed version of this recipe the baking time is wrong. It says 15 minutes but online it says 22 minutes. I ended up baking mine for 24 minutes and they were perfect. Use your own discretion and just bake them until they are almost done but not quite. All you are doing after you add the marshmallows/chips is browning the marshmallows and melting the chips slightly. The actual brownie part should be basically done by that point or you risk burning the topping before the base is ready.


Rocky Road Brownies
9 x 13 pan | King Arthur Flour Cookie Companion

1 cup (2 sticks, 8 ounces) butter
1/2 cup (3 3/4 ounces) brown sugar
1/2 cup (3 1/2 ounces) granulated sugar
2 teaspoons baking powder
1/2 teaspoon salt
1 teaspoon vanilla extract
2 large eggs
1 2/3 cups (7 ounces) All-Purpose Flour
1/3 cup (1 ounce) Dutch-process cocoa
3 cups (18 ounces) chocolate chips
1 cup (4 ounces) roasted salted almonds, coarsely chopped (or peanuts)
1 cup (2 ounces) miniature marshmallows

Preheat the oven to 350 degrees F. Lightly grease a 9 x 13-inch pan.

Cream together the butter, sugars, baking powder, salt, and vanilla. Beat in the eggs. Stir in the flour, cocoa, 2 cups of the chocolate chips, and the almonds.

Pat the dough into the prepared pan. Bake the bars for 22-25 minutes, till they're set around the edge but still soft in the center. Sprinkle with the remaining chocolate chips and the marshmallows, and bake till they soften, about 3 minutes more. Remove from the oven and cool completely before cutting into bars. (Using a plastic knife to cut these is the neatest way I have found to do this).

Tuesday, September 7, 2010

TWD: White Chocolate Peanut Butter Thumbprints


Peanut Butter cookies are a staple in our house, so this week I couldn't resist adding a fun and tasty twist. I used the recipe for the PB criss-crosses but made them into thumbprint cookies. Then I filled half the cookies with raspberry jam and the other half with white chocolate ganache. I am really pleased with how pretty they looked and how easy they were.

Taste-wise, I can't pick a favorite. You can't outdo the classic PB & J but then again, it's hard to beat creamy white chocolate that melts into buttery-smooth bliss on your tongue.


Thanks to Jasmine of "Jasmine Cuisine" who selected this week's Tuesdays With Dorie recipe: Peanut Butter Crisscrosses on page 78 of Baking: From My Home to Yours.

Sunday, September 5, 2010

Butterscotch Peanut Chews


If you are even slightly interested in heirloom baking or the history of baked goods, this book is a great one to take a peek at. It's a thick book - maybe 2" thick? - but despite the plentiful information it is not boring. I found it really enlightening to see how the recipes we know today originally came to be. It was like touching a piece of the past as though through act of baking I was participating in something bigger, something woven deeply through all aspects of our history.

Besides needing food to survive, there can be great pleasure derived from eating. Food is present in every celebration or gathering. It evokes memories. Special foods are reserved for special occasions.

The description in the book reads, "The candylike batter for this cookie is made quickly in a saucepan". Well, they ain't lying. I had this ready to go into the oven before the oven had even finished preheating. There's nothing fancy about these other than the simple beauty of carmelized brown sugar with a slight nuttiness from the peanuts. At the time I made this I wasn't sure what the author meant in step 5 where you're supposed to tamp down the sides of the 'cake', so I skipped it. It was still good but in retrospect I think it might have been more "chewy" if I had used a measuring cup or back of a metal spoon to press down the finished product so it was more compact and hence, more chewy and less cake-like.

I am submitting this recipe to Brenda's Canadian Kitchen for Cookbook Sundays - a great, easygoing bakealong that I highly recommend joining. Brenda is an awesome cook and I had the pleasure of creating the badge below for her, so click on over and check out her site :)


Peanut Butterscotch Chews
8" pan | Baking in America

1 cup flour
1/2 tsp baking soda
1/4 tsp salt
1 tsp cinnamon
1/4 cup butter
1 cup brown sugar
1/3 cup evaporated milk
1 egg
1 tsp vanilla
1/3 cup roasted peanuts, finely chopped

1. Preheat oven to 325 degrees F. Grease an 8" square pan.
2. Combine dry ingredients.
3. In a medium saucepan over medium heat, melt butter then add brown sugar, stirring constantly. Add evaporated milk and bring to a boil for exactly 1 minute, stirring once or twice. Cool to warm.
4. Beat in egg then vanilla. Stir in flour mixture only until incorporated, then add peanuts. Scrape into prepared pan and spread evenly.
5. Bake for 30 minutes or until toothpick comes out with a few moist crumbs sticking to it. Don't overbake they should be very moist. Cool for 5 minutes then tamp down sides of the "cake" to level it. Cool completely before cutting into squares.

Thursday, September 2, 2010

Lemon Tart


This tart was amazing through and through - From the tender, flaky shell to the tart filling dusted with powdered sugar for a touch of sweetness. I love making lemon squares and tasts like this one because they are so easy. No cooking or tempering eggs on the stove... just beat the filling ingredients together, pour into a hot crust and bake.

Presentation: Held its shape and sliced wonderfully.
Taste: Delicate yet bold.
Texture: Light, delicate crumbly crust and satiny filling.

I baked this in an 11" tart pan and had enough for a few extra mini tartlets. In my experience, tart pans, especially fluted ones, immediately up the "fancy-factor". These go from picnic to party just by changing their shape they are baked in. The recipe also halves well, just watch your baking time.


Lemon Tart
9 x 13 pan | Cook’s Illustrated, May 1998

Crust
1 3/4 cups all-purpose flour
2/3 cup confectioners’ sugar
1/4 cup cornstarch
3/4 teaspoon salt
3/4 cup butter, cold, cut into 1-inch pieces

Filling
6 eggs, room temperature
3 cups granulated sugar
2 tablespoons grated lemon zest
1 cup lemon juice
1 cup flour
Confectioners' sugar, for dusting

Note:
The lemon filling must be added to a warm crust. The 30-minute chilling and 20-minute baking of the crust should allow plenty of time to prepare the filling. If not, make the filling first and stir to blend just before pouring it into the crust. Store in plastic wrap, refrigerated for up to two days.

1. For the crust: Adjust oven rack to middle position and heat oven to 350 degrees. Lightly grease a 9 x 13 pan.

2. Pulse flour, confectioners’ sugar, cornstarch, and salt in food processor workbowl fitted with steel blade. Add butter and process to blend, 8 to 10 seconds, then pulse until mixture is pale yellow and resembles coarse meal, about three 1-second bursts. (To do this by hand, mix flour, confectioners’ sugar, cornstarch, and salt in medium bowl. Freeze butter and grate it on large holes of box grater into flour mixture. Toss butter pieces to coat. Rub pieces between your fingers for a minute, until flour turns pale yellow and coarse.) Sprinkle mixture into lined pan and press firmly with fingers into even, 1/4-inch layer over entire pan bottom and about 1/2 inch up sides. Refrigerate for 30 minutes, then bake until golden brown, about 20 minutes.

3. For the filling, whisk together the eggs, sugar, lemon zest, lemon juice, and flour. Pour over the crust and bake for 30 to 35 minutes, until the filling is set. Let cool to room temperature.

4. Dust with Confectioners’ sugar and cut.