Thursday, December 9, 2010

Semisweet Chocolate Layer Cake with Bakery Frosting


I volunteered to make a bunch of cakes for a cake walk at our church, so I was in mass production mode. I came up with the idea to bake two jelly-roll sheets 11" x 17" and cut each into 6 smaller rectangles, make 2-layer high cakes from these rectangles. It worked out *so* well. The layers were perfectly even, I didn't have to worry about splitting my cake into layers after it was baked, so from now on I will be making my layer cakes in sheet pans so they bake thinner and more evenly, then just cutting circles of cake from the large sheet pans.

This is a must-try frosting recipe, especially if you are in a bind for refrigerator space, as I often am. The frosting is just like the bakeries use on their cakes and does not require refrigeration if you are serving the cake within a day of making it. The Coffeemate instead of milk/cream makes it more stable. For longer storage it may be kept up to 3 months covered in the refrigerator. Just bring to room temperature before using.

Semisweet Chocolate Layer Cake
Makes 3 - 8" rounds | Gourmet, Feb. 2006

6 ounces semisweet chocolate, chopped
3/4 cup all purpose flour
3/4 cup cake flour
1/2 teaspoon baking powder
1/2 teaspoon baking soda
1/2 teaspoon coarse kosher salt
1 3/4 cups (packed) dark brown sugar
6 tablespoons (3/4 stick) unsalted butter, room temperature
1 teaspoon vanilla extract
2 large eggs
3/4 cup buttermilk

1. Preheat oven to 325 degrees F. Butter three 8" cake pans with 1 1/2-inch-high sides. Line bottoms with parchment paper round; butter parchment. Place chocolate in metal bowl set over saucepan of simmering water. Stir until melted and smooth.

2. Whisk all purpose flour and next 4 ingredients in medium bowl. Using electric mixer, beat brown sugar, butter, and vanilla in large bowl to blend (mixture will be crumbly). Add eggs 1 at a time, beating well after each addition. Beat in warm melted chocolate. Mix in dry ingredients in 2 additions alternately with buttermilk in 1 addition. Divide batter among prepared pans.

3. Bake cakes until tester inserted into center comes out clean, about 23 minutes. Cool cakes in pans 10 minutes. Turn cakes out onto rack; peel off parchment. Cool cakes completely. Can be made 1 day ahead. Wrap cakes in plastic and store at room temperature.

Bakery-Style No Refrigeration Needed Frosting
Makes 8 cups | adapted from Kittencal on Food.com

1 1/2 cups shortening
1/2 cup butter, softened
1/2 cup non-dairy powdered coffee creamer (Coffee Mate)
1/2 teaspoon vanilla
1 (32 ounce) package confectioners sugar, sifted
1/2-3/4 cup water
1/4 cup, approx. cocoa powder (optional)

1. In a large mixing bowl beat the shortening, butter, creamer and vanilla.
2. Gradually beat in the confectioners sugar.
3. Add in enough water (starting with 1/2 cup) until frosting reaches desired consistency.
4. To make chocolate frosting, beat in cocoa powder to taste or to achieve the desired chocolatey-ness.

Tuesday, December 7, 2010

Copycat Club: December 2010

Welcome to this month's Copycat Club (Our 3rd month!)


I have a request. Does anyone have a crumb cake recipe that is very similar to the Krusteaz Cinnamon Crumb Cake mix. I have tried a lot of crumb cakes (including New York Crumb Cake recipes) made from scratch but this Krusteaz mix still ranks pretty high on my list. It's *really sweet* and the crumb is gooey in the centre while being sugary and crunchy I have been experimenting for years looking for a copy cat recipe for this, since our Costco stopped selling the mix a few years ago. If anyone has any recipes or hints, I'd be very grateful :)

And now, here are the delicious looking treats that my talented food blogger friends have made the past month. Who needs restaurants with treats like these:

Brenda of Brenda's Canadian Kitchen made Olive Garden Chicken and Gnocchi Soup


Chaya of Comfy Cook made Ronzoni's Fettuccini Alfredo


The Girl Who Ate Everything made Lion House Rolls


Joy of Kitchen Flavours made Kenny Rogers' Corn Muffins


Jennifer of For Such a Time as This made Cracker Barrel Hashbrown Casserole


Jennifer also made Starbucks Peppermint Mocha


I, Tia of Buttercreambarbie made Buttercake Bakery's Chocolate Vanilla Bundt


I also made Little Debbie Snack Cakes
If you didn't have a chance to email me your post or if I somehow missed you, please add your Copycat post below. I'd love to take a peek!

Monday, December 6, 2010

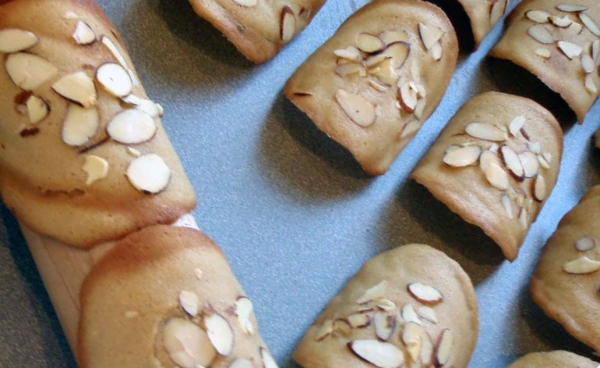
TWD: Maple Almond Tuiles

Hindy of Bubie’s Little Baker chose Translucent Maple Tuiles, on page 173 of The Book. Check out her blog for the recipe.

I had never made tuiles before in my life but the recipe was really simple and straightforward and approachable with only 4 ingredients! I added a hint of almond extract and sprinkled the tuiles with some sliced almonds before baking. I think they turned out really festive and way better than I expected them to.

In other news, there is a new furry addition to our family. His name is Fluffy and he is an 8 week old dwarf bunny rabbit! He is so affectionate and adores sitting on my lap. Especially since I give him lots of veggie scraps from the kitchen. He runs around while I'm at home and he's already almost litter trained. I'm in love. bunny love :)


Lastly, congrats to Sara of Cupcake Muffin - winner of my digital scale/chicken soup for the soup cookbook/spreader giveaway! Thank you everyone for your comments and stories of the foods that give you the warm fuzzies.

Sunday, December 5, 2010

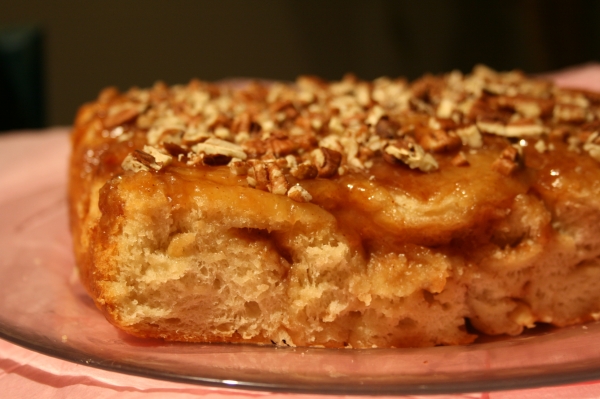
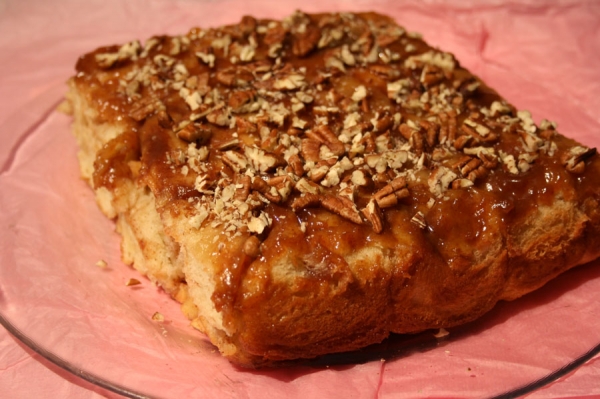
Caramel Apple Sticky Buns


There are a few more hours left to enter my Giveaway for a digital food scale, cookbook and holiday spreaders. Click over there to enter up until 11:59 PM PST Sunday, December 5, 2010.

These delicious, ooey gooey sticky buns are made with a delicious potato dough from on of my favorite recipe books. I was lucky enough to find the The Fannie Farmer Baking Book for $6.99 at Half Price Books when I last visited. This book is no longer in print but it should definitely be brought back. It is huge - no fancy pictures, only simple illustrations - but does it ever have a wealth of recipes for almost anything you ever wanted to bake, as well as interesting historical background. Information on baking techniques is clear and allows which allows for flexibility in altering recipes to suit your needs. It is the Joy of Cooking's equivalent in the baking domain.


If you can find one near you, Half Price Books is a great place to find cookbook gems and to trade in books for cash. It has become a "must visit" place every time I take a trip down to the States. I also found The Fannie Farmer Cookbook: Anniversary Edition for a steal. These buns are a combination of my favorite flavors: caramel, apples, cinnamon, pecans and sweet yeast bread. They are buttery and pillow-soft with a little crunch from the apple and a crisp-chewy texture around the edges from the baked caramel. Despite their sweet-sounding name, the buns were not overly rich. The dough contains 1/2 cup of mashed potato and uses the potato-water which makes it an excellent keeper. It stays nice and soft for longer than most other yeast doughs.


Caramel Apple Sticky Buns

Potato Sweet Dough
adapted from The Fannie Farmer Baking Book

1 1/4 cup warm potato cooking water (or milk)
1 pkg (2 1/4 tsp) active dry yeast
1/2 cup sugar
1 1/2 tsp salt
1/2 cup warm mashed potato
1/3 cup butter, softened
4 to 4 1/2 cups flour (all-purpose or mixture of a.p. and bread flour)

Caramel-Apple Filling
1 apple, peeled and diced
1 cup sugar
2 tbsp cinnamon
3/4 cup butter, softened
1/2 cup caramel sauce (bought or homemade)
1/2 cup chopped pecans

1. In a large mixing bowl (or stand mixer bowl) mix the yeast with the warm warm water and let dissolve, about five minutes. Add the sugar and salt and stir to combine. Then add the potato and butter, mixing to combine fully.

2. Using the dough hook, add 3 cups of the flour to the mixing bowl with the liquid ingredients. Mix dough on slow speed, adding flour until the dough is smooth and elastic. It should not stick to the bottom of the mixing bowl. If desired, you can do the final bit of kneading by hand. Put the dough in a large, greased bowl, cover and let rise until double in bulk (approx. 1 hr).

3. Combine apples, sugar and cinnamon in a small bowl and let sit to marinade while dough rises.

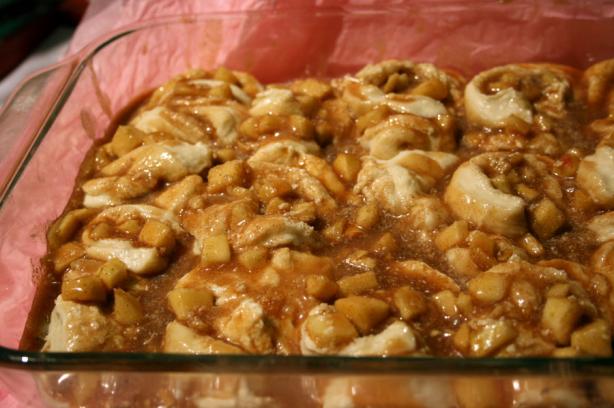
4. After dough has risen, punch down the dough, remove from bowl, and roll into a large rectangle 1/2" thick. Spread softened butter evenly over the dough and sprinkle with apple-cinnamon mixture. Drizzle caramel sauce evenly over the dough then roll up into a log and cut into buns. Place in a 9 x 13" baking pan. Cover and put in a warm place.

5. Let rise until almost doubled in bulk. Preheat oven to 375 degrees F. Bake for another 25 - 30 minutes or until golden brown and no longer "doughy". Cool in pan for 10 minutes then loosen the edges with a spatula and invert onto serving tray. Drizzle with extra caramel sauce (if desired) and sprinkle with chopped pecans.

Thursday, December 2, 2010

Spritz Cookies 3 Ways: Espresso, Chocolate & Vanilla


I am IN LOVE with this recipe because of its ease to handle and amazing texture. It is tender and oh-so-buttery. It holds its shape wonderfully thus producing the most perfectly-shaped cookies. Most recipes call for an egg to hold it together, but I find that the egg makes the cookies a little too tough and not quite crumbly enough. This recipe is egg-free and the end result is a lot like shortbread. Feel free to add food coloring for a festive touch or play around with flavorings and extracts.

The three variations I have included here make both a nice display of dark, golden and pale cookies with flavors that also pair well together - coffee, chocolate and vanilla.

Spritz cookies are traditional Scandanavian Christmas cookies. They are delicate, simple butter cookies, shaped by putting the dough through a cookie press. They are small in comparison to the monster-sized cookies we see these days, measuring only about 1 1/2" in diameter. I think they are just adorable and so retro. Cookie presses these days are cheap. If you haven't inherited one from your mom, you can get one like this Wilton Comfort Grip on Amazon for $11.35! They're so affordable and cute that I will probably be giving a few of these along with a pretty bag of assorted Spritz cookies to some of my friends this Christmas.

However, even if you don't own a Cookie Press you can still make these cookies. Just use a large star piping tip to pipe the dough into little rosettes or squiggles or lines.

Spritz cookies are not as simple as they may appear. It took me a few batches of ugly cookies to get the hang of it.

Here are some tips to making perfect Cookie-Press Cookies:

- The dough must be room temperature. If it's too cold, it won't stick to the cookie sheet. It's best if your butter is very soft to begin with.
- Non-stick cookie sheets do not work, because the dough won't adhere to it. Shiny aluminum is best, and it too must be room temperature, ungreased and not lined with parchment paper. If the metal sheet is warm, the dough won't stick.
- Make sure the press is absolutely upright in relation the the sheet, with the base resting flat on the surface.
- It takes practice to press out just the right amount of dough. Too little and it sticks to the press. Too much, and the design of the cookie gets lost after baking.
- Spritz dough does not freeze well. If you want to freeze these cookies, do so AFTER they are baked, in airtight containers.
- If you are baking chocolate spritz it can be hard to tell when they are done. Therefore, put at least one vanilla (light colored) cookie on the tray so you can use it to gauge color for doneness.

Spritz Butter Cookies (3 ways)
Makes 3 dozen | adapted from Canadian Living, Dec. 2010
Basic Recipe:
1 cup butter, room temperature
2/3 cup powdered sugar
2 tsp vanilla extract
1/4 tsp salt
1 2/3 cup flour

1. Preheat oven to 350 degrees F. Do NOT grease pans but do use heavy-duty shiny pans to avoid overbrowning the bottoms.
2. Using a mixer with the paddle attachment combine butter and powdered sugar, mixing until light and creamy. Add in vanilla and salt. Mix to incorporate. With the mixer off, add flour. Mix until combined and sticks together to form one mass of dough. Do NOT chill or it will be too firm to press or pipe onto the cookie sheet. [At this point you can refrigerate the cookies on the sheets to be baked later].
3. Fill your cookie press or piping bag (use a large star tip). Pipe or press onto the ungreased cookie sheet. These do not spread, so you can put them quite close together.
4. Bake for 8-10 minutes (or less) until edges are just golden and tops are still pale. Cool fully and store airtight.

Espresso variation: Dissolve 2 tsp instant espresso powder (or 1 tbsp instant coffee powder) into the vanilla before adding vanilla to the mixture in step 3.

Chocolate variation: Substitute 1/3 cup unsweetened cocoa powder for 1/3 cup flour.

Tuesday, November 30, 2010

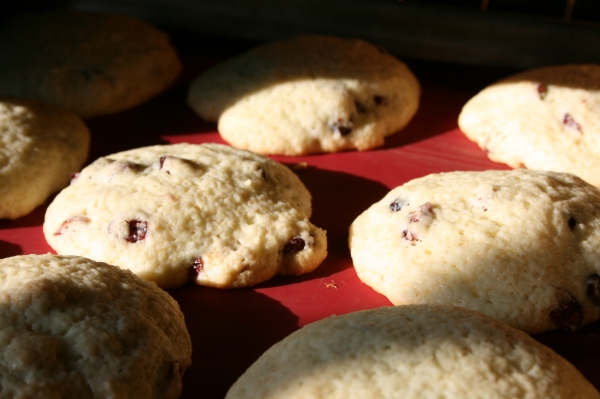
Cranberry Orange Cookies & a Giveaway


I didn't make this week's TWD recipe. My excuse is that I am exhausted from Black Friday shopping. We didn't sleep all night and we literally shopped for 24 hours. Left Vancouver, BC at 7 PM on Thursday night and were in Walmart in WA by 9:30 PM. We were there for the door crashers at midnight then went to Old Navy then Target for their opening at 4 AM. We basically hit every store as it opened. It was INTENSE. Looking back on it, the whole thing is quite comical. We had our walkie talkies, we had our store maps and we were on a MISSION. Thank the Lord that we had a nice border guard so we didn't have to pay tax on the $1000 worth of goods that we brought back home. I spent $110 in Walmart and $175 at Target and got way too many appliances. I can't wait till next year, lol.

Instead of the Devilish (Chocolate) Shortcakes, I made something simpler than simple and comforting with classic holiday flavors. Today I'm proud to post yet another great cookie recipe from 400 Sensational Cookies

I also have a GIVEAWAY (US and Canadian blogging residents only please): a Taylor 8lb digital food scale, the Chicken Soup for the Soul Cookbook & a set of 4 star-topped holiday spreaders. The book is full of heartwarming stories related to food and each story has a special recipe to accompany it. Digital scales are awesome for measuring nuts and chocolate and flour (and lots of other things, but I use mine most for those three).

All you have to do is leave a comment here to tell me what recipe brings back the best memories for you. If you have a link to that recipe on your blog, you might want to link to it :) Deadline to enter is Sunday, Dec 5th at 11:59 PM. I will pick a winner randomly and contact that person through her blog.
***GIVEAWAY EXPIRED***


Cranberry Orange Cookies
Makes 36 | adapted from 400 Sensational Cookies

3 cups flour
2 tsp baking powder
1/2 tsp baking soda
1/2 tsp salt
1 cup butter
1 1/3 cup sugar
2 eggs
1 tsp vanilla
1/4 cup orange juice
Zest of 1 orange
1 cup dried cranberries
1 cup chopped walnuts (optional)

1. Preheat oven to 325 degrees F.
2. Combine flour, soda, salt, powder. Cream together butter, sugar until light and fluffy. Add eggs then vanilla. Mix in flour then fold in cranberries and nuts.
3. Drop by tablespoonfuls leaving 1-2" between. Bake 12-15 minutes, until golden brown around the edges, however, they will be still pale on top.

Saturday, November 27, 2010

Buttercake Bakery's Chocolate Vanilla Swirl Bundt Cake

This chocolate & vanilla swirl bundt cake recipe is a clone of a cake you can find at a bakery in L.A. called Buttercake Bakery. I stumbled up on it while visiting that area last year. The chocolate chips burst like bubbles of flavor in your mouth and the cake is amazing. It's probably one of those things that's worth the calorie splurge and the extra effort required to make your own chocolate syrup. However, I bet you could use storebought chocolate syrup to save some time. The L.A. Times published this copycat recipe June 11, 2008 and I'm so glad I stumbled upon it! They call it "comfort food in cake form" and I couldn't agree more.

I will also be linking this to my Copycat Club for the December 7th round-up. (See link above for details and to join/submit any recipes).

Buttercake Bakery's Chocolate Marbled Cake
Makes 1 - 12" Bundt

2 1/2 cups sugar, divided
1/2 cup unsweetened cocoa powder
1/4 cup light corn syrup
2 1/2 teaspoons vanilla extract, divided
2 2/3 cups flour
2 teaspoons baking powder
1/2 teaspoon salt
1 cup (2 sticks) butter
4 eggs
1 cup milk
1 cup chocolate chips
Powdered sugar for dusting

1. In a small saucepan, whisk together one-half cup of the sugar, the cocoa powder and corn syrup with one-half cup hot water. Bring just to a simmer, stirring occasionally. Add a half-teaspoon of vanilla off the heat and set aside.
2. Heat the oven to 350 degrees. Butter and lightly flour a 12-cup bundt pan.
3. In a medium bowl, combine the flour, baking powder and salt and set aside. In the bowl of a stand mixer (or in a large bowl if using a hand mixer), cream the butter with the remaining sugar until light and fluffy. Whisk in the eggs one at a time until thoroughly incorporated, then whisk in the remaining vanilla.
3. Whisk about a third of the flour mixture into the batter, then a third of the milk. Continue whisking in the flour mixture and milk, alternately and a little at a time, until everything is added and the batter is light and smooth.
4. Gently fold in the chocolate chips, then divide the batter into thirds. Pour a third of the batter into the prepared bundt pan.
5. Whisk the chocolate syrup with another third of batter, then pour this into the prepared bundt pan. Pour the remaining third of batter over this, lightly swirl the batters with a wooden skewer or knife to give a "marble" effect and place the pan in the oven.
6. Bake the cake until a toothpick inserted comes out clean and the cake springs back lightly when touched, about 1 hour. Cool the cake in the pan on a wire rack. Invert the cooled cake onto a serving platter and dust lightly with powdered sugar.

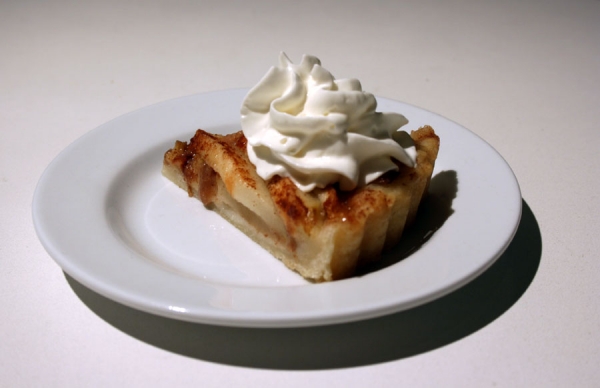
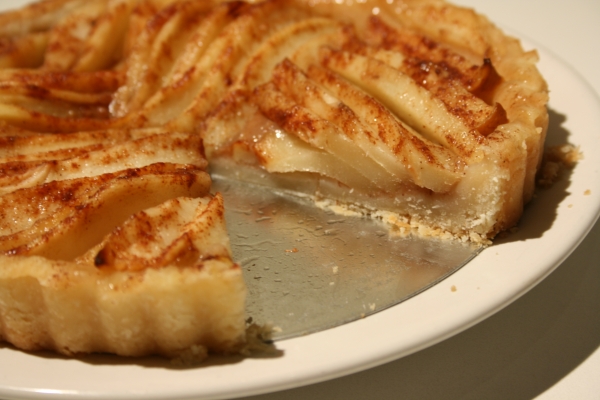
DB: Crostata

The 2010 November Daring Bakers’ challenge was hosted by Simona of briciole. She chose to challenge Daring Bakers’ to make pasta frolla for a crostata. She used her own experience as a source, as well as information from Pellegrino Artusi’s Science in the Kitchen and the Art of Eating Well.


I loved the pie crust - pasta frolla - the american counterpart of the classic Crisco shortening-rich pie crust.

Tuesday, November 23, 2010

Hostess Little Debbie Snack Cake Clones


These were super cute and super tasty too. I love how they look like plain old chocolate cupcakes until you bite into them and get a surprise: A delicious mouthful of chocolate filling. These are just like the snack cakes you buy individually cellophane-wrapped at the grocery store, except they I filled them with chocolate marshmallow creme instead of the plain white stuff. I loved how fluffy and foolproof the filling turned out because of the use of marshmallow creme. Don't overfill your muffin cups or else the cupcakes will rise and bleed into each other and your final product won't be perfectly round.


Reminder: Email me or leave a comment with your copycat posts - past or present - to be linked and included in the upcoming December Copycat Club round-up, posted the 7th of every month. See the round-ups in November and October for inspiration.

Hostess Snack Cake Clone
Makes 18 | Martha Stewart's Cupcakes

CUPCAKES 1 cup (2 sticks) butter, room temperature, plus more for muffin tins
3/4 cup unsweetened cocoa powder, plus more for muffin tins
2 cups all-purpose flour
2 teaspoons baking powder
1/2 teaspoon baking soda
1/2 teaspoon salt
2 cups sugar
3 large eggs, room temperature
1 cup sour cream, room temperature

FILLING
1 1/2 cups marshmallow creme (7.5-ounce jar)
1/2 cup (1 stick) butter, room temperature
[I added 1-2 tbsp cocoa powder to make a chocolate-creme filling]

1. Preheat oven to 350. Butter two 6-cup (each with a 1-cup capacity) jumbo muffin pans; dust with cocoa powder to coat, tapping out excess. In a medium bowl, whisk together cocoa, flour, baking powder, soda, and salt. Using an electric mixer, beat butter and sugar until light. Add eggs one at a time, beating well after each addition. On low speed, add half the flour mixture, followed by sour cream, ending with remaining flour mixture; mix just until incorporated (do not overmix).

2. Divide batter among prepared muffin cups. Bake until a toothpick inserted in center of a cupcake comes out clean, 25 to 30 minutes, rotating pans halfway through baking. Cool in pans, 5 minutes; remove cupcakes and cool, right side up, on a wire rack.

3. Meanwhile, prepare filling: In a medium bowl, whisk marshmallow creme and butter [and cocoa powder, if using] until smooth. Chill until slightly firm, 15 to 30 minutes. Transfer mixture to a heavy-duty resealable plastic bag, and seal; cut off one corner of the bag to make a 1/8-inch opening.

4. Using a small melon baller, scoop out center of each cupcake from the bottom, and reserve (you will use this to plug cupcake after filling). Hollow out each cupcake a bit more, discarding crumbs. Insert tip of plastic bag into each cavity, and squeeze to fill; replace plugs. Using remaining filling in plastic bag, decorate top of cupcakes.

Monday, November 22, 2010

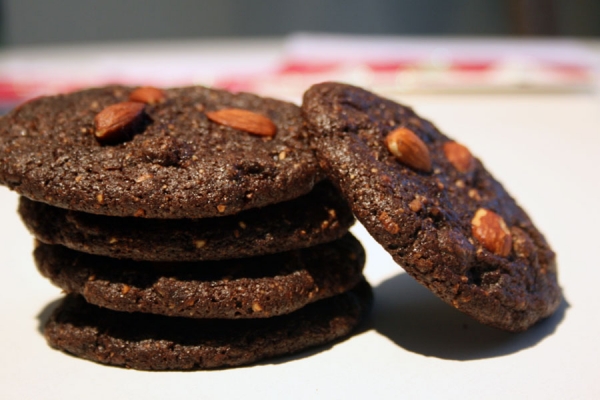
TWD: World Peace Cookies (Rewind)


This week's Tuesdays with Dorie recipe was a "Rewind". I knew immediately which recipe I was going to make: World Peace Cookies.

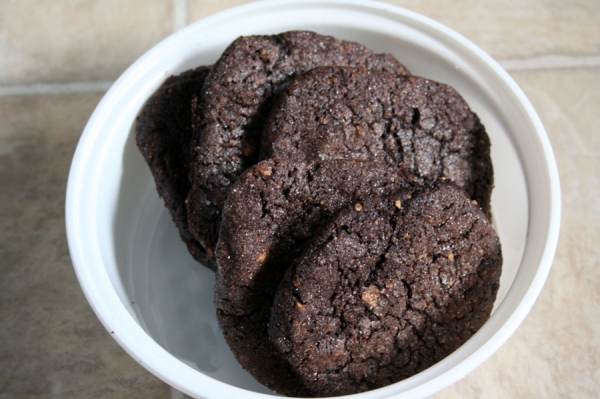
The book says, These butter-rich, sandy-textured slice-and-bake cookies are members of the sablé family. But, unlike classic sablés, they are midnight dark — there's cocoa in the dough — and packed with chunks of hand-chopped bittersweet chocolate. Perhaps most memorably, they're salty. Not just a little salty, but remarkably and sensationally salty. It's the salt — Pierre uses fleur de sel, a moist, off-white sea salt — that surprises, delights and makes the chocolate flavors in the cookies seem preternaturally profound.

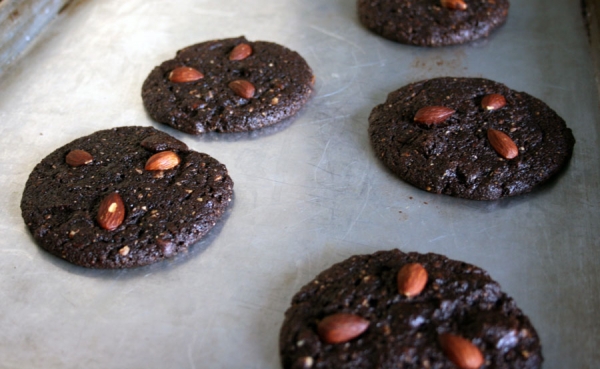
I made one small addition: mixing in some finely chopped almonds along with the chocolate chips. These were pleasantly easy to make and kinda reminded me of chocolate shortbread. I also love how well the dough freezes for "emergencies" when you need cookies at a moment's notice.


World Peace Cookies
Makes 36 | adapted from Baking: From my Home to Yours

1 1/4 cups all-purpose flour
1/3 cup unsweetened cocoa powder
1/2 teaspoon baking soda
1 stick plus 3 tablespoons (11 tablespoons) unsalted butter, at room temperature
2/3 cup (packed) light brown sugar
1/4 cup sugar
1/4 teaspoon salt
1 teaspoon pure vanilla extract
5 ounces bittersweet chocolate, chopped or 3/4 cup chocolate chips
1/3 cup chopped almonds
Milk or cream as needed (1 tbsp)

1. Sift the flour, cocoa and baking soda together.
2. Working with a stand mixer, preferably fitted with a paddle attachment, or with a hand mixer in a large bowl, beat the butter on medium speed until soft and creamy. Add both sugars, the salt and vanilla extract and beat for 2 minutes more.
3. Turn off the mixer. Pour in the dry ingredients, drape a kitchen towel over the stand mixer to protect yourself and your kitchen from flying flour and pulse the mixer at low speed about 5 times, a second or two each time. Take a peek — if there is still a lot of flour on the surface of the dough, pulse a couple of times more; if not, remove the towel. Continuing at low speed, mix for about 30 seconds more, just until the flour disappears into the dough — for the best texture, work the dough as little as possible once the flour is added, and don't be concerned if the dough looks a little crumbly. Toss in the chocolate and almonds and mix only to incorporate. If it is too crumbly to form a dough, add a little milk or cream as needed.
4. Turn the dough out onto a work surface, gather it together and divide it in half. Working with one half at a time, shape the dough into logs that are 1 1/2 inches in diameter. Wrap the logs in plastic wrap and refrigerate them for at least 3 hours. (The dough can be refrigerated for up to 3 days or frozen for up to 2 months. If you've frozen the dough, you needn't defrost it before baking — just slice the logs into cookies and bake the cookies 1 minute longer.)

Getting Ready to Bake:
5. Center a rack in the oven and preheat the oven to 325 degrees F. Line two baking sheets with parchment or silicone mats.
6. Using a sharp thin knife, slice the logs into rounds that are 1/2 inch thick. (The rounds are likely to crack as you're cutting them — don't be concerned, just squeeze the bits back onto each cookie.) Arrange the rounds on the baking sheets, leaving about 1 inch between them.
7. Bake the cookies one sheet at a time for 12 minutes — they won't look done, nor will they be firm, but that's just the way they should be. Transfer the baking sheet to a cooling rack and let the cookies rest until they are only just warm, at which point you can serve them or let them reach room temperature.